
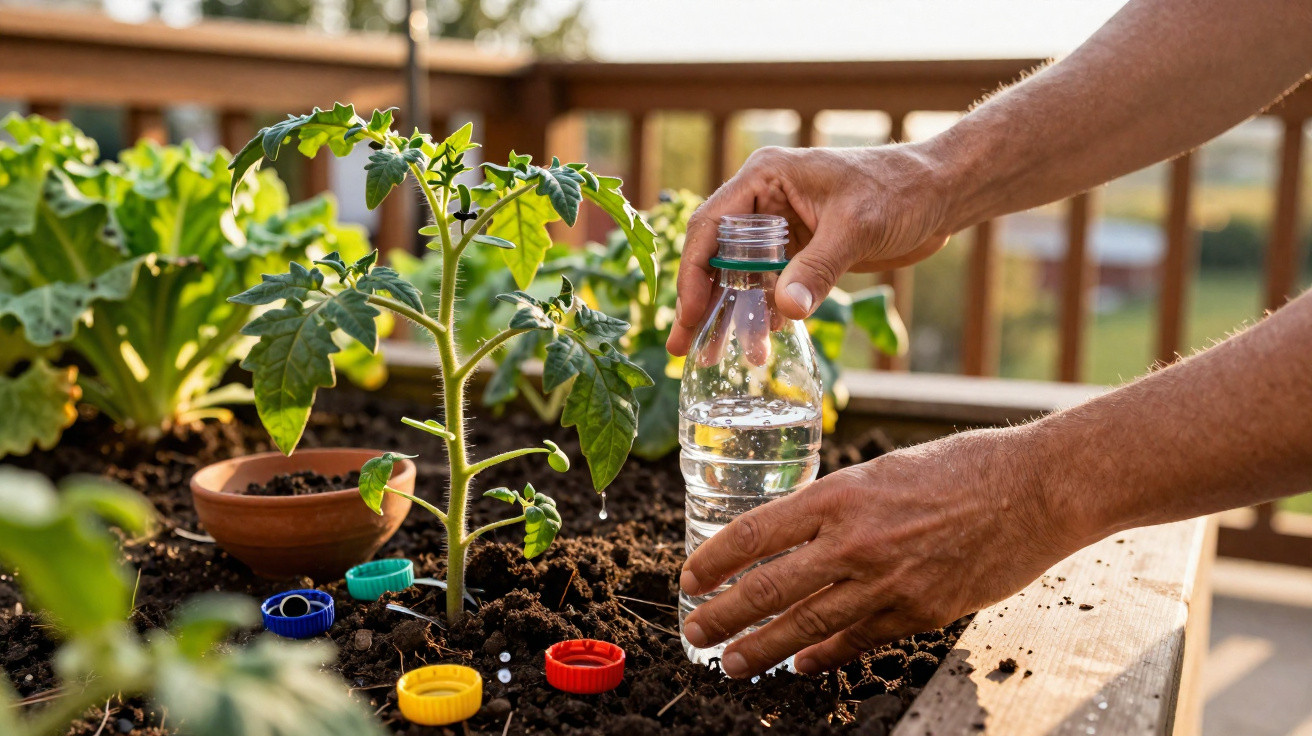
Of all things, a disposable kitchen item turns out to be a water saver, slug deterrent and safety aid in the vegetable garden.
Anyone standing over a bed in spring with soil on their fingers and a watering can in hand will know the issue: the sun beats down, plants start to droop, and even after watering, the soil often seems dusty dry again just a few hours later. Many people then turn to costly irrigation systems. Yet a surprisingly effective answer is sitting in the recycling bag: ordinary plastic bottle caps.
Why bottle caps are so useful in the vegetable bed
In everyday life, caps from water, juice and milk bottles are almost automatically thrown away or put out for recycling. That is a waste, as the material easily withstands rain, frost and sunshine and does not break down immediately. Those very qualities make these small round items unexpectedly useful in the garden.
Anyone who saves their caps has free material for watering, pest protection and more – without spending a penny at the garden centre.
It becomes particularly interesting when caps are combined with empty plastic bottles. Together, they can be turned in minutes into a simple yet highly effective watering system placed directly at the roots. Tomatoes, peppers and cucumbers then receive water exactly where they need it: deep in the soil rather than across the surface.
Summer drought stress: an underestimated risk
Many amateur gardeners apply too much water at once, then leave too long between watering sessions. As a result, some of the water evaporates from the surface while some runs away sideways. The roots miss out, plants suffer, and during particularly hot spells an entire crop can quickly go into survival mode.
A slow drip close to the soil acts rather like a “drinking straw” for the root system. It keeps the ground lightly moist for hours without making it waterlogged. This focused supply is especially worthwhile for hungry crops such as tomatoes, courgettes and peppers.
The upside-down bottle method: drip irrigation from recycled materials
What you need for this simple drip system
A small collection of household items that would otherwise arise anyway is enough to make it:
- Empty plastic bottles with a capacity of around 1.5 litres
- Matching screw caps
- A large sewing needle, thin nail or pointed awl
- A sharp craft knife or knife
- Optional: a lighter for briefly heating the needle or nail
No further equipment is required. There is no electricity, no hose and no complicated installation kit.
Turning a cap into a reliable dripper
The pierced cap is the key part of the system. It determines whether the water drips out in a controlled way or escapes in a rush.
- Briefly heat the needle or nail with the lighter.
- Pierce one tiny hole precisely in the centre of the cap.
- Screw the cap on and fill the bottle with water as a test.
- Check it over the sink: ideally, it should release around one drop every two to three seconds.
If the flow is too quick, the only solution is a new cap with a smaller opening. If hardly any water comes through, enlarge the hole slightly. This minute spent testing pays off throughout the summer.
To make topping up the bottle easier later on, neatly cut out its base with the craft knife. The upper opening then serves as a filling funnel above the soil.
Installing the bottle in a bed or balcony planter
The right position in the root zone
The ideal time to fit the bottles is when young plants are moved into the bed or large containers. They can then be positioned easily without damaging the roots.
The steps at a glance:
- Dig a hole around ten to fifteen centimetres deep beside the plant.
- Place the bottle upside down in the hole, with the cap going in first.
- The side with the cut-off opening should remain above the soil.
- Firm the soil well around it so that nothing moves.
A hand’s width away from the base of the plant is ideal. This puts the emerging drops directly into the active root zone.
How often the water reservoirs need refilling
At the beginning of the season, filling the bottles with a watering can once a week is sufficient in many regions. When temperatures rise noticeably in high summer, intervals of two to three days make sense.
Through capillary action, the soil draws exactly as much moisture as the root system can absorb at that moment – no more and no less.
For longer trips away, two bottles can be installed for each particularly thirsty plant. This helps even sensitive crops cope better with a heatwave.
What the system really does for plants
Healthier plants thanks to dry foliage
One major benefit is that water does not land on the leaves, but solely in the soil. This significantly lowers the risk of fungal diseases such as powdery mildew or blight. Tomatoes repay this with sturdier shoots and leaves that remain vigorous for longer.
As moisture levels stay more even, ripening fruits are also less likely to split. This is particularly helpful for tomatoes and cucumbers, preventing unsightly cracks and soft patches.
Less water use, higher yields
Those who use the drip systems consistently can often noticeably reduce their total watering volume. Rather than wetting a large area, each litre reaches the places where it matters most.
Typical effects that many amateur gardeners notice after only a few weeks include:
- stronger stems and denser foliage
- productive plants that keep going for longer
- far fewer wilted spells on hot days
The deeper layers of soil also remain pleasantly cool. Soil organisms and earthworms are more comfortable, which in turn improves soil structure over the longer term.
More clever uses for old plastic bottle caps
Simple mini traps for hungry slugs
Caps are useful not only as part of the watering system, but also as small traps for slimy garden diners. Set out as shallow dishes around young lettuces, they can be filled with a splash of beer or sweet syrup.
The smell attracts slugs like a magnet. Rather than immediately attacking the fresh leaves, they end up in the trap. This can reduce the need for pellet poison on the ground, making the garden considerably safer for pets and hedgehogs too.
Visible protective caps for pointed canes
Anyone working among densely planted beds with bamboo canes or metal rods will know the hazard: one careless step or a bend down, and the cane is suddenly at eye level. Pushing a cap on top makes the risk safer in a single move.
Simply press the cap firmly onto the upper end. Its bright colour stands out immediately against the greenery, while its rounded shape helps prevent injuries. This is especially worthwhile in narrow rows, raised beds or where children enjoy helping in the garden.
Why saving bottle caps pays off in the long term
Zero-waste gardening with a noticeable effect
What appears to be leftover rubbish becomes useful gardening equipment. This not only saves water and money, but also reduces the need for newly manufactured plastic from the garden centre. Every cap reused means one less item entering the recycling stream.
Anyone who fully embraces the principle can equip entire beds systematically with drip bottles. Particularly in dry summers, this creates a small, almost self-regulating water cycle that makes watering much less demanding.
Practical tips for everyday garden use
A few habits help keep the system running smoothly:
- Collect caps at home in a bowl until there are enough for a bed.
- Rinse bottles thoroughly before use, especially those that previously contained soft drinks.
- Check the flow once a month in case soil has collected in front of the hole.
- Remove bottles from the soil in autumn, clean them and use them again in spring.
If desired, combine drip irrigation with a thin mulch layer of grass clippings or straw. This enhances the effect because the surface receives additional protection against evaporation. Caps, bottles and mulch then work hand in hand – and the vegetable garden gets through summer far more comfortably.





Comments
No comments yet. Be the first to comment!
Leave a Comment