
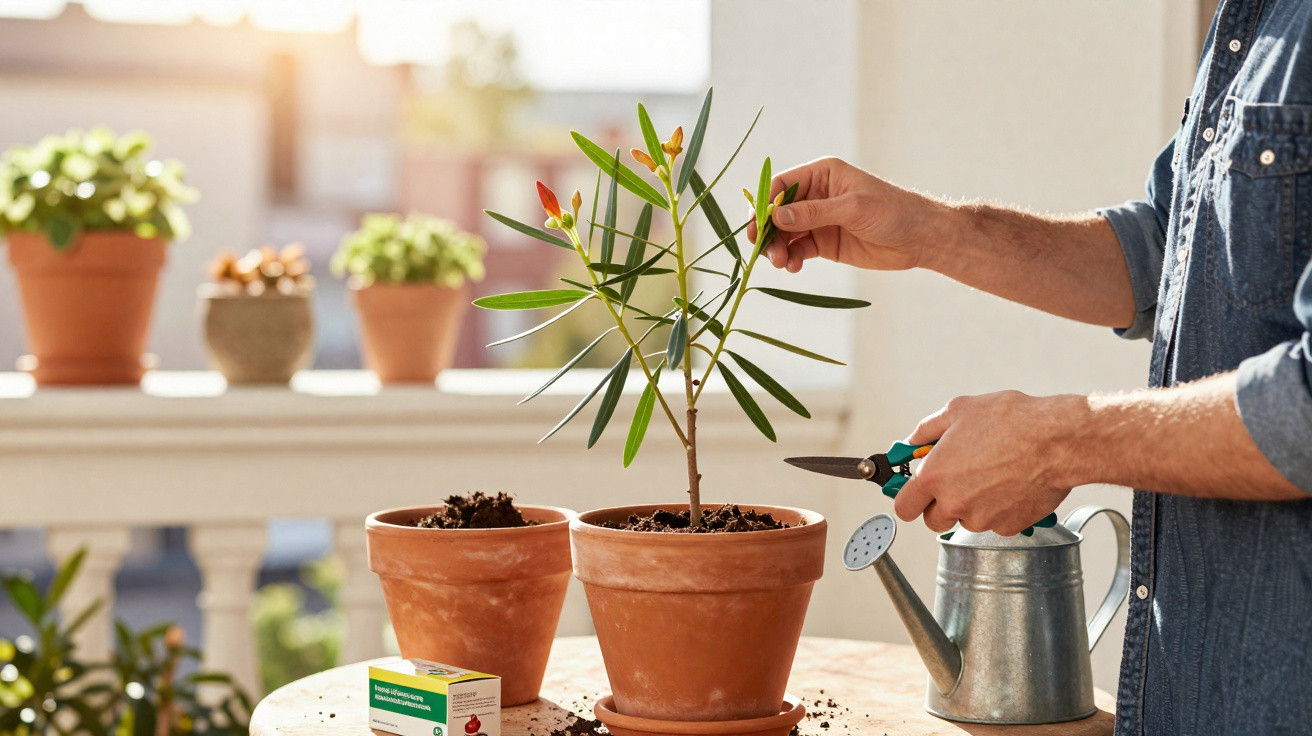
Many oleanders look beyond saving after winter: brown leaves, bare shoots and scarcely any sign of life.
Yet, with the right plan, this Mediterranean favourite can still be rescued.
When gardeners carry their container plant from the cellar back onto the terrace in spring, they are often met with a shock. The formerly lavishly flowering oleander may resemble a skeleton, with scorched leaves and brown shoots. Even so, the shrub usually has more vigour left than first appears. A clear step-by-step approach can help hobby gardeners turn weakened plants back into an impressive ball of flowers.
How to tell whether an oleander can still be saved
Before reaching for the secateurs, assess the plant. The crucial question is whether living tissue remains beneath the bark that appears dead. Further effort is worthwhile only if it does.
Lightly score the bark with a fingernail or sharp knife. A green, moist layer underneath means the shoot is alive. If it is brown and dry throughout, that section has died. Check several areas: the tips, the middle of the shoots and the very bottom where they emerge.
“Living wood can be recognised by the green layer beneath the bark – brown and dry means it has died completely.”
Pay particular attention to the base of the plant, where the best-protected buds are located. Small, slightly plump-looking bumps on the shoots or emerging directly from the trunk are often the first indication that the oleander is preparing to produce new growth.
The right time to move it outdoors
Bringing the plant out of its winter quarters too early risks damage from late frosts. Oleander originates from the Mediterranean and can tolerate a brief light frost, but it is extremely sensitive to repeated sub-zero temperatures.
As a rule of thumb, move it outdoors only once no night frosts are forecast and night-time temperatures remain reliably above about 10°C. Depending on the region, this may be anywhere from late March to mid-April.
A gradual transition is advisable:
- begin with just a few hours a day in partial shade
- after a few days, extend the time it spends outside
- place it permanently in full sun only afterwards
If the oleander is planted in a border, remove fleece and other winter coverings in stages as well, while keeping a close eye on the weather forecast.
Pruning oleander selectively for strong new growth
Once frost is no longer a risk and it is clear which shoots are alive, it is time to prune. This determines the shrub’s shape, health and flowering potential for the entire season.
Start by removing every completely brown, cracked and dried-out branch. Cut these back into healthy green wood. Shoots that cross one another or grow inwards should also be removed, allowing light and air to reach the centre of the crown.
Long, thin branches benefit from being cut back firmly by one-third to two-thirds. This encourages fresh, sturdy side shoots to form. For severely damaged specimens, a drastic cut to around 40 centimetres above ground level can be worthwhile. The plant will then effectively rebuild itself from the bottom up, although flowering may be less abundant this year.
“A bold pruning cut can feel harsh, but it often gives the oleander exactly the boost it needs for a vigorous fresh start.”
Repotting, strengthening roots and supplying nutrients
Container-grown plants often suffer from too little room in their pots after winter. A quick look underneath usually reveals the situation: roots pushing out through the drainage holes signal an urgent need for action.
When a new pot is needed
- roots circle the entire root ball like a net
- the root ball can barely be pressed in
- water runs straight through without soaking into the compost
In this case, only a slightly larger pot will help. Its new home should have a clear drainage hole, ideally with a layer of expanded clay or gravel for drainage. A suitable growing medium is a blend of flowering-plant compost, some coarse sand and a portion of mature compost. This keeps the soil loose, prevents waterlogging and still provides sufficient nutrients.
If a larger container is impractical because of space or weight, remove the top layer of compost and replace it with fresh, nutrient-rich soil. This is also the point to begin fertilising.
The right fertiliser for abundant flowers
Oleander needs plenty of potassium to flower profusely. A liquid fertiliser for flowering plants with a high potassium content is ideal. From March to September, an application in the watering water every one to two weeks is usually enough.
“Never apply highly concentrated fertiliser to bone-dry soil – it damages the roots and weakens an already stressed plant.”
Watering, position and common mistakes – how to keep flowers coming
Watering requires care: too little slows growth, while too much causes root rot. After winter, the plant needs regular moisture but cannot tolerate waterlogging.
For container plants, wait until the top layer of compost has dried before watering. Then water slowly and directly around the root area until water runs into the saucer. Empty any standing water there after a few minutes. In a border, two thorough waterings per week are generally sufficient during hot summer weeks.
Oleander needs plenty of light to produce an impressive display of flowers. Several hours of direct sun every day are essential. A spot in front of a warm south- or south-west-facing wall is especially suitable, as it stores additional warmth and offers protection from wind.
Common mistakes that prevent flowering
- putting the plant outside too early and suffering frost damage in April
- moving it suddenly from dark winter quarters into blazing midday sun
- constant moisture in the saucer and around the roots
- nervous watering: small but very frequent amounts of water
- heavy fertiliser applications to a dry root ball
Avoiding these pitfalls can often transform a tired-looking shrub into a vigorous, densely leafy flowering candidate within only a few weeks.
What keeps oleander strong and resilient in the long term
Alongside the spring routine, it is worth considering long-term care. A shrub that has been properly hardened off copes much better with winter, even in relatively cool areas.
From late summer onwards, avoid feeding the plant too heavily so that its shoots can mature and become woody in time. Soft, newly produced growth is far more likely to freeze back. In autumn, keep it slightly drier – do not allow it to dry out, but stop giving it heavy soakings.
In exposed areas, choose a sheltered position, such as beside a house wall, together with effective winter protection made from fleece and leaves. Place container plants as close as possible to a protected wall, ideally on wooden boards or polystyrene sheets so the roots are not sitting directly on icy ground.
Toxicity, safety and suitable companion plants
One point is easily overlooked amid enthusiasm for the flowers: every part of the oleander is poisonous. Children and pets must not have access to its leaves or branches, and pruning without gloves is not advisable either. People who react strongly may develop skin irritation simply from contact with the sap.
In containers, the plant combines well with other sun-loving species. Lavender, for example, also prefers dry, warm conditions, while low rock-garden perennials can be planted at the front. These plants keep the root area a little cooler and soften the overall appearance without depriving the oleander of light.
Anyone who keeps the Mediterranean shrub’s needs in mind – plenty of sunshine, free-draining soil, carefully measured water and restrained fertilising with an emphasis on potassium – can often turn even a winter-damaged specimen back into a vigorous, free-flowering feature for the terrace or garden.



Comments
No comments yet. Be the first to comment!
Leave a Comment