
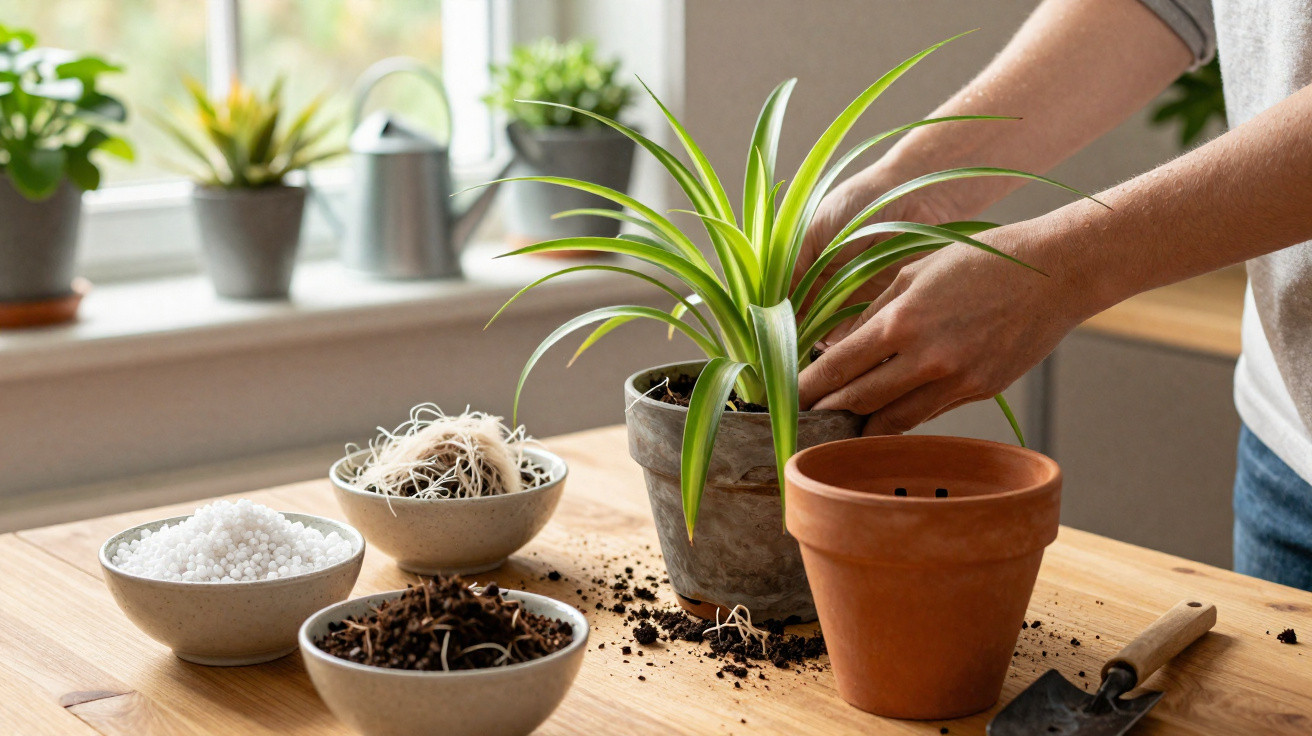
Many indoor gardeners tweak every possible variable: more light, less water, a different spot. Yet the usually tough spider plant still looks miserable. The real issue is often hiding in plain sight in the pot: the wrong soil mix, which either suffocates the roots or lets them dry out completely. With a simple three-ingredient substrate, you can noticeably reduce brown tips and encourage the plant into a genuine flood of babies.
Why the spider plant misbehaves when the soil isn’t right
The spider plant (botanically Chlorophytum comosum) is often treated as the beginner’s champion among houseplants. It copes with the occasional missed watering, grows quickly, and produces long, arching stems with small plantlets. Even so, it’s more sensitive than many people assume - just not always in the way you’d expect.
When you notice yellow or brown leaf tips, the first guess is usually too little or too much water. Either can be true, but the root cause is very often the same: a substrate that doesn’t suit its roots. The spider plant’s thick, fleshy roots store water, fill a pot quickly, and still need airflow at the root tips. If they sit continuously in wet, heavy compost, they can rot from the inside.
"The right soil determines whether the spider plant droops sadly - or bursts over the rim like a green fountain full of plantlets."
A second warning sign, alongside brown tips, is that the plant produces hardly any offshoots. When it’s happy, it regularly sends out new “babies” on long stems. If those stems stop appearing, the balance between substrate, watering routine, and nutrient supply is often no longer working.
The three-ingredient substrate that slows down brown tips
The good news: the spider plant doesn’t need a high-tech mix. A straightforward, well-thought-out blend of three components is enough to prevent waterlogging, keep the compost open and airy, and still hold adequate moisture.
The three building blocks at a glance
- 1. Base: compost for leafy houseplants
This makes up most of the substrate. It provides nutrients and a basic structure, but it shouldn’t be overly heavy. Garden soil from a flower bed is a poor choice: it’s too dense, too clay-rich, and far too likely to cause waterlogging in a pot. - 2. Perlite for air around the roots
This white, lightweight volcanic material creates air pockets in the pot. It stops the compost compacting and allows excess water to drain away more quickly. - 3. Fibre component: coir fibre or peat
Coir fibre or peat holds water, releases it gradually, and keeps moisture levels more stable. This gives the roots longer access to moisture without leaving them sitting in soggy compost.
How many pros mix the ideal rootball
For a medium-sized pot, a large mixing bowl is usually enough:
- Loosely fill a bowl with leafy houseplant compost.
- Add roughly a generous handful of perlite.
- Mix in another generous handful of coir fibre (or peat).
- Combine everything thoroughly until the mix feels airy and lightly crumbly.
A quick test helps: gently squeeze a handful of substrate. If the clump falls apart again, the mix is open enough. If it stays as a solid lump, it needs more air - work in a little extra perlite.
"The aim is soil that gets rid of excess water quickly after watering, but never clumps into a hard, wet block."
The right pot: snug, with drainage holes - but not tiny
Even the best compost won’t help if the pot is unsuitable. Spider plants prefer things slightly snug - it’s fine for the roots to fill the rootball well. In an oversized pot, too much substrate stays wet for too long because the roots can’t colonise it quickly enough.
When the pot has become too small
- Roots are pushing up through the surface or appearing at the rim.
- Thick roots are forcing their way out of the drainage holes underneath.
- The compost seems to dry out at record speed even though you’re watering normally.
If your spider plant shows several of these signs, it’s time to repot. Key point: go up by no more than one size - only slightly wider than the existing rootball. And make sure the pot has sufficiently large drainage holes.
Repotting step by step
- Prepare the new pot and check there are several openings at the bottom.
- Add a thin layer of the prepared three-ingredient substrate.
- Ease the plant out of the old pot carefully; don’t tear the rootball apart aggressively.
- Position it so the surface sits at the same height as before.
- Fill around the sides with substrate and press only lightly - small air gaps are beneficial.
- Water thoroughly until water runs out of the bottom, then let the pot drain well.
After repotting, allow the surface of the substrate to dry slightly between waterings. Spider plants dislike permanently “wet feet”. It’s better to water well once and then pause, rather than constantly giving small sips.
Common soil mistakes that make spider plants unwell
Many issues come from well-intended but unsuitable substrate choices. A few classics show up again and again on houseplant shelves at home and in offices.
| Mistake | Consequence for the spider plant |
|---|---|
| Pure garden soil from a flower bed | Too heavy, compacts easily, encourages root rot and fungal problems. |
| Pot without drainage holes or with blocked drainage | Water builds up, the substrate stays wet, roots gradually rot away. |
| Pure cactus compost | Dries out very quickly, leaves go limp, tips dry out. |
| Pot that’s too large with a high peat content | Compost stays soaking wet for a long time; the plant struggles with lack of oxygen at the roots. |
| Too much fertiliser in dense substrate | Salt stress; leaf tips turn brown; hardly any plantlets form. |
Encourage a baby boom with nutrients and care
Once the soil mix is right, a few simple adjustments can push a spider plant to produce more stems and plantlets. The roots don’t need constant feeding, but they do respond well to a regular, gentle supply.
- Dose liquid fertiliser carefully: A balanced feed for leafy houseplants at half strength every two to three weeks during the growing season is usually sufficient.
- A little root stress helps: A pot that’s nicely root-filled often prompts the plant to produce more plantlets.
- Keep conditions steady: Avoid dramatic moves, avoid harsh midday summer sun right by the window, and avoid cold draughts.
Brown tips often have more than one cause: dry central-heating air in winter, fertiliser salts building up in the substrate, hard tap water, and - crucially - an unsuitable compost mix. If you trim the brown ends back at an angle with clean scissors and switch to the three-ingredient substrate at the same time, you’ll usually see fresh, healthy tips and new offshoot stems in the following weeks.
When a complete compost change is worth it
If the spider plant has mushy roots, a musty smell, or extremely compacted compost, simply topping up won’t be enough. In that case, a full substrate replacement is the best option. Remove as much rotten root material as possible with clean scissors and place the plant into the fresh mix. For the next one to two weeks, water a little more sparingly so the root wounds can seal.
If you keep several spider plants, repotting offers an easy comparison: plants in the light, airy three-ingredient mix typically restart growth faster, develop stronger leaves, and produce noticeably more plantlets than plants left in a heavy, standard rootball. That visible difference shows just how strongly the choice of substrate can decide between success and frustration on the windowsill.
Comments
No comments yet. Be the first to comment!
Leave a Comment