
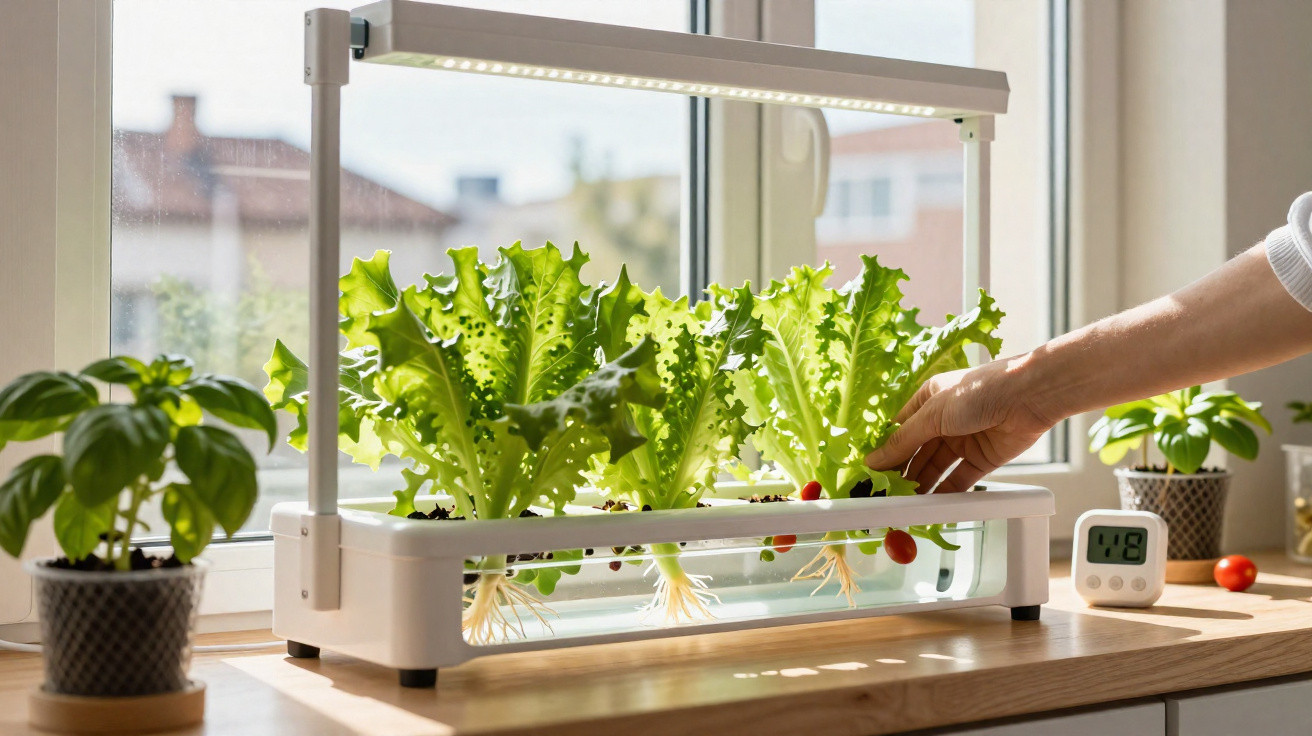
Having a window hydroponic mini garden at home is rather like keeping a chef’s miniature vegetable patch inside the flat: you can reach out and pick freshly grown green leaves for much of the year, even where space is limited. Plants grow without soil, using only nutrient-enriched water in a tidy, clean system with a straightforward routine that fits into a busy everyday schedule. As it is a controlled setup, it also limits exposure to common soil-borne pests and lets you monitor plant development more accurately, including making more technical adjustments to nutrients and light, as professional greenhouses do.
What is a window hydroponic mini garden and how does it work?
A window hydroponic mini garden is a compact growing system in which roots develop in a nutrient solution rather than soil, making the most of the natural daylight coming through a window. Its purpose is to provide clean, consistent and predictable cultivation, particularly suited to leafy crops such as lettuce, rocket and culinary herbs.
Small containers are commonly used, including plastic boxes or repurposed bottles, provided they are opaque so that light cannot reach the water and encourage algae growth. Seedlings sit in net pots, sponges or perforated cups, which keep the roots partly submerged while providing nutrients and oxygen without leaving soil scattered around the home. In some setups, small airstones connected to aquarium pumps can also be used to increase oxygenation in the nutrient solution and speed up growth. In more advanced versions, some growers monitor the solution’s pH and electrical conductivity (EC) to keep nutrient levels within the ideal ranges. This is especially useful in flats where temperatures fluctuate throughout the year.
Watch a video on the Hidronar hortas e hidroponia YouTube channel explaining how to build a small hydroponic system for a window:
How do you set up a window hydroponic mini garden step by step?
Setting up the system requires attention to a few essential details: selecting the container, germinating the seeds, preparing the nutrient solution, moving the seedlings and following a maintenance routine. Taking care with these stages helps prevent issues such as green water, unhealthy roots and weak leaves.
The reservoir should be sturdy and dark, with a secure lid and holes correctly sized for net pots or reused cups. Seeds can be germinated in cotton wool, a neutral growing medium or specialist sponges. The young plants are then transferred so that part of their roots is in the solution and part remains exposed to air, which helps prevent rot and promotes faster growth. In very warm flats, it is worth positioning the reservoir slightly away from the window glass to stop the water becoming too hot.
- Use fertilisers formulated specifically for hydroponics, adjusting the concentration to suit the plant’s growth stage. If possible, monitor the pH-generally ideally between 5.5 and 6.5-to support nutrient uptake.
- Choose filtered or good-quality water for mixing nutrients, avoiding excessive chlorine and impurities that may harm the roots.
- Top up the reservoir regularly and replace the solution at set intervals, usually every 10 to 15 days, or whenever you notice a change in its colour or smell.
- Treat yellowing or wilting leaves as signs that the light, nutrients or temperature may need adjusting, and also check that the roots are not receiving too much water.
How can you ensure sufficient light for a window hydroponic mini garden?
Light is one of the most important factors in successful cultivation, since indoor light levels are usually lower than those outdoors. Windows that receive several hours of direct sunlight help produce firmer, crisper leaves with richer colour, without the need for large structures.
Where natural light is insufficient, it can be supplemented with LED grow lights, providing an average of 12 to 14 hours of light each day. Keeping the lamps at a safe distance prevents leaf scorch, while rotating the container occasionally helps avoid “lopsided” plants that grow towards the light on only one side.
- North- or north-east-facing windows often provide good light in many towns and cities.
- Heavily closed curtains drastically reduce incoming light and hinder photosynthesis; opt for pale fabrics or leave a section open during the day.
- Light-coloured walls, aluminium foil or nearby white surfaces can act as simple reflectors, improving the effectiveness of available light.
What can you grow, and what are the benefits of a window hydroponic mini garden?
Low-growing plants with quick life cycles and tender leaves tend to perform very well in small containers, especially in bright indoor spaces. Different lettuces, rocket, baby spinach, basil, coriander, parsley and spring onions adapt well, whereas tomatoes, peppers and cucumbers require more room, stronger light and supporting structures.
One useful idea is staggered planting: rather than filling the whole system at once, add small batches of seedlings every week or fortnight to maintain a steady harvest. In this way, the window becomes more than just a light source; it turns into a productive, educational corner where you can observe the plant cycle, better control what comes into contact with the roots and enjoy fresh leaves almost all year round, even without a garden. Beyond convenience, the practice helps cut food waste because you harvest only what you need at that moment. It also allows you to try different varieties and flavours at home, adapting the system as you learn. For people living in large cities, a window hydroponic mini garden can also serve as a small green retreat, making the home feel more welcoming and linking urban daily life with the direct experience of growing food.
Comments
No comments yet. Be the first to comment!
Leave a Comment