
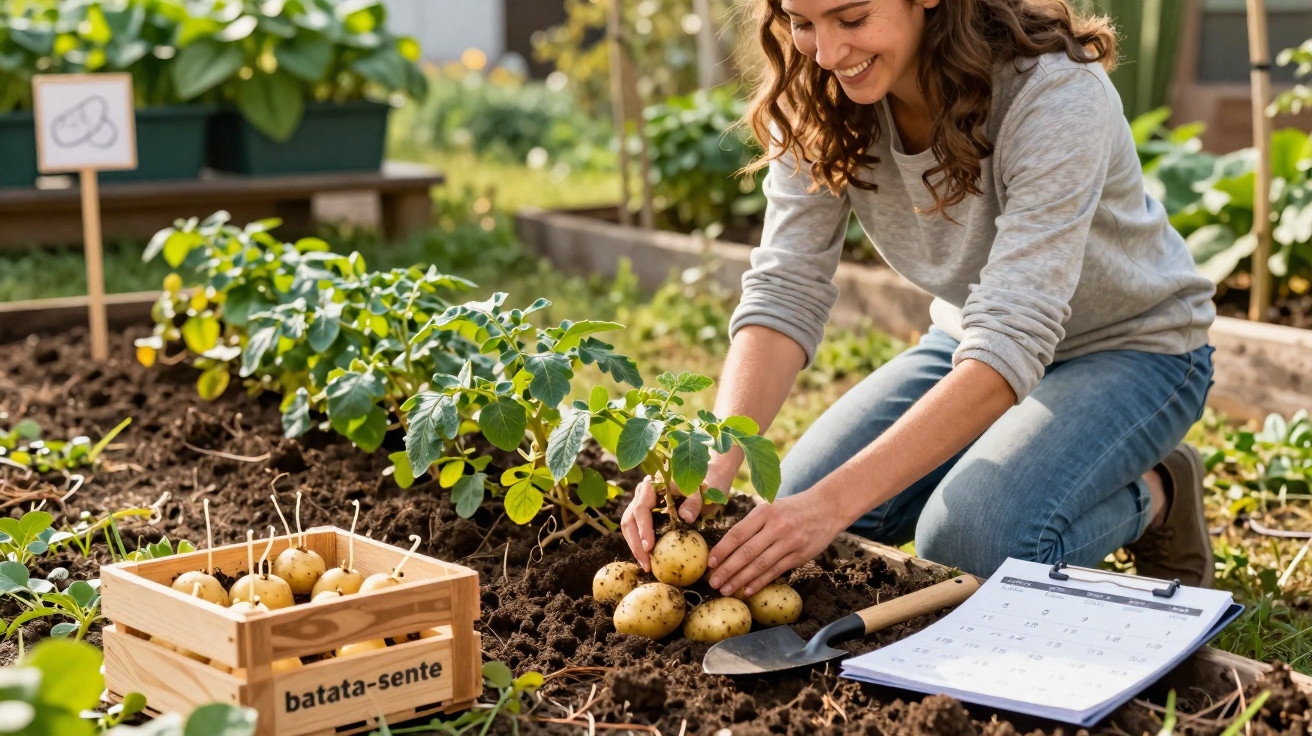
Many amateur gardeners look to the calendar, a neighbour’s advice or even the phases of the moon when deciding when the tubers should go into the ground. An experienced professional gardener, however, relies on something far more dependable: clear cues from the soil and the weather. Pay attention to those, and you’ll harvest noticeably more while avoiding the season’s classic mistakes.
The perfect moment: when potatoes really should go into the ground
The key rule is simple: it isn’t the date that matters, it’s soil temperature. Potatoes get going reliably once the ground has reached around 7 to 10 °C at a depth of 10 cm. Below that, the seed potatoes effectively sit in cold sludge, are more prone to rotting and take far longer to establish.
"The pro’s rule of thumb: only plant once the soil is consistently warmer than 10 °C - not when the calendar says so."
If you want to be precise, use a soil thermometer. These straightforward metal probes are available from garden centres for a modest price. Take two or three readings over several days to confirm the soil is genuinely warm enough on an ongoing basis.
When does each region usually reach that point?
Across much of Central Europe, the rough time windows are typically as follows:
- Mild wine-growing areas, river lowlands, sheltered spots: often from late March to early April
- Central regions, many urban gardens: commonly mid-April to early May
- Cooler areas, uplands, higher elevations: more like early to mid-May
An old (and surprisingly dependable) trick is to sit directly on the bare garden soil. If you can stay there for a few minutes without feeling chilled, the ground has already reached a decent starting level. If you’re unsure, it’s usually wiser to wait an extra week. Planting later into warm soil generally delivers a better yield than rushing in while it’s still cold.
Harvest earlier with a few simple tricks
If you’re impatient to get going, you can create a small head start. Dark mulch film or a strip of black horticultural fleece can raise the soil temperature by around 2 to 3 °C. Depending on the weather, that can bring planting forward by 1 to 2 weeks.
Lay the film tightly over the bed, weigh down the edges and put it in place at least two weeks before planting. The trapped warmth builds up underneath and is held particularly well during a damp spring. In more exposed locations, this can make the difference between an early potato crop and a standard harvest.
Without good soil, you won’t get big tubers
Potatoes thrive in soil that is loose, deep, slightly moist and well drained. In heavy, wet ground, tubers often stay small or may partially rot.
A quick check is easy: take a handful of soil, squeeze it firmly, then open your hand.
- If it remains a hard, smeary lump and may even stick to your fingers, the soil is too clay-heavy and compacts quickly.
- If the ball breaks apart readily and crumbles, the structure is far better suited to potatoes.
If your soil is very heavy, start preparing in autumn:
- Spread a layer of well-rotted compost about 3 to 4 cm deep.
- Mix in a little coarse sand or fine grit to open up the structure.
- Leave the area alone over winter; frost and rain will naturally break down clods.
- Don’t plant potatoes in the same spot again until at least the fourth year, to help prevent disease.
Good seed potatoes easily outperform supermarket potatoes
A common mistake is using supermarket potatoes as seed. They are often treated with sprout inhibitors and tend to produce less vigorous plants. It’s also an easy way to introduce disease into your garden.
"Professionals use certified seed potatoes - they produce healthy, high-yield plants and are worth the extra cost."
As a broad guide, 1.5 kg of seed potatoes can produce roughly 10 to 20 kg of crop, depending on the variety and how you care for them. Early varieties usually yield a little less, but they reach the plate sooner.
Chitting for a faster start
For an early advantage in spring, chit your seed potatoes first. The method is straightforward:
- Start 4 to 6 weeks before your planned planting date.
- Place the potatoes in shallow trays or empty egg cartons with the eyes facing upwards.
- Keep them bright but cool at around 10 to 15 °C; avoid direct, harsh sunshine.
- Once you see firm, short shoots of 1 to 2 cm, they’re ready to plant.
Long, white, soft shoots are not ideal. They snap easily and set plants back. If you begin in time and keep an eye on temperature, you’ll get compact, dark green sprouts - perfect for strong growth.
Planting day: how to set your tubers correctly
On planting day you don’t need high-tech kit or specialist tools. More important is the right position: sunny and airy, but not constantly battered by wind. Waterlogging after rain should not be an issue.
In beds, draw furrows about 10 to 15 cm deep. Space the potatoes roughly 30 cm apart, with rows around 60 to 70 cm apart. Point the shoots or eyes upwards, then cover with soil so the tubers sit securely in darkness.
Earthing up: the underrated yield booster
Once the green shoots reach roughly 20 cm tall, it’s time for a key job: earthing up. Pull soil from between the rows towards the plants and shape a small ridge around each shoot.
What this achieves:
- Developing tubers sit deeper and stay dark - green patches are considered inedible.
- The soil warms more quickly and doesn’t dry out as fast.
- Extra side roots can form, which may increase the crop per plant.
Repeat the process a second time a few weeks later. This creates stable ridges that work well in traditional beds, raised beds and even large containers.
Growing potatoes on a balcony or terrace
No garden doesn’t have to mean no potatoes. They also do very well in large pots, sacks or sturdy planters. Choose containers of at least 30 litres, and make sure there are drainage holes at the bottom.
The process mirrors planting in the ground:
- Add a thin drainage layer of expanded clay pellets or coarse gravel.
- Tip in about 15 cm of loose, nutrient-rich compost/soil.
- Set 2 to 3 chitted potatoes on top, eyes facing upwards.
- Cover with 10 cm of soil and place the pot somewhere bright and warm.
- As the foliage grows, keep topping up with more soil, forming small mounds around the shoots.
On balconies, compost dries out much faster. Regular watering and a light feed during growth keep plants strong. In hot summers, a bright location helps prevent the container overheating.
Healthy plants, less hassle: crop rotation and disease
If you want potatoes to perform well year after year, a simple rotation plan helps. Growing them in the same spot every season encourages soil pests and fungal problems. Ideally, leave a four-year gap before planting Solanaceae (such as potatoes, tomatoes or peppers) in the same bed again.
If you only have small beds, containers can be a useful alternative, or you can regularly work in fresh soil. A more open planting with air between plants reduces moisture on the leaves and noticeably lowers the risk of blight.
Practical tips for an even better yield
A few extra adjustments can turn a decent crop into a very good one:
- Remove weeds early: especially in the first weeks, weeds compete for nutrients. Stay on top of them to give potato plants the upper hand.
- Water moderately but deeply: waterlogging is harmful, but long dry spells during tuber formation are too. Water less often, but thoroughly.
- A light potassium boost: potassium-rich fertilisers or small amounts of wood ash encourage firm, storable tubers.
- Don’t lift too early: for maincrop potatoes, wait until the foliage has died back significantly so the skins can toughen properly.
Terms like “early potato” and “late potato” mainly refer to maturity time. Early varieties are ready after 80 to 100 days, but they are less suitable for long-term storage. Later varieties require more patience, but can often be kept well into winter.
Once you’ve taken these basics on board, you’ll quickly notice something: the question “When do I plant potatoes?” isn’t answered by the calendar, but by your own soil. With a glance at a thermometer, the current weather and the quality of your seed potatoes, a handful of unremarkable tubers can turn into a surprisingly generous - and often very personal - harvest.
Comments
No comments yet. Be the first to comment!
Leave a Comment