
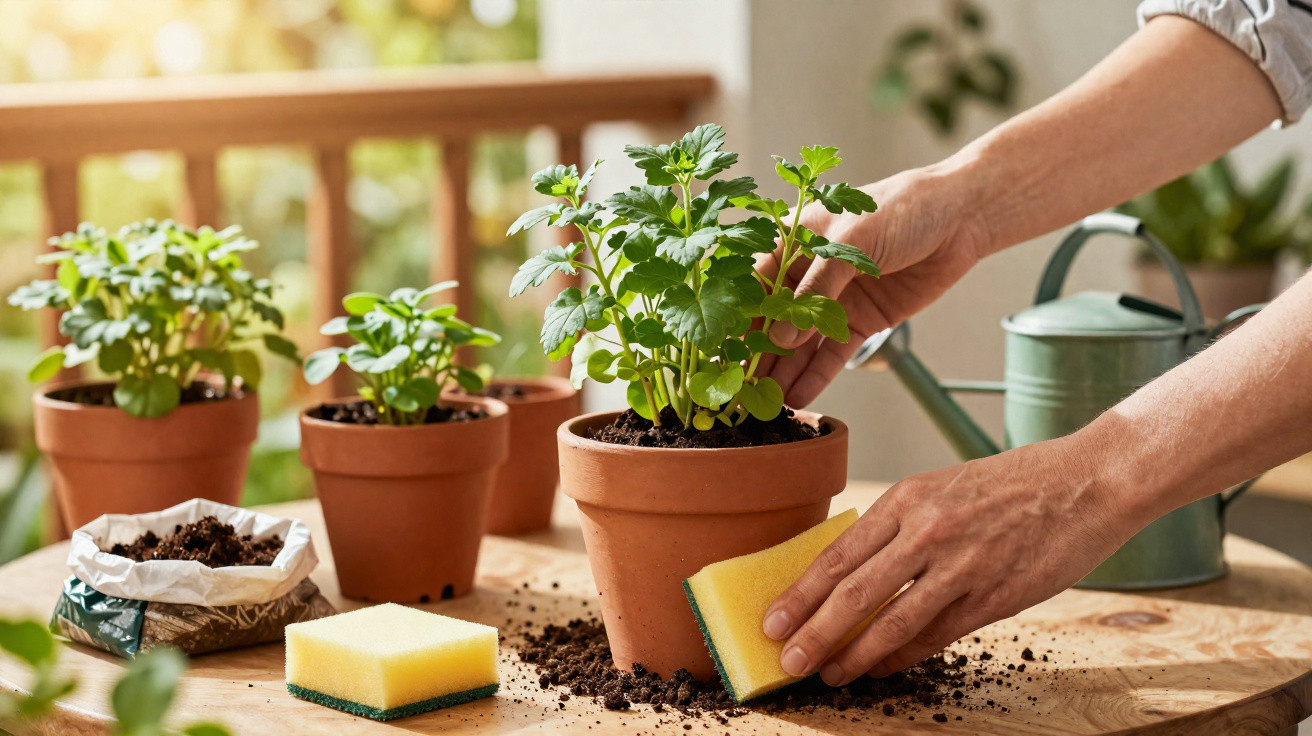
Long discarded from the kitchen cupboard, a small washing-up sponge can become a quiet lifesaver for thirsty plants when buried in a garden bed.
The gardening season is beginning: the first spells of sunshine alternate with chilly nights, rain is slow to arrive, and many amateur gardeners are battling dried-out pots and beds. Yet the answer is often sitting inconspicuously beside the sink: when properly prepared and buried in the garden, an old washing-up sponge can retain water, protect roots and even give the compost a boost.
Why a washing-up sponge becomes a water manager in spring
Roots are especially vulnerable in spring. Days grow longer and sunshine becomes stronger, but watering routines have not yet settled into place. Sometimes there is too much water, sometimes too little – balcony planters and pots in particular dry out quickly, especially in windy spots.
This is exactly where a washing-up sponge shows its strengths. Its porous structure acts as a miniature water reservoir:
“Placed in a flowerpot, the sponge absorbs excess watering water and gradually releases it back into the soil – almost like a drip system without any technology.”
This means that:
- soil dries out more slowly;
- roots are less likely to suffer from “thirst shocks”;
- intervals between watering can be slightly longer – useful for short periods away.
The trick is particularly useful for:
- balcony planter plants such as geraniums, petunias or herbs;
- vulnerable young plants with shallow root systems;
- small pots exposed to strong sunshine.
How the washing-up sponge trick works in a flowerpot
Using this method is remarkably straightforward and requires no expensive gadgets. Follow these steps:
- Thoroughly clean the old washing-up sponge (more on this shortly).
- Prepare the pot by placing broken terracotta pieces or gravel over the drainage holes.
- Lay one or two sponges flat on the drainage layer.
- Add compost over the top and plant your chosen plant.
- Water well so that the sponge becomes fully saturated.
The sponge therefore sits beneath the compost like a damp cushion. When watering, surplus water drains downwards, the sponge soaks it up and releases moisture again as the growing medium becomes drier.
Compost booster: when the sponge disappears into the heap
Pots are not the only beneficiaries. Sponges made from natural materials can also prove surprisingly useful in compost. They retain moisture in the heap and provide extra structure for micro-organisms.
“In compost, a natural sponge works like a sponge in the forest: it stores rainwater, keeps the environment damp and supports tiny organisms during decomposition.”
Which sponges are suitable for compost
The following are suitable without concern:
- cellulose sponges;
- luffa (loofah) sponges;
- other kitchen items clearly labelled “natural” and containing no plastic.
Sponges made from the following are entirely unsuitable for compost:
- typical yellow-and-green plastic;
- foam containing plastic;
- products with a scouring side made from plastic fibres.
These products release microplastics and residues, so they do not belong anywhere vegetables may later be grown.
How to use sponges correctly in compost
If you have a natural sponge, the best approach is as follows:
- Clean the sponge thoroughly after it has been used in the kitchen.
- Cut it into small pieces measuring around two to three centimetres across.
- Loosely mix these pieces into the compost, ideally in the middle section.
The pieces absorb water, keep the heap moist for longer and introduce a little air into its structure. In spring especially, when compost starts up again after winter, soil life benefits from consistent moisture.
Safety first: disinfect and prepare the washing-up sponge properly
A used washing-up sponge is not an innocuous item. In the kitchen, it collects grease, cleaning products and bacteria. It should not go directly into a pot in that state.
“A damp washing-up sponge left lying around for hours is considered a genuine bacteria hotel – so treat it thoroughly before taking it into the garden.”
Simple cleaning methods
Before using it in the garden, give the sponge a short treatment:
- Rinse thoroughly: Hold it under hot water until no foam remains.
- Boil it: Place it in boiling water for several minutes.
- Treat with vinegar: Soak it in plain household vinegar, leave it to work, then rinse it again.
- Microwave it (only damp sponges with no metal parts): Heat on high for two minutes to kill germs.
Important: after this process, the sponge should never return to the kitchen. Once it is for the garden, it is always for the garden.
Four clever garden uses for an old washing-up sponge
1. A moisture store in a pot
This is the classic use: a water reservoir in a flowerpot or balcony planter. It is ideal for anyone who does not want to water every day or spends a lot of time away. This approach also works well in a greenhouse, for example with tomatoes grown in containers.
2. A helper for sowing and raising seedlings
A sponge can be cut into small cubes using a knife. Place one seed in each cube. The moistened sponge cube creates a perfect, gently damp bed for germination.
Once the young plant is about seven centimetres tall, the whole cube, roots included, can be transferred into a pot or garden bed. The sponge will decompose over time in the case of natural varieties, or remain in place as a moisture cushion.
3. Light protection against cold and pests
Laid flat on the soil and secured with a stone, a sponge can provide a little protection for sensitive plant bases against late frosts. The layer of air in the material slightly cushions temperature extremes.
If the sponge is also soaked with a few drops of strongly scented essential oils that are often considered deterrents in the garden – such as peppermint or lavender oil, heavily diluted – some crawling visitors may be more likely to avoid the area. Do not overdo it, as plants react sensitively to oils that are too concentrated.
4. Moisture support for patio containers
Large container plants such as olive trees or small citrus trees quickly suffer when wind draws water from the surface. One or two sponges placed flat beneath the upper layer of compost can serve as an extra buffer. They retain water from watering and release the moisture a little more evenly.
Which sponges can go into the garden – and which cannot
Before the sponge permanently leaves the kitchen, it is worth checking what material it is made from.
| Type of sponge | Use in a pot | Use in compost |
|---|---|---|
| Cellulose sponge | Yes, as a water store | Yes, if largely free from cleaning products |
| Luffa sponge | Yes, ideal for natural gardens | Yes, decomposes over time |
| Plastic sponge (yellow-green) | Limited use in a pot; do not bury it in areas used for vegetables | No, because of microplastics and residues |
| Foam sponge | Only temporarily in a pot; best avoided | No |
Anyone wishing to keep their garden as free from pollutants as possible in the long term should choose natural varieties when buying sponges. These can later be used far more easily in compost or a garden bed.
Signs that a washing-up sponge has reached the end of its life
A sponge does not last for ever in the garden either. It is worth checking pots and beds regularly. Clear signs that it is finished include:
- a strong, unpleasant smell;
- visible mould growth;
- material breaking down into crumbly remnants;
- a slimy-looking surface.
Natural sponges in this condition can still go into compost, provided they have not been exposed to lots of cleaning products. Plastic sponges should then be placed in general waste.
Why the washing-up sponge trick is more than just a novelty
Using old washing-up sponges in the garden is kinder not only to plants but also to the bin bag. A household throws away quite a few sponges over the course of a year – some of them can continue to do useful work rather than ending up in general waste.
At a time of longer dry spells, every small water store is of interest. Those who water their pots more intelligently can approach watering with a little more ease and reduce the risk of finding dried-out balcony planters after a warm weekend.
For many amateur gardeners, a small trial is worthwhile: use a sponge in one pot and none in another, then compare which compost remains damp after three sunny days. Often, the difference is already apparent when you test the growing medium by hand.
Anyone who also consistently switches to sponges made from natural fibres gains a practical garden helper that can ultimately return to the natural cycle. An unassuming kitchen utensil thus becomes a quiet professional for water management and soil life.

Comments
No comments yet. Be the first to comment!
Leave a Comment