
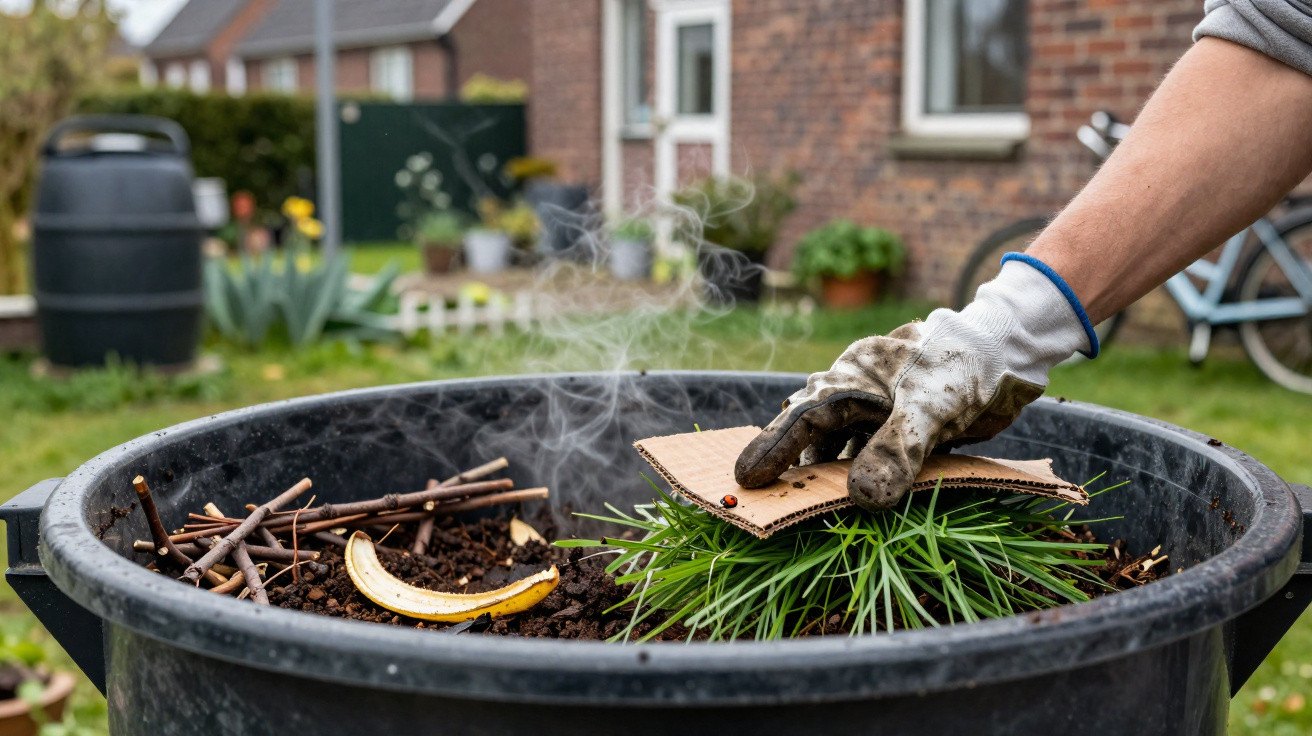
The first thing that strikes you is not the scent.
It is the warmth. Lift the lid of an ordinary black compost bin at the end of a compact suburban garden and a light puff of steam drifts into the cool morning air. Banana skins, coffee grounds and torn cardboard – the familiar ingredients – have become a warm, dark, crumbly mixture. A fortnight earlier, it was kitchen waste and grass cuttings. Now, it looks remarkably like soil.
The explanation behind this apparent magic is disarmingly straightforward: layers. The gardener responsible for the heap laughs and says she simply piles “the right stuff in the right order”. There are no devices or expensive compost activators involved. Instead, a regular sequence of browns and greens keeps the heap hot for nearly the whole year. Her neighbours look at their cold, slimy piles and ask what she does differently.
The answer is hidden in those quiet layers – and it works quickly.
Why some compost piles race ahead while others stall
On a cold day, stand beside two compost heaps and the contrast is almost tangible. One is dense, flat and slightly smells like an abandoned fridge. The other feels loose and bouncy at the top, with layers resembling a lasagne: dry twigs, tender grass, papery leaves and fresh peelings. Push in a hand fork and the warm heap seems to exhale and give way, releasing the rich, earthy aroma gardeners quietly love.
That layered arrangement is more than visually appealing. It positions oxygen, water and food for the microorganisms at work inside. Stack “brown” carbon materials and “green” nitrogen materials in a rough sequence, and the heap becomes a living machine. A pile that appears untidy yet layered can break down within months. A seemingly neat but compressed heap may remain unchanged for a year.
A London community garden recorded this contrast with almost obsessive care. It used two bins side by side: one received a casual mix of whatever arrived, while the other was assembled in intentional 5–10 cm layers. Both had the same weather and, overall, the same materials. Within 90 days, the layered bin had reduced by nearly two-thirds and reached internal temperatures above 60°C. The “dump and hope” bin remained cool, damp at the top and unrotted underneath, with identifiable cabbage leaves still attached.
This difference is not magic; it comes down to biology and physics. Microbes require balance: sufficient nitrogen to reproduce, as well as carbon to power their work. Placing grass cuttings between dry leaves and shredded cardboard distributes nitrogen across the heap, rather than allowing it to form a foul-smelling mat. Slender branches and twiggy prunings maintain air passages, preventing the microbes from running out of oxygen. The outcome is a naturally ventilated stack where bacteria and fungi can travel freely and break down material at speed.
Fast composting is fundamentally about access: access to food, air and water. Layers offer the simplest means of providing the microscopic workforce with all three, without making composting feel like another job.
The core compost layers that quietly turbo-charge your heap
To make decomposition race instead of plod along, begin in a place few people consider: the base. Rather than putting waste directly onto bare ground, create a 10–15 cm foundation of coarse, woody material. Use small branches, woody perennial stems, maize stalks or even thick sunflower stems. This base acts like an “air mattress”, stopping the heap from resting in a pool of water while allowing air to travel upwards.
Then build up thin, alternating layers of greens and browns. Add a few handfuls of grass cuttings, kitchen scraps or used coffee grounds, then cover them with a light layer of dry leaves, shredded cardboard or straw. Aim for layers of 5–8 cm, rather than adding a large quantity of one material at once. If you have particularly wet ingredients – watermelon rinds, soft fruit or manure – enclose them firmly between brown layers so they do not slip to the sides and rot by themselves.
A small-garden gardener in Manchester relies on a pattern she calls “3-2-1”: three scoops of browns, two of greens and one of something coarse. Her brown materials tend to be unglamorous – ripped egg boxes, dry hedge leaves and newspaper. Kitchen scraps and the occasional bucket of fresh grass make up her greens. The coarse addition may be twiggy prunings or rough straw. It sounds almost too basic on paper. Yet her heap regularly reaches temperatures that are “hand-too-hot” within a week, even in spring, while her neighbour’s single-texture grass pile becomes a slimy, matted green block.
There is a reassuring simplicity to this approach. You do not have to calculate nitrogen-to-carbon ratios with laboratory accuracy. Just identify what the heap lacks. Is it wet and smelly? The brown layers are probably too sparse or too tightly packed. Is it dry and inactive? It needs more greens, or its greens are buried too far down to have an effect. Everyday materials such as leaves, cardboard, cuttings and peelings are already around you, ready to be arranged for microbes like a slightly untidy layer cake.
The principle beneath the surface is straightforward. Greens drive rapid bacterial growth, much like feeding coal into a furnace. Browns moderate that activity, keeping the heap from sinking into a hot, oxygen-free mass. The coarse structural layers of twigs provide a framework that prevents the contents from compressing under their own weight. Once all three appear in sequence – coarse, green, brown, then repeat – the heap largely manages itself. You will still need to turn it occasionally, but the layers carry most of the workload.
Micro-adjustments that make layers work in real life
The quickest composters rarely have access to superior materials. They simply prepare ordinary materials in smarter ways. Before putting a layer into the bin, they usually make a small adjustment. Grass cuttings are loosened and combined with a little straw or shredded paper. Large pieces of cardboard are ripped into strips instead of being laid down like tiles. Tough stems are snapped or chopped so that they cannot create impenetrable ribs through the heap.
Kitchen waste is not simply tipped in and abandoned. The bucket is emptied, its contents spread into a thin, uneven layer, then covered with something dry and light: a shower of leaves, a dusting of sawdust or a handful of partly shredded newspaper. This small covering step quietly performs three jobs: it absorbs excess water, contains odours and deters flies. During a hectic week, it may be the heap’s only maintenance – and that will often be sufficient.
Let us be honest: nobody really does this every day. Life intervenes, and the compost corner often becomes the place where disorder accumulates. There may be scraps from a hurried evening meal, a huge batch of grass from the first spring cut, or a bag of dry leaves left untouched since autumn. On those untidy days, success is not about perfection but limiting the consequences. If you add too much of one material, deliberately counterbalance it with a generous layer of its opposite. Too much wet grass? Add a substantial covering of torn cardboard and dry stems. Adding a full bag of leaves in one go? Break it up with kitchen scraps and a little water as you build the pile.
An experienced allotment holder captured the approach in one simple sentence:
“I don’t have a perfect compost recipe, I just refuse to let any one material be the boss.”
That outlook is the understated foundation of successful layering. Instead of being a fixed container, the heap becomes a living thing that you inspect from time to time. Put your hand in. Notice the slight crackle of dry material and the squelch of wet layers. Make an adjustment. Eventually, these changes become instinctive, like adding salt to a soup you have prepared countless times.
- Begin every new composting “session” with a quick check: is the surface dry, sodden, cold or warm?
- If there is a sharp or rotten smell, the heap lacks air or browns – add twigs, straw or cardboard.
- If it is dusty and inert, add a rich, moist green layer along with some water.
- Always include at least three materials: one green, one brown and one coarse material.
- Every few weeks, turn the outside towards the centre to bring neglected layers back into action.
Letting compost layers do the slow work for you
There is something quietly stabilising about a heap that warms, settles and darkens through the seasons. You begin to interpret its layers in the way others read weather forecasts or traffic conditions. A glimpse of orange peel, a length of straw, the papery remnants of leaves midway through their transformation. The everyday materials that fill bins and bags in most households become a subtle measure of how you live and how willing you are to wait.
On a difficult day, the compost heap can seem like another chore watching from the edge of the garden. On a better one, it is a modest act of defiance: taking what your home discards and turning it, quite literally, into life. Once you see how a handful of uncomplicated layers accelerates decomposition, composting becomes less of a mysterious duty and more of a slow conversation with the soil. The heap gives its response: too wet, too dry, too neglected, just right.
On a warm evening, lift the lid and spot a deep, chocolate-brown crumble developing below, and you might smile at the thought that it was mouldy salad and cardboard Amazon parcels only weeks ago. The divide between waste and resource suddenly appears far narrower than it did before. You may start asking what else in daily life could work in the same way – layered, balanced and quietly changing in its own, oddly efficient, time.
| Key point | Detail | Benefit for the reader |
|---|---|---|
| Aerated base | Layers of branches and stems at the bottom allow air to circulate | Prevents compacted, foul-smelling heaps and speeds up the start |
| Alternating greens and browns | Repeated thin layers of nitrogen-rich and carbon-rich waste | Maintains a healthy balance for rapid decomposition |
| Chopped or torn materials | Cardboard, stems and leaves are broken into small pieces | Increases the surface area available to microbes and saves weeks |
FAQ:
- How thick should my compost layers be? Work in small slices rather than large slabs: 5–8 cm per layer is usually right. Thin layers break down faster. After adding very wet material, finish with a slightly thicker dry layer.
- Can I compost only kitchen scraps without browns? You can, but the process will be slow, smelly and likely to attract flies. Adding even a few handfuls of shredded cardboard, paper or dry leaves to each bucket of scraps changes the process dramatically.
- Do I need to turn a properly layered pile? Layering means less frequent turning, but does not eliminate it altogether. Turn the heap every 3–4 weeks to keep decomposition moving quickly and return older layers to the hot centre.
- Are weeds safe to add into the layered compost? Most annual weeds are suitable if your heap becomes hot. Problematic perennial roots and seed heads are risky unless you know the centre of your heap consistently reaches 55–60°C.
- Why is my layered compost still not heating up? The heap may not have enough volume, nitrogen or moisture. Aim for at least 1 m³ of material, add further greens and moisten it until it has the feel of a wrung-out sponge.
Comments
No comments yet. Be the first to comment!
Leave a Comment