
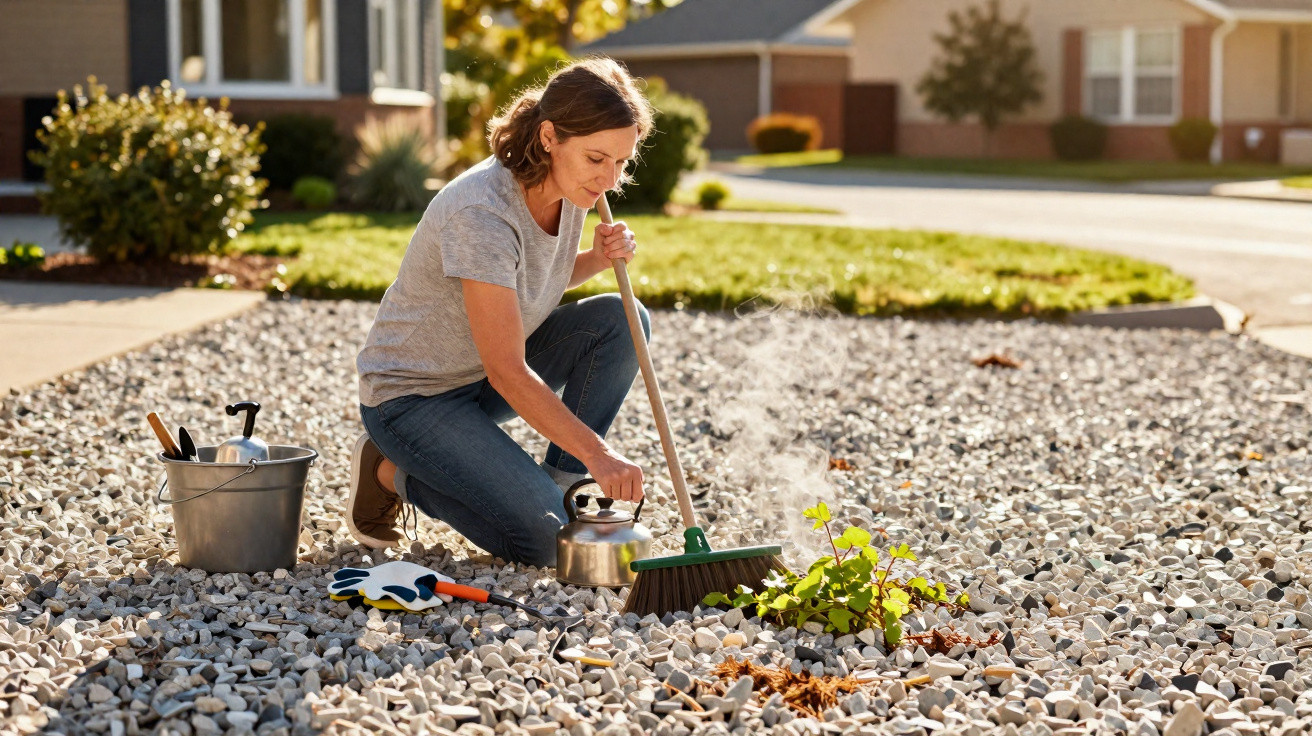
Many garden owners will recognise the pattern: you spread the gravel with care, and for a few weeks the driveway looks like it has come straight from a catalogue. Then, as soon as temperatures rise, dandelion, chickweed and couch grass force their way through even the smallest gaps. If you do not want to spend all your time bent over pulling seedlings out, it is easy to reach for chemical sprays out of frustration and lack of time. Yet you can cut the chore down dramatically with three straightforward, natural steps - even in areas with strict water restrictions.
Why your gravel driveway gets overgrown so quickly
Gravel looks neat and contemporary, but it does not automatically stop plants from establishing. Over time, a fine layer of dust, soil, leaves and seeds collects between the stones. That build-up becomes a thin but highly fertile film where any wind-blown seed can quickly take hold.
If the gravel layer is too shallow, or if the stones are very rounded, sunlight can reach the ground more easily. Many common “path invaders” - such as dandelion, plantain or purslane - need only a few millimetres of substrate to get started.
In summer, the weather amplifies the problem. The combination of heat, short showers and thunderstorms creates ideal conditions even in areas that are usually dry. Once plants have rooted, their root systems knit the base together, trap moisture and can even leave patches feeling muddy.
"The longer wild plants spread across the gravel, the more time-consuming and irritating every single clean-up becomes."
At the same time, many people fall into a vicious cycle: for convenience, they use broad-spectrum herbicides on the surface. These products can burden soil, groundwater and insects - and they rarely address the root cause, because new seeds keep arriving. A more sustainable approach is mechanical control that avoids sprays and works with minimal water.
Three natural steps that stop the weed surge
1. A mineral “armour layer”: build your gravel correctly
The most important step does not happen in midsummer - it happens beforehand, with proper preparation. If you “upgrade” your gravel driveway in spring, you save yourself many hours of work later on.
- Remove existing weeds thoroughly: Before you start, dig out or scrape off all plants, including the roots.
- Lay geotextile: A water-permeable weed-control membrane blocks light while still allowing rain to soak into the ground.
- Use crushed gravel: Angular stones (around 6–14 mm) lock together better than rounded, washed gravel.
- Use enough depth: Spread at least 5 cm - ideally 7 cm - of gravel evenly to reduce germination.
- Install edging: Clear borders made from metal, stone or concrete stop grass roots creeping in from the lawn.
A small but consistent routine also matters: once or twice a month, clear leaves, seed heads and other debris off the driveway. That prevents a “mini humus” layer forming, which would otherwise give new plants somewhere to settle.
2. Use a wire brush as your everyday tool
If you only reach for a hoe every few months, you are already on the back foot. It is far easier with short, regular sessions - ideally using a purpose-made path brush, or a sturdy wire brush on a long handle.
Use the method like this:
- Choose the right moment: Early morning is ideal, when the surface is slightly damp with dew.
- Work in circular motions: Run the brush over the gravel with light pressure; small seedlings lift out quickly.
- Avoid beds and lawn edges: Brush only the gravel surface, so you do not push roots into neighbouring areas.
- Clear away the remains: Sweep up plant material and dispose of it - do not leave it lying there.
For the first few weeks, a quick brush every 14 days is worth it. Each pass usually takes only a few minutes, but it stops seedlings turning into dense mats. Acting early saves your back and knees, and it saves water too, because this mechanical approach works without any watering.
"The brush replaces back pain: if you go over the gravel regularly, you stop small seedlings turning into real problem patches."
3. Slow stubborn clumps down with boiling water
Even with membrane and brushing, a few tufts often remain - especially where the gravel layer is thinner or where old roots are still in the ground. Here, a simple kitchen trick helps: boiling water.
Application is straightforward:
- Heat water in a saucepan or kettle.
- Pour the rolling boiling water carefully and directly onto the base of the plant.
- For perennial species such as couch grass or plantain, check again a few days later and repeat if needed.
The sudden heat ruptures cell walls, and the leaves wilt quickly. This works best on fine, shallow-rooted species. Against deep-rooted “professionals”, it tends to slow growth rather than eliminate it, meaning you may need several rounds or additional digging out with a narrow spade.
Important: do not let hot water run onto adjacent beds or the lawn, as desirable plants can be damaged as well. On days when the ground is already warm, smaller amounts are enough and the effect is particularly strong.
How to plan gravel maintenance with minimal effort
If you do not want to spend summer on your knees, you can turn these three steps into a simple seasonal routine. The table below shows one possible rhythm:
| Period | Task | Frequency |
|---|---|---|
| Spring | Deep clean, check membrane, top up gravel | Once |
| Spring to early summer | Brush the surface | Every 2 weeks |
| Summer | Targeted use of boiling water | Every 10–15 days as needed |
| Year-round | Remove leaves and plant debris | 1–2 times per month |
If you stick with it, the second year is usually much easier. Many seeds simply cannot find a suitable niche, and new growth drops noticeably.
What you should avoid for environmental and safety reasons
In dry areas, it can feel tempting to use aggressive products. However, any short-term relief comes with consequences. Total herbicides containing active ingredients such as glyphosate can, sooner or later, reach groundwater, harm microorganisms and endanger pollinators if used incorrectly.
Even supposedly “home-made” remedies are not harmless: salt or vinegar solutions are corrosive, can salinise the soil, and in legal terms do not belong on paved or gravel surfaces. Many councils explicitly prohibit their use.
Mechanical methods are far better for people, pets and soil. If you intervene early, you do not need a pressure washer or harsh chemicals. During heatwaves and hosepipe bans, this approach pays off twice over because it can be done almost entirely without water.
Practical examples and small extras for fewer weeds
A tip from many home gardens: heavily used sections - for example by the front door or by the garage - can be broken up with strips of paving or stepping stones. Wild plants have far fewer opportunities there, and the main walking route stays clean for the long term.
It also helps to do a quick check after heavy rain. If you notice more fine soil in certain spots, or gravel that has been washed away, it is worth topping up and compacting those areas. That closes gaps before root mats can develop.
If you want to improve the look of the surface while also making it easier to maintain, you can combine different grain sizes: coarser material at the bottom, then a thin top layer of finer, angular stones. The structure becomes more stable while still being comfortable to walk on.
"The better the construction beneath the gravel, the less you will have to kneel, bend and swear later."
Over the longer term, it pays to look at the whole plot: bare soil at the edges, neglected joints, or neighbouring wild areas act as constant seed sources. If you mow, mulch or maintain planted border strips from time to time, you reduce the “weed cloud” drifting over the drive.
Step by step, you end up with a gravel driveway that stays largely weed-free through summer - despite water restrictions and without toxic products. The work is spread across many small, manageable actions, rather than turning into one frustrating marathon in high summer.

Comments
No comments yet. Be the first to comment!
Leave a Comment