
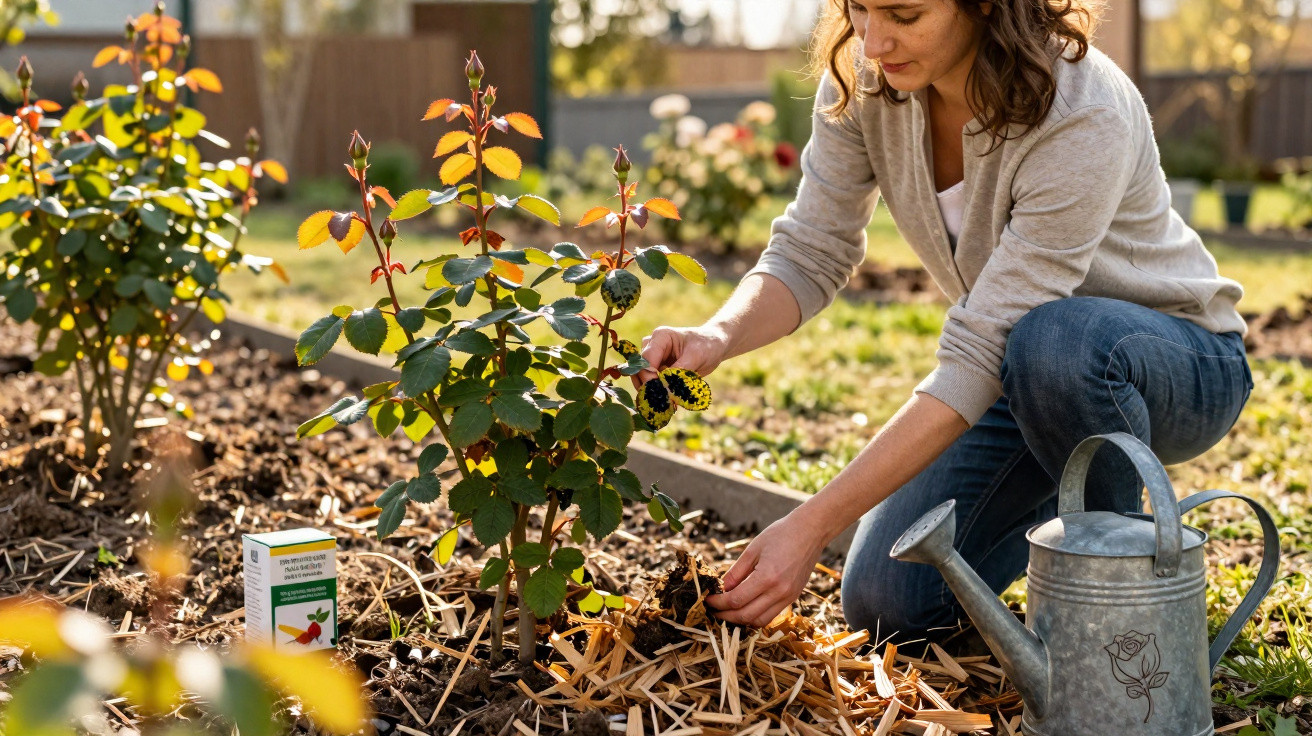
Many amateur gardeners ask themselves every year why their roses fade in June, produce hardly any flowers and look generally miserable. The real reason often begins much earlier: a low-key fungus uses spring to establish itself in the rose bed. If you plan three simple jobs for March, you remove the disease’s foundations and set your roses up to stay vigorous and full of flowers right through to autumn.
Black spots on rose leaves: what’s really going on
So-called black spot is one of the most common rose problems. Typical signs are yellowing leaves with dark, irregular blotches. Later, the foliage drops early-often by mid-summer. The plants then look stripped and manage only a few small blooms.
The culprit is a fungus (Diplocarpon, also known as Marssonina rosae). You can’t see it, but it clings stubbornly to anything left in the rose bed: fallen leaves, small twig pieces and other plant debris. That’s where it “overwinters”, waiting for the right conditions.
Between about 13 and 30 degrees and when leaves stay wet for a long time, the fungus spreads explosively – mild, rainy spring days are ideal.
In spring, raindrops splash spores up from the soil onto fresh rose foliage. From there, wind and splashing water carry them on to other plants. A bed packed with roses-or plants set too close together-can then act almost like an express train for the disease.
Why March is the decisive month for roses
The good news is that you can break this cycle if you act early enough. March is particularly suitable because:
- the fungus is already lying in wait in the soil and on old leaves,
- the roses are just about to start growing,
- temperatures soon rise into the range that favours rapid fungal spread.
In this short window, three straightforward tasks can significantly reduce problems later in the season. This isn’t about chemicals; it’s mainly about hygiene, protection and strengthening the plant.
Step one: tidy thoroughly around the roses
Start with a simple but crucial job: clearing up. Anything still lying around from last year can be a potential source of fungal infection.
Remove old leaves consistently
When you walk the garden in March, do the following at each rose:
- Pick up every old leaf from the ground, even those partly buried.
- Pull out leaves and dead bits caught in the centre of the shrub.
- Cut off thin, dead shoots that are clearly dried out.
Important: don’t put this material on the compost heap. The fungus can survive there and return to the bed when the compost is used. It’s better to dispose of it in general waste or take it to your local green-waste facility.
If you remove infected leaves carefully in March, you take away a large part of the fungus’s starting base for the new season.
Step two: the right protective carpet on the soil
Once the area around the roses is clean, move on to the next part of the anti-fungus plan: a protective mulch layer. It delivers several benefits at once.
Mulching isn’t just decorative-it helps prevent fungus
Suitable materials include, for example:
- well-rotted compost,
- bark mulch,
- wood chippings,
- or a blend of compost and bark.
Spread the layer around the base of the rose without piling it directly against the stems. A good guide is roughly 3–5 centimetres thick-clearly there, but not heaped up like a mound.
The mulch layer works like a shock absorber: raindrops hit it without flinging fungal spores up from the soil onto the leaves.
There are further advantages too:
- The soil doesn’t dry out as quickly, helping roses cope better in warm spells.
- Weeds grow much more slowly and are easier to remove.
- Compost used as mulch also adds nutrients and improves soil structure.
If you grow lots of roses, it’s worth booking mulching in as a fixed March task: go bed by bed-clean up, then apply mulch-so fungal pressure drops across the whole garden.
Step three: strengthen roses deliberately rather than only treating them
A rose that is robust and well supplied with nutrients copes with disease far better than a weakened plant. Alongside pruning and siting, nutrition in March plays a key part.
The right feed at the right time
Towards the end of March, when new growth is clearly starting, it’s worth applying the first feed. Suitable options are:
- a dedicated rose fertiliser with a balanced nutrient mix,
- well-rotted compost-around a spade’s width per plant,
- or organic-mineral fertilisers from a garden centre.
Always apply fertiliser to the soil around the rose, not into the centre of the stems, then water well so nutrients reach the roots.
Well-fed roses produce stronger growth, develop thicker leaves and sturdier shoots – making it much harder for fungi to get established.
Many gardeners also use plant tonics or strengthening products added to watering cans. Often, small amounts applied regularly are enough. It’s sensible to check the dosing instructions so you don’t push the roses too hard.
How the three March tips work together
The three tasks-tidying, mulching and feeding-work as a system, each supporting the next. In practical terms, this is what happens:
| Step | Main effect |
|---|---|
| Remove leaves | Significantly reduces the amount of fungal spores in the bed |
| Mulch layer | Prevents splash infection and keeps soil conditions more even |
| Fertilise correctly | Boosts the plant’s defences and encourages strong growth |
If you get these done every March, you create a kind of baseline protection. Of course, an exceptionally wet summer can still lead to infection, but the outbreak is usually much milder.
What to do if roses are already infected
If you already have a rose in the garden that’s badly affected, you can’t undo the damage completely-but you can limit it. In that case, it’s worth removing the last remaining leaves from the previous year with extra care, even if it’s fiddly.
During the growing season, cut off and dispose of heavily affected leaves promptly before they produce large amounts of spores. Consistent watering helps too: water roses less often but thoroughly, and wet the soil rather than the leaves where possible.
Helpful extras for healthier roses
Beyond the three March steps, a few other adjustments can lower disease pressure:
- Don’t plant roses too close together, so leaves dry quickly after rain.
- Choose the sunniest positions you can; shade encourages fungal issues.
- Water in the early morning rather than late evening.
- When planting new roses, look for tougher, disease-resistant varieties.
Some terms linked to rose diseases can sound complicated at first. “Fungal spores” are, put simply, tiny reproductive particles-like seeds, but for fungi. They float in the air, cling to raindrops or sit on old plant material. The goal of all these measures is to cut the number of spores around the rose as much as possible.
If you invest an extra hour in your roses in March, you often save yourself many hours of frustration in summer. Healthy leaves, strong shoots and abundant flowers are rarely down to luck-they’re usually the result of a few well-timed, sensible actions at the start of the season.




Comments
No comments yet. Be the first to comment!
Leave a Comment