
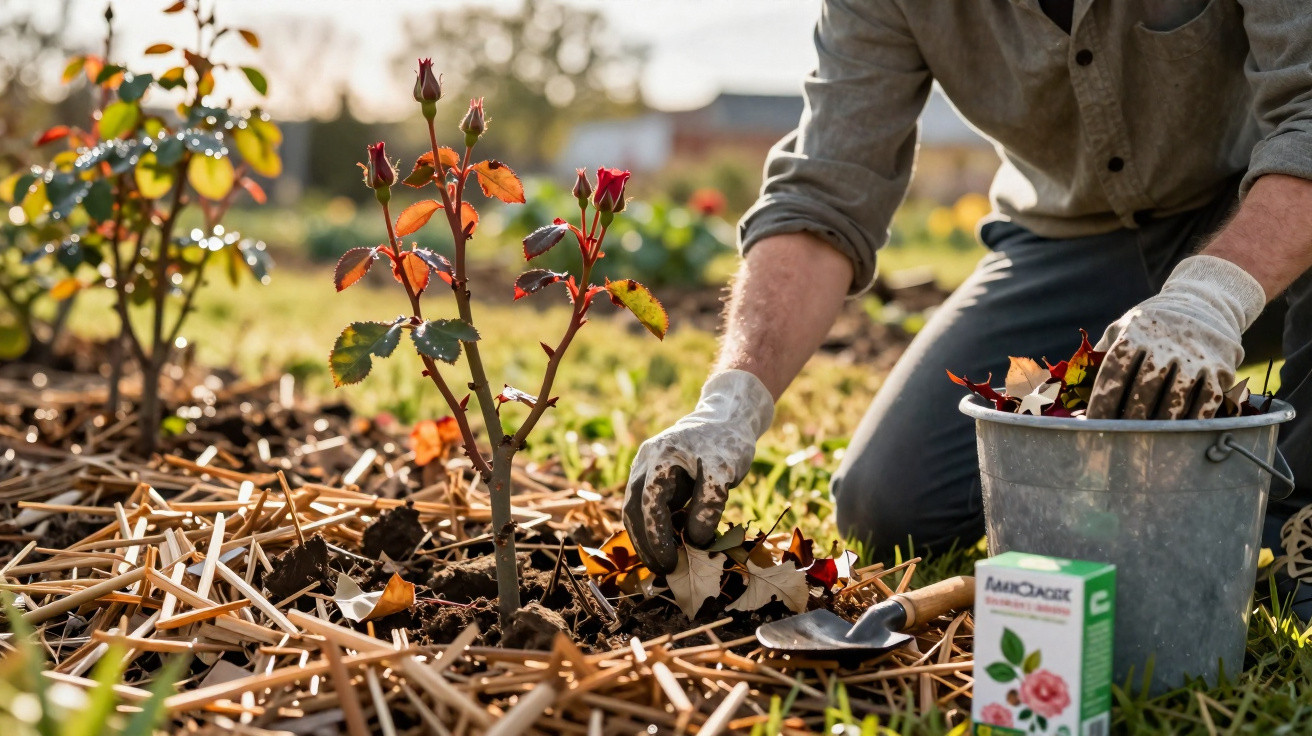
When rose leaves turn yellow in summer, bare shoots remain and the flowers seem undersized, the cause is often an avoidable mistake made in spring.
Many amateur gardeners ask why their roses are plagued by black spots year after year while the neighbouring bed remains healthy. The explanation is rarely down to having a natural gift for gardening. Instead, it is almost always linked to three straightforward jobs that should be completed in March – just as the fungus responsible emerges from its winter dormancy.
What really causes black spots on roses
The condition known as black spot is among the most common issues in a rose garden. At first, its appearance seems harmless: small dark marks on the leaves, frequently surrounded by a yellow halo.
“Within weeks, a handful of inconspicuous spots can leave roses bare and weakened, with hardly any capacity to produce flowers.”
Affected foliage turns yellow and drops prematurely, draining the plant's energy. Although the rose will usually put out new growth, it remains noticeably less vigorous. During dry summers, these roses suffer water shortages more quickly, while aphids and other pests can also attack weakened plants more easily.
The cause is a fungus (Diplocarpon or Marssonina rosae). It does not overwinter in the stem, but rather in fallen leaves and plant debris around the rose. The process begins with the first mild, damp days of spring: rain splashes spores up from the ground onto fresh leaves, and wind carries them onwards to other rose bushes. Temperatures of roughly 13 to 30 degrees, together with several hours of wet foliage, are enough for the disease to spread explosively.
March is the key month for breaking the cycle
Anyone wanting healthy roses in summer needs to act much earlier. The most important month is not June, at the height of flowering, but March, when the plants are only just waking up. At this point, you can determine whether the fungus will have an opportunity to take hold later in the season.
Three tasks are particularly important:
- Thoroughly clear the ground beneath the roses
- Apply a protective layer of mulch
- Feed and strengthen the roses deliberately
Remove old leaves: the dangerous fungal reservoir on the ground
The first measure is straightforward but highly effective: clear away all dead material from around the base of each rose. Over winter, this area accumulates:
- fallen, infected leaves
- small pieces of dead twig
- fragments of bark and weed debris
This is precisely the material the fungus uses as its winter shelter. Leaving it in place gives it a direct launch point for infecting the new leaves. Therefore, clean the area thoroughly in March – as soon as the ground is firm enough to walk on:
- Collect every old leaf from beneath and within the rose, including those caught in the centre of the bush.
- Remove cut-off thin shoots and any weak remnants.
- Dig out weeds around the stem so that the area is genuinely clear.
“Important: this material does not belong on the compost heap. The fungus could survive there and later return to the garden.”
It is better to dispose of it with household waste or take it to the local green-waste collection site, where the high temperatures used for composting are more likely to kill the fungus.
Apply a mulch layer: protection from rain splash and drought stress
Once the ground is clear, move on to step two: spread a mulch layer around the rose bush. It serves several purposes at once:
- It intercepts raindrops, preventing spores from splashing from the soil onto the leaves.
- It retains moisture in the ground and protects the rose from drought stress.
- It suppresses weeds that would otherwise take nutrients and water from the rose.
Suitable materials include mature compost, bark mulch, shredded prunings, or a blend of compost and bark. The layer must be sufficiently deep – around three to five centimetres is a useful guide.
“Leave a gap of one or two finger widths around the stem itself, so that the bark does not remain permanently damp.”
Roses mulched in March usually need less watering in summer and grow more evenly. This is particularly noticeable in hot years, as mulched areas dry out much more slowly than bare soil.
Feed roses properly: strong plants become ill less often
The third measure concerns nutrients. Roses are heavy feeders. They produce a great deal of woody growth, plenty of leaves and new buds continuously over many months. All of this requires energy – and that energy is lacking if the plant begins the season underfed.
Late March, when buds are swelling and the first fresh shoots can be seen, is the ideal time for the first feed. Suitable options include:
- specialist rose fertilisers in an organic-mineral formulation
- mature compost, lightly worked into the soil
- slow-release organic fertilisers such as horn shavings combined with compost
A mineral rose fertiliser works more rapidly, whereas organic options promote living soil over the longer term. Many gardeners therefore choose a combination: a little mineral fertiliser to get started, alongside compost for the basic nutrient supply.
| Measure | Best time | Main benefit |
|---|---|---|
| Remove old leaves | Early to mid-March | Eliminates the fungus's source of infection |
| Apply a mulch layer | After clearing, in March | Guards against splash, retains moisture and suppresses weeds |
| Feed roses | Late March, as growth starts | Strengthens the plant and increases flowering power |
How natural rose tonics can help
Many amateur gardeners also use plant-strengthening products, for example preparations made from nettles, algae or specialist clays. These products are generally diluted with water and either poured directly onto the soil or sprayed over the foliage.
A typical application is a few millilitres of concentrate per litre of water, with the mixture then distributed around the root area. Such products are not a replacement for fertiliser, but they can improve resistance. The same principle applies as with people: a well-nourished, robust rose copes with fungal spores better than one that is exhausted.
Preventive rose care throughout the season
March creates the foundation, but care during the rest of the year also matters. To limit black spot, follow several basic rules:
- Avoid continually watering over the leaves; water directly around the root area instead.
- Space roses so that air can circulate and foliage dries quickly.
- Remove spent flowering shoots regularly, enabling the plant to focus its energy.
- At the first signs of spots, pick off affected leaves promptly and dispose of them.
In wet summers, it is not always possible to prevent the disease completely, but its severity can be reduced considerably. Those who have cleared the area, mulched and fed their roses properly in spring will often find that, although a rose may lose a few leaves, it remains vigorous and free-flowering overall.
When damage is already present: realistic expectations
If roses have stood in the same location for years and have often been severely affected, patience is required. One thorough clear-up in March can improve the situation significantly, but it will not restore a chronically weakened plant overnight. In some cases, hard pruning or even moving the plant and replacing the soil can help.
When planting new roses, consider disease-resistant varieties. Many modern cultivars carry quality marks for robustness and develop noticeably less black spot. Combined with the three March measures, this creates a highly resilient system.
Why the effort in March is genuinely worthwhile
The three jobs – clearing, mulching and feeding – often take only a few minutes per rose. Yet their effect lasts through the whole season: stronger growth, more flowers, less stress after every rain shower and substantially lower fungal pressure.
“Anyone who spends ten minutes on a rose in March saves many frustrating hours in summer dealing with yellow leaves and ailing shoots.”
For many gardeners, this makes the month a kind of “service interval” for the rose garden. Take a careful look once, clean up thoroughly and provide the right care – then there is a good chance that, in June, the roses will look exactly as imagined in winter: densely leafy, healthy and full of buds rather than black spots.


Comments
No comments yet. Be the first to comment!
Leave a Comment