
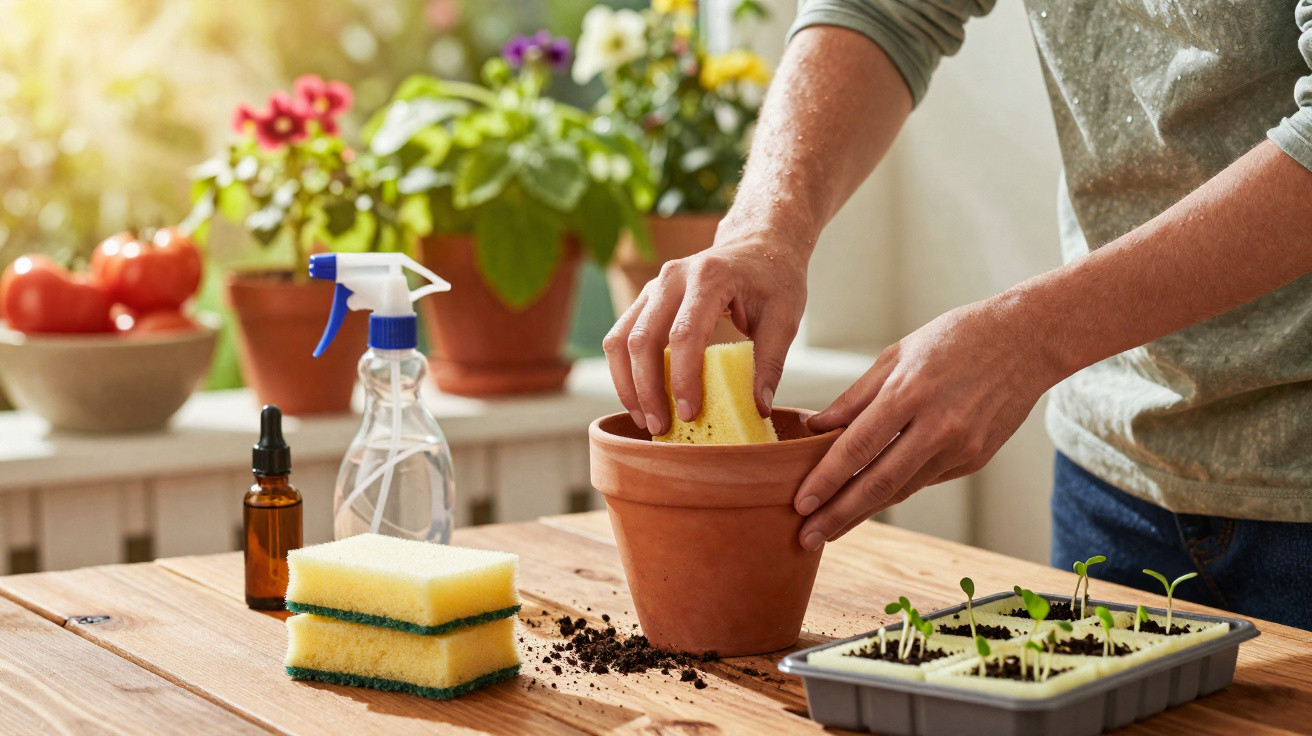
With one simple trick, they can do remarkable work in the garden.
Alongside eggshells, coffee grounds and compost scraps, many homes contain another small treasure: the worn-out washing-up sponge. Although it may look like ordinary household waste, it can become genuinely useful for window boxes, vegetable plots and houseplants - provided it is cleaned properly first and used thoughtfully.
Why an old sponge can be useful in the garden
Washing-up sponges are made from porous material. This is precisely what makes them useful to gardeners: they hold water, release it gradually and can also provide a little insulation. On a small scale, they can therefore do jobs for which expensive accessories are often bought.
A discarded kitchen sponge can be turned into a miniature water reservoir, a germination aid for seeds or even a natural form of pest protection.
Before trying any of these uses, however, one step is essential: thorough cleaning. Kitchen sponges in particular can harbour large amounts of bacteria. Anyone intending to use one in the garden should reduce its germ load first, so pathogens are not transferred to vulnerable plants.
Cleaning a sponge: turning kitchen waste into a garden helper
Simply rinsing a used sponge is not enough to reuse it safely. Heat- or acid-based treatments are far more dependable for substantially reducing germs.
Gentle disinfection methods
- Hot water: Place the sponge in boiling water for a few minutes, then allow it to cool fully and squeeze it out.
- Microwave: Heat a damp sponge briefly (around 1 minute) at medium power. Caution: only use sponges without metal components, and never leave them unattended.
- Vinegar soak: Put the sponge into a mixture of water and clear household vinegar, leaving it to soak for several minutes.
Once treated, the sponge should have a neutral smell and no visible food residue. If it is already crumbly or badly discoloured, it should be disposed of instead - in a flower bed, it is then more likely to create problems than solve them.
Mini water reservoir: using a sponge to tackle drought stress
Its most practical everyday role is as a small water store. This can make a noticeable difference, particularly on sunny balconies or for plants that are sensitive to heat.
A hidden water reserve in pots
Anyone growing plants in pots or window boxes will know the issue: the soil may still feel damp at the surface while the roots below are already dry. A sponge can help even this out.
- Moisten the sponge thoroughly, but do not leave it dripping wet.
- Position it either beneath the soil directly next to the root ball or on the base of the pot before adding compost.
- Keep the soft side facing the soil and the abrasive side facing downwards.
The sponge absorbs surplus watering and releases it again as the compost dries. Many amateur gardeners use this approach especially for geraniums, petunias, herbs on the windowsill or balcony boxes exposed to midday sun.
A practical trick for holidays
If you are away for only a weekend and have nobody to water your plants, place several damp sponge pieces in window boxes or planters. Put them around the base of the plants and cover them lightly with soil.
Several damp sponges in a balcony box can extend the interval between watering by one to two days - often enough for a short trip.
Even so, water the plants thoroughly beforehand. A sponge cannot replace weeks of care, but it buys time and helps prevent rapid drying during hot weather.
Sponges as a germination aid: seeds on a soft base
This material can also be used when raising young plants. Many professionals use loose, moist growing media to achieve even germination - a small sponge works in much the same way.
How to germinate seeds on sponge pieces
- Cut the cleaned sponge into small cubes or flat strips.
- Moisten it well, without soaking it.
- Press one seed lightly into each piece.
- Arrange the pieces in a shallow tray and cover them, for example with clear film or a lid.
- Place them somewhere bright but out of direct sunlight.
The material maintains a consistently moist base while allowing some air at the surface. Once the seedlings are a few centimetres tall and have formed small roots, plant the entire sponge piece with the young plant into soil. After a short time, the roots will grow through the material and into the compost.
This method is especially suitable for:
- Cress, rocket and other fast-germinating seeds
- Tomatoes, peppers and chillies for starting indoors
- Lettuce and certain herbs, such as basil
Protection from cold and heat: a sponge as mini insulation
Plants in pots are strongly affected by fluctuating temperatures because their root zone has little surrounding mass. A sponge can provide an extra insulating layer here.
How a sponge protects the root area
Lay a damp sponge on the soil with its soft side down and secure it using a small stone to create a type of cushioning layer. At night, it retains some warmth in the pot; during the day, it shields the surface from direct sunshine.
It works somewhat like miniature mulch:
- Temperature changes around the root ball are less severe.
- The top layer of soil dries out more slowly.
- Sensitive young plants get a steadier start to the season.
This trick is ideal for early spring sowings or container plants on balconies exposed to the first cooler nights. In very hot summers, the covering can also extend the watering schedule slightly.
Natural pest protection with scented sponges
Sponges are useful for more than water: they can also carry scents. Some insects avoid particular fragrances that people find pleasant or neutral.
Using essential oils against crawling visitors
Sponge pieces can be soaked with strongly scented plant oils and placed around vulnerable plants. Many amateur gardeners have found the following effective:
- Peppermint oil
- Lemongrass or citronella oil
- Lavender oil, particularly near seating areas
A few drops are enough to create a light scented veil. The pieces stay in place, unlike dried herbs that can quickly blow away. Use sparingly around children and pets, and choose high-quality oils.
Sponge pieces with scented oils can act as a subtle fragrance barrier in a flower bed, without using chemical sprays.
No garden will ever be completely free of feeding damage, but natural aids such as these can help reduce the need for harsh products considerably.
When sponges can cause problems in the garden
Useful as this method is, it has limits. Not every sponge suits every plant, and certain materials should never go into a flower bed in the first place.
- Heavily soiled sponges: Discard sponges with grease or food remnants straight away.
- Persistent odour: Do not reuse a sponge that smells musty or chemical.
- Very hard water: In areas with hard water, be slightly more cautious to avoid salt deposits forming in pots.
- Cheap coloured and scouring sponges: Brightly coloured, very firm versions may release dyes, making them less suitable for placing directly by roots.
For the safest option, choose simple, as-neutral-as-possible household sponges without added chemicals. Also, inspect any sponges used outdoors regularly and replace them if mould appears or they begin to break down.
Practical examples and everyday combination tips
The sponge trick can easily be combined with other familiar gardening methods. For example, anyone using coffee grounds or crushed eggshells as soil improvers can also position a sponge piece near the root zone. This allows nutrients and water to reach the plant more evenly.
In balcony and urban gardens, where every centimetre and every litre of water matters, these small tricks offer noticeable relief. Whether it is a tomato planter, a herb shelf or a miniature bed on the windowsill, a well-placed old sponge provides more stable moisture, protects plant roots and reduces watering trips.
Especially during dry summers or in homes without automatic irrigation, a throwaway item can become a useful part of a sustainable gardening routine. Once people have had positive results, they often deliberately set aside their worn-out sponges - not for the bin, but for the next planter.
Comments
No comments yet. Be the first to comment!
Leave a Comment