
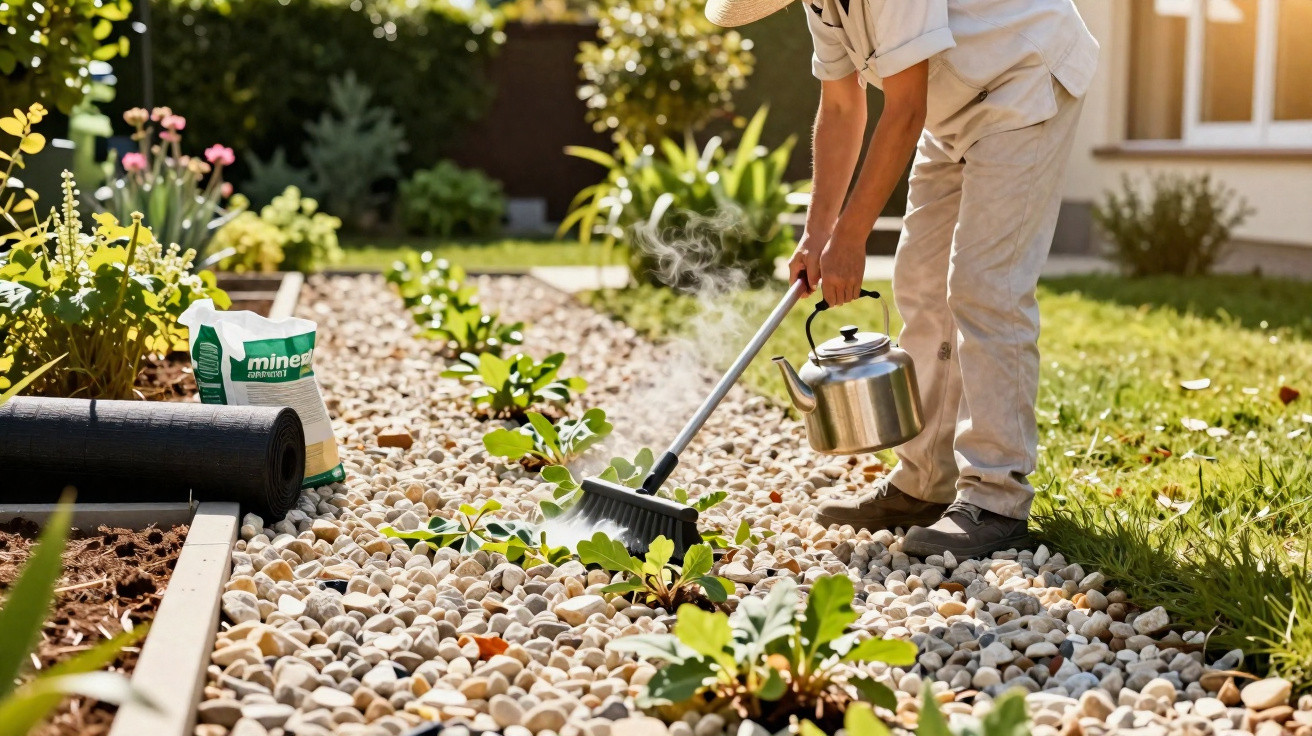
With three straightforward steps before summer, you can put a stop to it.
Plenty of homeowners know the pattern: the moment temperatures rise, chickweed, dandelions and couch grass push up between the stones. You end up kneeling on the gravel, pulling out shoots, sweating in the heat - and a fortnight later it all starts again. At the same time, more and more councils are introducing water restrictions, and chemical sprays are coming under increasing scrutiny. The good news is that a gravel surface can be kept almost weed-free with sensible preparation and a bit of routine - without poison and without constant watering.
Why a gravel path suddenly “explodes” in summer
Gravel looks tidy, contemporary and fairly low-maintenance. But that impression can be misleading: stones do not form an airtight barrier. Over time, fine dust, leaves, pollen and other organic debris settle between the grains. That builds a thin layer of humus - exactly what wind-blown seeds need.
Seeds arrive on the breeze, birds add their contribution, and one short shower is enough for the first seedlings to take hold. If the gravel layer is too shallow, or if you’ve used very rounded stones, even more light reaches the base layer - giving wild plants an ideal head start.
In summer, hot spells are often broken up by brief thunder showers. That combination suits opportunistic species such as purslane, dandelion and couch grass perfectly. They root close to the surface, grow rapidly and take advantage of the smallest gap.
"If you’ve never prepared the base beneath your gravel area, you’re practically inviting weeds in - the battle starts in the soil, not on the surface."
If you leave plants to it, their roots gradually knit the whole sub-base together. The surface then holds onto more moisture and, in places, can even turn muddy. The path looks neglected, becomes slippery, and can be hazardous in frost or wet weather. Chemical products containing glyphosate don’t solve the issue for good and can burden soil, groundwater and beneficial insects such as wild bees or ground beetles.
Three natural steps that stop a weed takeover
1. A mineral “armour”: build up gravel and membrane properly
The most important work happens before the hottest period. Put in a little time in spring and you’ll have far less to do in July. Start by clearing the area thoroughly of existing growth - ideally lifting out the roots as well.
Then build the layers as follows:
- Lay a geotextile: a water-permeable weed-control membrane blocks light but still allows rainwater to soak through.
- Choose the right gravel: sharp, crushed gravel with a grading of around 6–14 millimetres is ideal. The angular pieces interlock, letting less light through.
- Use sufficient depth: 5–7 centimetres of an even gravel layer is a solid rule of thumb. Anything thinner quickly becomes a seedbed.
- Edge it neatly: kerbs or metal edging stop roots creeping in from adjacent lawn under the gravel.
Once it’s down, compact the surface - for example with a plate compactor or, at the very least, a heavy hand tamper. This closes up voids that plants would otherwise exploit.
After that, upkeep is easy but needs to be regular: once or twice a month, sweep or rake leaves, needles and fallen seed heads off the gravel so a new nutrient film doesn’t build up on top.
2. Brush, don’t hoe: work upright, get results faster
For ongoing care, a sturdy brush is worth it. Purpose-made weed brushes for paths - or a stiff outdoor broom with a handle - work well. You can do the job standing up, which is far kinder to backs and knees.
Using short, forceful strokes, you loosen the top layer of gravel. Fresh seedlings and early moss patches are dislodged before they can form a stable root system.
"If you smother young plants at the seedling stage, you avoid the miserable job of tugging out mature clumps at 30 °C in the shade."
Two time windows tend to work best:
- early morning: dew moisture softens the surface slightly, so plants release more easily.
- late evening: the stones have cooled down, making the task much more comfortable than at midday.
At peak growth, a quick brush-through every two weeks is usually enough. What matters is removing the loosened debris - leaves, tiny plants and humus remnants - straight away and disposing of it in the food and garden waste. If you leave it there, it immediately becomes a fresh sowing layer.
3. Boiling water for the stubborn cases
Some grasses and deep-rooted species can survive both brushing and a gravel layer. For these “survivors”, boiling water works well as a targeted spot treatment.
A safer way to do it:
- Heat water in a saucepan or kettle.
- Pour slowly and accurately at the base of the stem, as close to ground level as possible.
- Within seconds, the plant tissue is destroyed and the plant dies back.
Fine-rooted species such as chickweed or young dandelions are particularly sensitive. With tough grasses or plantain, you may need a second or third pass, spaced a few days apart.
Important: only treat in dry weather and keep clear of lawns or planting beds. If you apply hot water regularly - roughly every 10 to 15 days during the main growing period - and only where needed, you can keep the persistent remnants under control without a single drop of herbicide.
How to use water restrictions and heat to your advantage
In many areas, summer watering is limited. For gravel paths and driveways, that’s not a drawback - it actually helps. A dry sub-base slows most weeds down. The key is using moisture only minimally as a helper, for instance in the morning with dew or on days with slightly higher humidity.
If you avoid routinely hosing your drive and instead treat only deep-seated plants with boiling water, you save drinking water while also cutting back growth. The gravel layer itself doesn’t need regular soaking - in fact, every extra splash encourages germination and moss.
Common mistakes that turn a gravel surface into a weed bed
Most headaches come back to the same recurring oversights:
- gravel laid too thin (under 4 centimetres)
- no weed membrane underneath, or a low-quality one
- rounded decorative gravel instead of crushed aggregate
- failing to remove leaves and plant debris regularly
- using lawn sprinklers over a wide area, keeping the gravel permanently damp
Keep these points in check and you’ll have to intervene far less often later.
How often you really need to do it - realistic maintenance intervals
Many gardeners overestimate the effort involved. With a sound build and a clear routine, this is usually enough:
| Period | Measure | Frequency |
|---|---|---|
| Spring | Rebuild the surface or carry out a thorough renewal | once |
| May–August | Brushing and sweeping | every 2 weeks |
| May–August | Boiling water on problem spots | every 10–15 days as needed |
| Autumn | Remove leaves, check the gravel layer | every 2–4 weeks |
The result isn’t a “no effort at all” surface - but it is a predictable, manageable maintenance task that fits easily into everyday life.
What terms like geotextile and mineral mulch actually mean
Retailers often use different labels, which can be confusing. A geotextile or weed-control membrane is usually a tough, water- and air-permeable plastic fabric. It stops light reaching the soil without completely interrupting drainage.
Mineral mulch is simply a layer of stone material - gravel, chippings or crushed stone. Unlike bark mulch, it doesn’t rot and it doesn’t add extra nutrients. That’s exactly why it’s so useful for areas you want to keep relatively lean.
Why avoiding chemicals pays off in the long term
By steering clear of chemical products, you’re not only protecting bees, earthworms and soil micro-organisms. You also reduce legal risk: in many councils, herbicides on sealed or hard surfaces such as driveways have long been banned or are allowed only with special permission.
Mineral layers, brushing and hot water act locally and don’t accumulate in the ground. They protect groundwater and leave no residue that children or pets could ingest. And a well-kept gravel drive gives your home a clean, bright approach - without that sinking feeling each time summer arrives and you feel tempted to reach for a bottle of weedkiller.


Comments
No comments yet. Be the first to comment!
Leave a Comment