
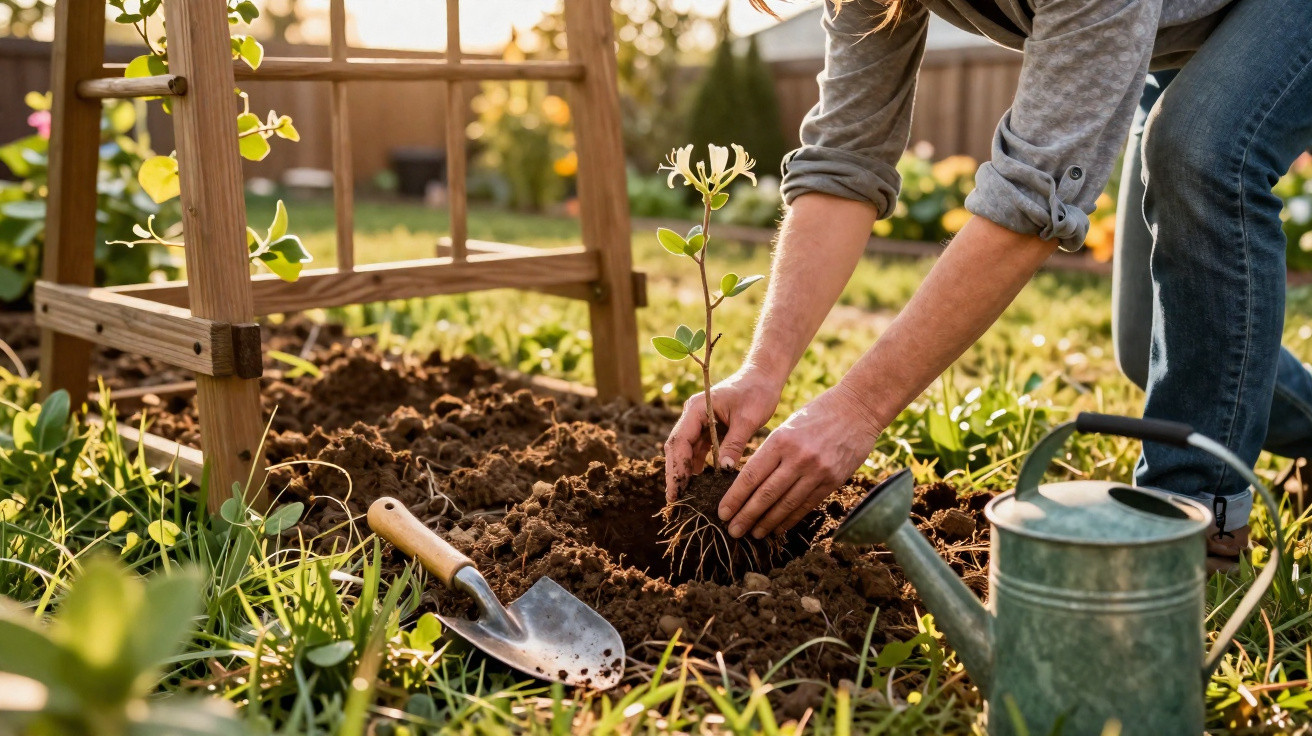
Honeysuckle can appear effortlessly charming, yet success depends heavily on when you plant it and how you look after it in the early weeks.
Why gardeners keep turning to honeysuckle
Across gardens in Britain and North America, honeysuckle (Lonicera) continues to grow in popularity because it delivers fragrance, supports wildlife and provides fast cover without requiring constant fuss.
- Climbing varieties can cloak bare fences, walls and pergolas within a couple of growing seasons.
- Bushy forms are useful for relaxed, informal hedging and wildlife-friendly corners.
- Many cultivars bear nectar-filled, tubular blooms that attract bees, butterflies and moths.
- Several species go on to form berries that birds feed on after the flowers fade.
Honeysuckle brings together three things gardeners rarely get in one plant: fragrance, resilience and structure.
That combination is especially valuable in compact gardens or rented outdoor spaces. One plant can provide privacy on a balcony, soften an entrance or transform an uninteresting boundary-without needing attention every day.
Timing your planting: why the calendar matters
Honeysuckle is sold in garden centres throughout the year, but what really dictates how it settles is the mix of soil warmth, moisture and overall conditions-rather than what the label says.
Planting in autumn for stronger roots
In temperate climates, autumn offers a subtle but significant edge. Between roughly September and November, the ground often remains warm while the air cools, so root growth continues even as the plant slows above ground.
Planting honeysuckle in warm, moist autumn soil gives it months to anchor itself before spring growth surges.
That extra time below the surface can help honeysuckle to:
- Build a broader, deeper root network.
- Handle late-spring dry periods with less stress.
- Produce more flowering growth in the following season.
This approach works well across much of the UK and Ireland, and in many northern parts of the United States. Where winters are harsher inland or further north, early autumn is usually best so roots establish before severe frosts. In milder coastal areas, planting can often continue later because the soil seldom freezes hard.
Spring planting as a workable second choice
Spring planting-roughly March to May-can still be successful, but it calls for closer attention. As days lengthen, wind and brighter conditions can dry the soil quickly, and new leaves increase water loss.
In the first growing season, consistent watering is essential. Container-grown honeysuckle, in particular, can dry out rapidly even when the weather feels mild. A mulch layer helps conserve moisture and evens out soil temperature around developing roots.
Two situations make planting risky at any time:
- Frozen ground, which prevents roots from expanding and may lift young plants as the soil heaves.
- Severe heatwaves, which can overwhelm unestablished roots and scorch soft new growth.
Light, soil and support: setting honeysuckle up properly
Honeysuckle is more forgiving than many climbers, but it performs best when you plan the site before you start digging.
Getting the exposure right
Most widely grown garden types do best in sun or partial shade. A common guideline is “head in the sun, feet in the shade”: give foliage and flowers good light, while keeping the root zone cooler and moisture-retentive.
Protection from strong, drying winds reduces the risk of buds shrivelling before they open. In built-up gardens, warmth reflected from walls can even prolong the flowering period, particularly for evergreen and semi-evergreen forms.
Choosing or building the right support
Climbing honeysuckles twine and wrap, rather than clinging with suckers like ivy, so they need a structure they can wind around.
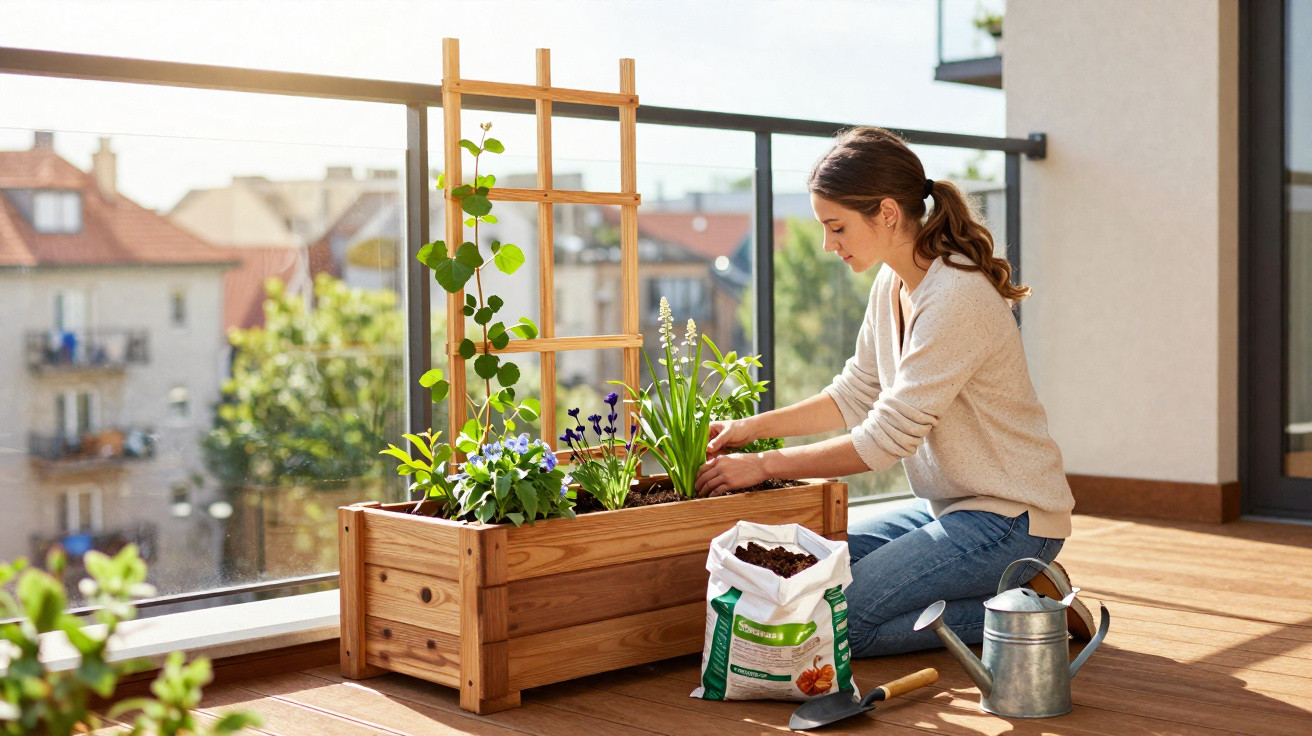
- Timber trellis panels or wall wires are ideal for narrow side returns.
- Pergolas, arches and arbours can form scented walk-through passages.
- Strong mesh or fencing can suit exposed plots, as long as it remains firm.
Without a planned support, honeysuckle tangles into itself, flops onto nearby shrubs and becomes difficult to prune later.
Shrubby honeysuckles don’t require a framework, though in breezy sites they can benefit from a stake for the first year or two.
Soil structure and drainage
Honeysuckle prefers reasonably fertile, free-draining soil enriched with organic matter. Dense, compacted clay can restrict roots and hold water around the crown.
Gardeners typically improve the planting area by incorporating:
- Compost or well-rotted manure to increase fertility and soil activity.
- Sharp sand or fine grit in sticky soils to improve drainage.
- Leaf mould to enhance structure and balance moisture.
| Soil condition | Risk for honeysuckle | Simple correction |
|---|---|---|
| Waterlogged clay | Root rot, weak growth | Raise planting area, add grit and organic matter |
| Very sandy | Rapid drying, nutrient loss | Add compost and mulch regularly |
| Thin soil over rubble | Stunted roots, stress in heat | Enlarge planting hole, remove debris, fill with enriched soil |
Step‑by‑step: planting honeysuckle for lasting impact
Planting itself is quick, but a handful of small details can influence vigour and long-term health.
1. Prepare the planting area
Clear a space larger than the pot by removing weeds, old turf and stones. Work the soil to around 30–40 cm deep so fresh roots can move into it readily. Add compost or a slow-release, balanced organic fertiliser to support early growth without scorching tender roots.
2. Dig the right-sized hole
Make the hole roughly twice the width of the rootball and only a little deeper. Extra width encourages outward growth rather than roots circling tightly. Break up any compacted layer at the bottom so water can drain away instead of pooling.
3. Position the plant carefully
Ease the plant from its container. If the roots are tightly spiralled at the edge, gently tease a few free so they’ll head into the surrounding soil. Place it so the base of the stems sits level with the existing ground.
For climbers, tilt the rootball slightly towards the support and set the plant around 20–30 cm out from a wall or fence. That distance allows rainfall to reach the root zone and leaves room for roots to expand.
4. Backfill, firm and water
Refill with the improved soil, easing it in among the roots. Press down lightly with your hands rather than stamping, which can compact the soil. Shape a shallow dish around the base to help water collect and soak in.
A deep, slow watering straight after planting removes air pockets and helps soil settle snugly around every root.
Add an organic mulch-bark, composted wood chips or leaf mould all work well-keeping it a few centimetres clear of the stems to lower the risk of rot.
Care after planting: from first bud to full curtain of flowers
Once established, honeysuckle is surprisingly undemanding, but the first year is when good habits make the biggest difference.
Watering and feeding
While the plant is settling in, check moisture often. The surface can look dry even when the soil below is still damp, so push a finger in deeper to assess. A thorough soak once or twice weekly is usually better for new plants than light daily watering.
In spring, a feed with a potassium-rich fertiliser encourages flowers. Too much nitrogen-particularly from high-nitrogen lawn feeds-can result in lots of leaf growth while reducing fragrance and bloom.
Training and pruning
Young climbing honeysuckle benefits from early direction. Use soft ties to attach fresh shoots loosely to wires or trellis, guiding stems into gaps where you want coverage. As growth thickens, the plant will twist and support itself.
After flowering, gardeners commonly:
- Cut out dead, diseased or damaged stems.
- Reduce congestion so light and air can reach the middle.
- Trim back straying shoots to keep it within its space.
If a plant becomes old and unproductive, it often responds well to renovation pruning carried out gradually over two or three years, removing some of the oldest stems close to the base to prompt new growth.
Watching for pests and diseases
Aphids, powdery mildew and-depending on location-honeysuckle leaf rollers can affect stressed plants. Regular checks help you catch signs such as curled foliage, sticky deposits or a greyish fungal film early, when trimming out affected parts and adjusting watering can still improve the situation.
Common mistakes that hold honeysuckle back
A few familiar issues can reduce flowering or shorten a plant’s lifespan, even when the chosen variety is suitable for the area.
- Planting where drainage is poor, leaving roots sitting in cold, stagnant water.
- Failing to provide a climbing framework, so stems sprawl into a tangled mat.
- Under-watering during year one, particularly with spring-planted container specimens.
- Allowing growth to swamp neighbouring shrubs or obstruct gutters and windows.
Most honeysuckle failures trace back to the first twelve months: wrong spot, water stress or no structure to climb.
Choosing the right honeysuckle for your space
The best choice depends on preference, climate and available room. Highly scented climbers, such as common honeysuckle, work well near entrances and seating. Evergreen or semi-evergreen options can provide year-round screening in milder areas. Compact, shrubby forms are often better for low hedges beside paths and driveways.
Before buying, gardeners often look at eventual size, flowering period and whether the plant is likely to set berries. In family gardens with young children, some people opt for non-berrying types, as berries from certain species can cause stomach upset if eaten in larger amounts.
Beyond planting: using honeysuckle in wider garden design
Honeysuckle can do more than simply fill a gap-it can support an overall design approach. Planted alongside late-flowering clematis on the same support, it can extend colour and interest across a longer season. Combined with other night-scented plants near a patio, it creates a summer-evening atmosphere without depending on artificial fragrances.
Garden designers also use honeysuckle to help form wildlife corridors through a plot, connecting hedges, trees and wildflower areas so birds and pollinators can travel more easily. As weather patterns change, this living network adds resilience-making one scented climber part of a larger ecological plan.

Comments
No comments yet. Be the first to comment!
Leave a Comment