
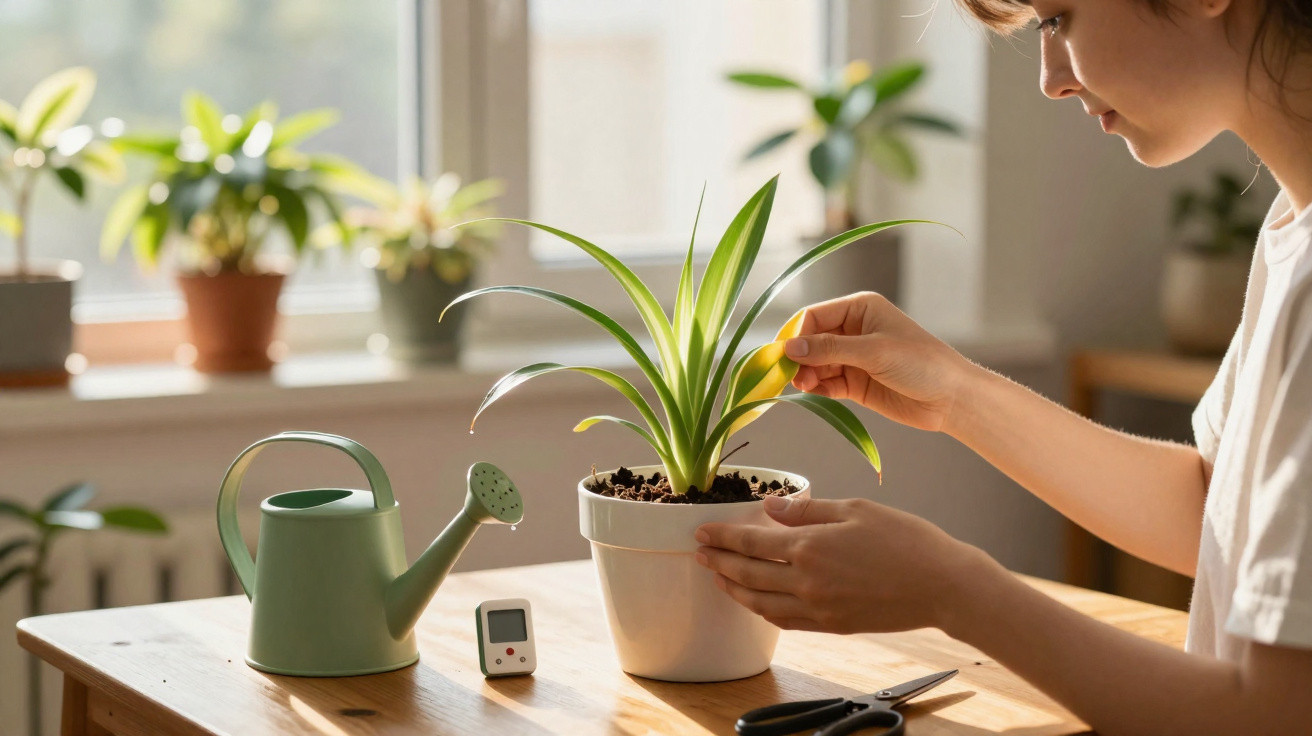
It can look like a minor cosmetic issue at first: a few leaves bent out of shape, a dried-out tip, a patch of yellowing here and there. In practice, those leaf changes are often your clearest clue about how the plant is being watered, where it’s positioned, and how it’s being looked after. If you learn to read what the leaves are telling you, you can halt a lot of damage before the roots suffer badly - and turn your spider plant back into a striking “indoor fountain”.
What a truly healthy spider plant looks like
A vigorous spider plant produces long, narrow leaves that are a rich green or green-and-white striped. The clump of leaves grows densely from the centre, then arches outwards in wide curves - much like a jet of water from a fountain.
Healthy leaves feel supple. If you run your hand over them, you won’t notice hard creases, brittle patches, or soft, mushy areas. Even when they reach 60 to 90 centimetres in length, they should stay flexible and spring back into shape after light pressure.
The key sign is uniform shape. The central rib should run through the leaf in a smooth curve, without sharp angles. As soon as a leaf shows a distinct kink - almost as if it has been folded - something is off.
"A healthy clump of leaves looks like a closed fountain - with no sharp kinks, and no soft or brittle sections."
Kinked or snapped leaves: harmless mishap or a care problem?
Not every damaged leaf is a cause for alarm. Sometimes it’s simply down to physics: the pot was too close to the edge, someone brushed past it, the cat turned it into a play area, or a heavy object pinned a leaf. In those cases, you’ll usually see only one or two affected leaves while the rest of the plant looks normal.
If it starts to spread - several new leaves bending over, lots of tips looking limp, or foliage forming odd, unnatural curves - the cause is almost always related to care. Common triggers include:
- too much water in the pot
- too little water over an extended period
- damaged roots
- the wrong spot: too dark or in strong, direct sun
- very dry air from central heating
- lack of nutrients in old compost
The good news is that spider plants communicate very clearly through their leaves. With a careful look, you can usually build a first diagnosis in just a few moments.
What the leaves reveal about your watering
Symptom 1: Soft, yellowish, kinked leaves
If the leaves droop, feel soft, and show yellowish or slightly translucent patches around the bent sections, waterlogging is a likely culprit. The pot often feels heavy, and the compost stays wet all the time - sometimes even feeling a bit slick.
Check test: push a finger about 5 centimetres into the compost. If it still feels wet even though you last watered several days ago, that strongly suggests you’re watering too often or the pot/compost isn’t draining properly.
"Waterlogging damages the roots first - the leaves often show the problem later, through kinks and soft patches."
Symptom 2: Dry, brittle leaves with kinks
If the leaves feel firm but dry, snap easily, and the compost pulls away from the edge of the pot, your spider plant is being underwatered. The plant can no longer keep enough moisture in the leaf tissue. What should be an elegant arch becomes stiff, brittle, and prone to creasing.
Symptom 3: Soft leaves despite corrected watering
Have you already adjusted your watering routine, but the leaves are still soft and unstable? Then it’s worth checking the root ball. Gently lift the plant from the pot. If many roots are brown, mushy, and smell unpleasant, you’re dealing with root rot - typically caused by prolonged waterlogging.
How to rescue your spider plant step by step
1. Reset your watering routine
Use the top layer of compost as your main guide. Hold off watering until roughly 5 centimetres of the compost has dried out. Only then water thoroughly, until a little water runs out of the drainage hole - and always empty the saucer afterwards.
If you’re unsure, a simple moisture meter can help. It shows how wet the root zone really is, which stops you watering “out of habit”.
2. Check the roots and intervene if needed
If root rot seems likely, act promptly: remove the plant from the pot and cut away any brown, soft, rotten roots with clean scissors. Healthy roots should be pale and firm.
Then repot the spider plant into fresh, airy compost - ideally a blend of multi-purpose compost with some coarse material such as expanded clay pellets or sand. The new pot must have a drainage hole, and a thin drainage layer at the bottom is helpful.
3. Cut off kinked leaves decisively
A leaf that’s been badly kinked or snapped will not straighten again. The channels that move water and nutrients are damaged. The plant then wastes energy on a leaf that can no longer function properly.
For that reason, cut such leaves off right at the base using a clean, sharp tool. Spider plants are tough and usually produce healthy new growth quickly.
Position, humidity, nutrients: other key adjustments
The best spot for strong, stable leaves
Spider plants do best in bright, indirect light. Harsh direct sun at a south-facing window can scorch the leaves, while deep shade encourages long, weaker growth that kinks more easily.
An ideal location is near an east- or west-facing window, ideally slightly raised or in a hanging basket. If you have pets or small children, this also reduces accidental knocks that can cause mechanical leaf damage.
Keep an eye on humidity and dry heated air
Very dry air - especially during the heating season - makes leaf tips dry out faster and can encourage splits and kinks. Simple ways to help include:
- placing a tray of water with pebbles under or beside the pot
- grouping several plants together to create a small “microclimate”
- using a humidifier for short periods if necessary
This helps the leaves stay more elastic and less prone to break points.
Refresh nutrition before the compost runs out
If your spider plant has been in the same compost for years, it often starts to run short on nutrients. Among other signs, you may notice duller leaves, slower growth, and generally less tension in the leaf tissue.
From spring to late summer, a standard liquid feed for houseplants every two to four weeks at a weak dose can help. In winter, feeding is rarely needed (or not at all), because the plant is less active.
Practical examples of common mistakes
A frequent situation: the spider plant sits directly above a radiator and close to the window. You water often “out of sympathy” because the surface dries quickly. But inside the pot, water is actually building up, the roots struggle, and the leaves turn soft and begin to kink. The fix: shift the plant slightly, increase humidity, use the finger test to time watering - and repot if necessary.
Another scenario: the plant hangs very high in a darker corner and gets watered only now and then because it’s awkward to reach. The leaves become dry, snap easily, and the whole clump looks weak. In this case: move it closer to the light, choose a more accessible position, and establish a consistent watering routine.
What the terms mean - a brief explanation
Waterlogging means water is sitting in the pot for long periods and very little air reaches the roots. The roots begin to rot and can no longer take up water - so the plant can look paradoxically dry even while the compost is wet.
Drainage covers anything that helps water leave the pot more quickly: drainage holes, a layer of expanded clay pellets at the bottom, and an open, free-draining compost mix. It protects roots from rot and supports sturdier, stronger leaves.
If you watch your spider plant closely, note small changes, and respond to these signals, you’ll be rewarded with a robust, long-lived houseplant that will forgive the occasional mistake - as long as a one-off slip doesn’t become the norm.
Comments
No comments yet. Be the first to comment!
Leave a Comment