
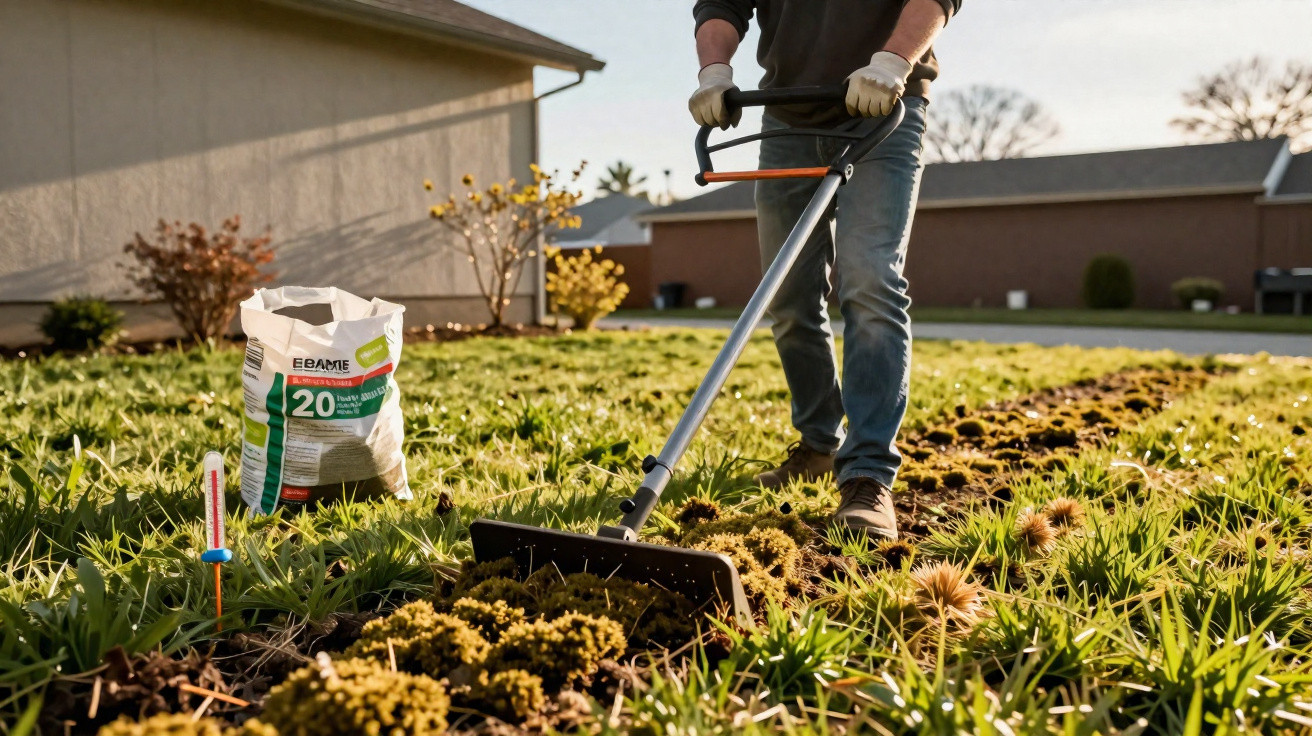
If you look out of the window right now, you’ll often see nothing more than a dull, yellowy patch of grass and think, “Spring will sort it out.” That’s exactly where the mistake starts. Beneath that seemingly harmless winter cover sits a problem that can leave your lawn ruthlessly dried out by July. It comes down to one key job that you should ideally finish by the end of March.
Why the lawn looks so tired after winter
After a damp, grey winter, a real layer of build-up forms across the lawn: dead blades, old roots, remnants of leaves, and often a mat of moss on top. It’s only 1–2 cm thick, but it behaves like a lid.
"This lawn thatch blocks water and air – the roots stay near the surface, and the soil underneath dries out rapidly."
The result is that the grass roots hardly extend beyond the top few centimetres. That’s precisely the layer that warms up first in May and June-and dries out first too. Once the thermometer stays clearly above 25 °C for longer stretches, the lawn reacts immediately: it loses its sheen, then becomes patchy, and eventually turns brown across large areas.
The good news is that, with timely action, you can break this cycle. The sweet spot is late winter or very early spring, as the soil begins to warm up again.
The perfect timing: how to read the “lawn calendar” properly
Whether your lawn is ready for its treatment depends less on the date and more on soil temperature. Use these indicators as a guide:
- Soil consistently at around 10–12 °C
- No prolonged frost expected
- The lawn is showing the first delicate new shoots
Depending on where you live, this is often sometime between early and late March-though in cooler areas it may not happen until early April. In many places, getting moving by roughly 31 March is about right. If you leave it too late, young roots can already be heading into the first heat spells in May-at that point the lawn copes much less well with the process.
The decisive step: scarifying the lawn properly in March
The key task is scarifying. The principle is straightforward: you lightly score the surface and pull the thatch out of the sward. Here’s how to do it.
Step 1: Mow the lawn short
Set your mower to a cutting height of about 2–3 cm. The soil should be slightly damp, but not soggy. If it’s too wet, the ground will tear; if it’s too dry, the blades on the machine can bounce.
Step 2: Set the scarifier correctly
Whether you use an electric model, a petrol machine, or a hand scarifier, the depth is what matters. The blades should only bite a few millimetres into the sward.
- Recommended depth: about 2–4 mm
- The roots must not be ripped out across large areas
- With hand tools: two gentle passes are better than one aggressive one
Go over the lawn once lengthways and then again across it-like a chessboard pattern. That’s the best way to remove the thatch as thoroughly as possible.
Step 3: Remove thatch and moss completely
After scarifying, the lawn often looks alarmingly battered. That’s exactly what puts many hobby gardeners off-and then half the thatch is simply left behind. That’s a mistake.
"Everything the scarifier pulls out needs to come off the lawn: moss, dead blades, and root remnants must all be cleared away."
Use a leaf rake or lawn rake for this, or run the mower over the area with a collection box. Only when the surface is clean can the soil breathe again and take up water properly.
Getting the soil ready for summer
Once you’ve scarified, the soil surface is open-making it an ideal moment to improve it. Two measures in particular make a noticeable difference.
A fine layer of compost or lawn topsoil
Spread a thin layer across the whole area, around 1 cm deep. Suitable materials include:
- mature, sieved compost
- lawn topsoil or a specialist lawn dressing
Use a stiff broom or a rake to work it in so it drops into the slots and disappears between the blades. This improves water absorption and adds nutrients.
Sand on heavy soils
If you have clay-rich, heavy ground, it’s also worth applying sand. Ideally, use washed river sand. It falls into the gaps, loosens the structure and reduces waterlogging. If your soil is already very loose and sandy, you can skip this step.
Why scarifying makes a lawn more heat-resistant
You usually don’t see the payoff until months later-when the neighbours are already reaching for the hose. With the thatch removed, spring rainfall can penetrate far better into deeper layers. Fertiliser reaches the places the roots can actually use it. Above all, the grasses effectively “learn” to root more deeply.
"A lawn with a deep root system can draw moisture from deeper soil layers – and stays green for longer during heatwaves."
A practical example: on a sunny, south-facing patch, a thunderstorm downpour often just runs off an unmaintained, thatch-bound lawn. On an area that was scarified in March and lightly dressed with soil-and perhaps sand as well-the water soaks in like a sponge. That stored moisture can be the difference between green and brown in July.
Aerating the lawn: how to keep the benefits going into autumn
If you want the improvement to last through the year, regular aeration helps. Unlike scarifying, aeration loosens the ground at points rather than scoring it across the whole surface. Useful options include:
- a garden fork to make holes at regular intervals
- a spiked roller or rolling aerator
- hired machines from a DIY shop for large lawns
An interval of roughly four to six weeks from spring to autumn is usually enough. This reduces compaction from foot traffic, brings oxygen to the roots and lowers the need for watering during hot spells. Alongside that, it’s sensible to raise the mowing height slightly in summer: longer blades shade the soil, so it dries out less quickly.
What if you missed the deadline?
If you didn’t manage it by the end of March, you don’t have to abandon the lawn until next year. As long as the soil is still around 10–12 °C and no heatwave is forecast, you can usually still scarify moderately in early April.
In that case, follow two rules:
- Work more shallowly, staying nearer the lower end of the depth range.
- Reseed bare patches immediately with lawn seed and lightly roll it in.
Right before a long dry spell, it’s better to wait or proceed very cautiously. Young grass seedlings cope far worse with strong sun and a lack of rain.
Tricky situations: shade lawns, moss, and permanently wet ground
Areas under trees, beside walls, or in dips can be especially awkward. They stay damp for longer, often cooler and shadier-ideal conditions for moss. Here, a gentle but consistent approach works best:
- scarify only lightly, but aerate more thoroughly
- carefully thin surrounding trees and shrubs
- overseed with a suitable shade lawn mix
- water lightly and evenly in spring, rather than rarely and heavily
If your soil is very acidic, you can consider applying lime over the longer term to raise the pH. However, a soil test is worth doing first so you’re not guessing.
How to avoid common mistakes
Many lawns suffer less from the weather and more from poor maintenance choices. The usual culprits are:
- scarifying during frost or straight after heavy rain
- setting the blades too deep so half the lawn is torn out
- leaving thatch and moss lying on the surface afterwards
- failing to overseed bare patches
- cutting too short in mid-summer
Avoid these issues and you’ll often find you need to water far less than you expected. The right mowing height, well-aerated soil, and a timely scarify are as effective for a lawn as air conditioning is for a living room.
A closer look at key terms and what they mean in practice
The commonly used term “lawn thatch” refers to the dense layer of old blades and roots right on the soil surface. A small amount is normal; too much can make the ground almost water-repellent. Scarifying is designed to reduce exactly that layer.
Many gardeners use the term “topdressing” for applying a thin layer of soil or compost after scarifying. Doing this every year or every other year steadily improves soil structure over time. When combined with targeted spring feeding, it produces a noticeably tougher lawn that copes better even in hot summers.




Comments
No comments yet. Be the first to comment!
Leave a Comment