
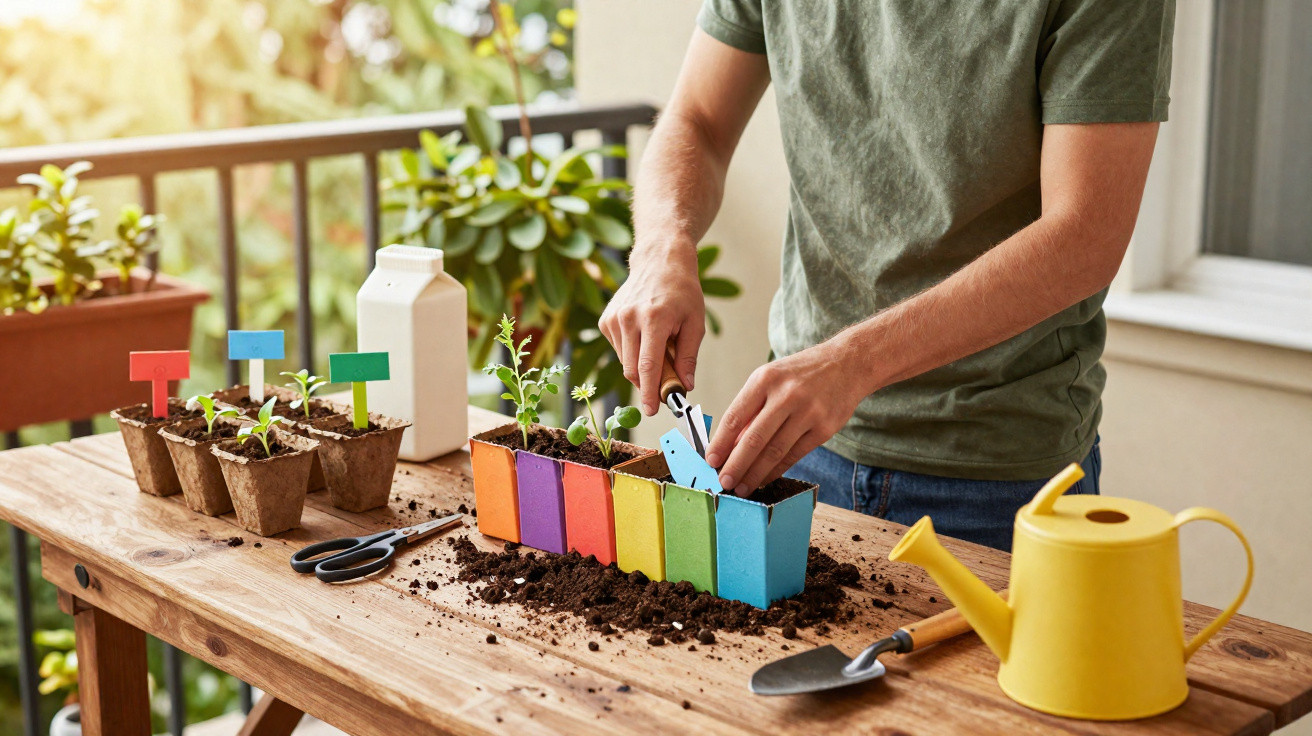
Long-life milk cartons often go straight in the bin once they’re empty, yet they can be turned into genuinely useful items for anyone growing plants at home. With a few simple cuts and a bit of creativity, this type of packaging can become a plant pot, an organiser or a handy gardening accessory-helping to cut waste, save money and adapt your garden to everyday needs.
How do you prepare long-life milk cartons for use in the garden?
Getting the carton ready properly is the first step in any reuse project. Start by cutting off the top section, removing the spout and the flaps. Wash it thoroughly with water and mild washing-up liquid, then leave it upside down to drain until it is completely dry.
Once dry, you can cut the carton to suit whatever you want to make. Mark your lines with a ruler and pen for cleaner, more accurate cuts. For projects that will be handled a lot, it helps to strengthen the edges with adhesive tape, which improves durability and reduces the risk of the sides tearing.
Watch a video on the YouTube channel Orchard and Vegetable Garden in Pots about reusing long-life milk cartons to make seed trays, pots and other practical items for a home vegetable patch:
https://www.youtube.com/watch?v=F0B6bUjscb4
How do you use a milk carton as a plant pot and seed tray?
To turn the carton into a pot or seed tray, keep the bottom section at around 8 to 12 centimetres high. Make small holes in the base for drainage and, if you like, paint the outside with a suitable paint-waiting for it to dry fully before adding compost or other growing medium.
When it’s ready, you can sow seeds or plant young seedlings. It works particularly well for a few types of home growing:
- Vegetable seeds, such as lettuce, rocket and spring onions;
- Flower seedlings that will later be moved into larger pots;
- Small culinary herbs that can be grown directly in the carton.
When the roots have filled the space, carefully cut down one side of the carton so you can lift out the root ball intact. You can then move it into another pot or a bed, with the carton acting like a temporary nursery for your plants.
How can you turn milk cartons into garden labels and organisers?
The same carton that becomes a pot can also help you keep the garden in order. If you open it out into a flat sheet, you can cut strips or rectangles, taper one end, and write plant names with a permanent marker-creating sturdy labels for beds and pots.
As an organiser, you can keep the carton whole (without any soil) to store small gardening items. Cut off only the top, reinforce the rim, and line up several cartons in a drawer or on a shelf to create practical compartments for decorative stones, gloves, labels and seed packets.
How do you make simple watering cans and irrigation reservoirs from a milk carton?
You can also improvise watering solutions with this material. If you keep the cap on and make small holes in the side near the spout, you can tip the carton to create a fine-spray watering can-useful for gentle watering of young seedlings or small pots.
For a simple drip-irrigation reservoir, fill the carton with water, close it tightly and make holes in the lower area-either at the base or on the side near the bottom. Then partially bury it next to the plant. The water seeps out slowly through the holes, keeping the soil damp for longer and helping anyone who spends many hours away from home to look after the garden at low cost through smart reuse of materials.


Comments
No comments yet. Be the first to comment!
Leave a Comment