
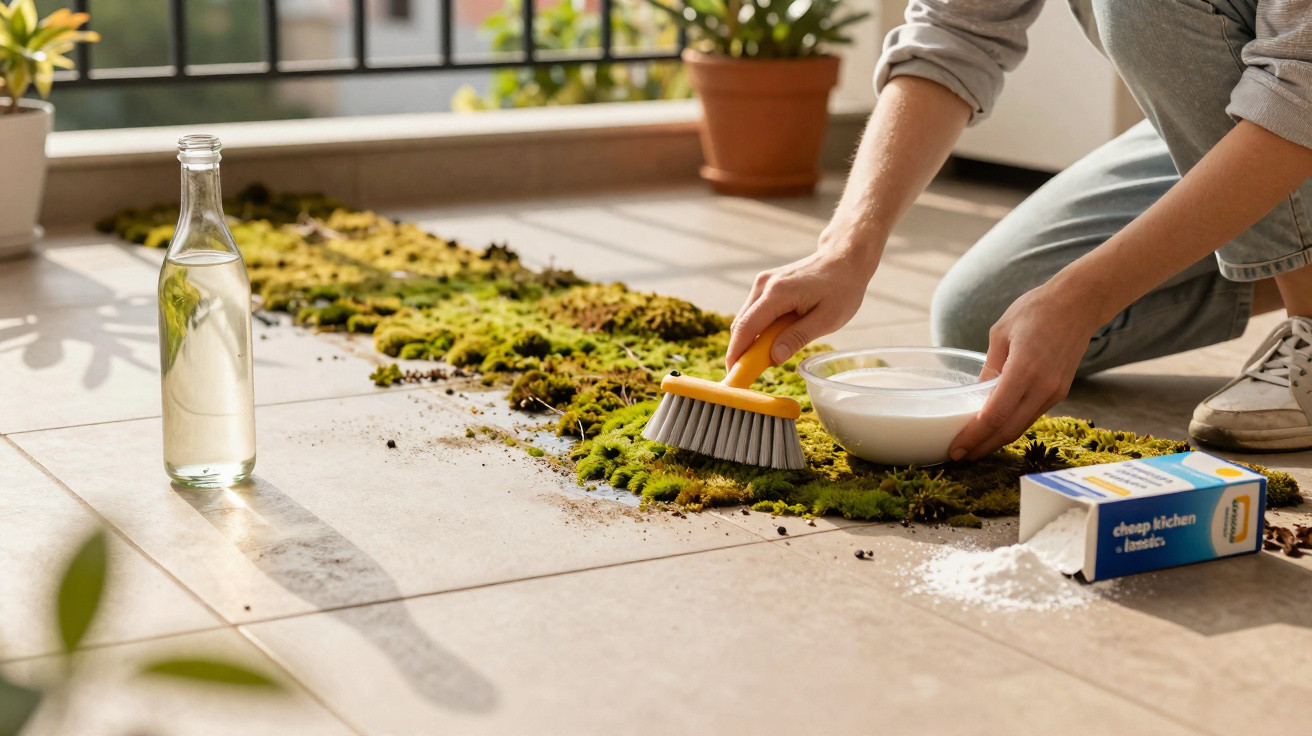
Many homeowners know the unpleasant surprise that arrives in spring: the first mild days encourage you outdoors, only to reveal a patio surface streaked green, slippery and far from welcoming. Rather than relying on costly specialist cleaners or a noisy pressure washer, a low-cost kitchen staple-priced at around 30p in British supermarkets-may be enough.
Why moss and algae quickly develop on patios
After a wet winter, concrete slabs, block paving and stone steps provide ideal conditions for moss and algae. Moisture lingers wherever drainage is poor, sunlight is limited, or plant pots have remained in one position for months. Even these small, permanently damp patches are sufficient for the green layer to spread.
The result is more than simply untidy-looking. That slimy coating makes every step less secure: children can slip more easily, while older people may suffer serious falls. As a result, many people instinctively reach for a pressure washer or harsh patio cleaners from the DIY shop.
This is where a straightforward alternative, increasingly popular in the UK, comes in: distilled white vinegar. Elsewhere, the equivalent is generally sold as clear table vinegar or white wine vinegar with a high acid content.
A clear kitchen vinegar can loosen moss, algae and light dirt in around an hour-without high pressure or harsh chemicals.
The low-cost household remedy: white vinegar from the kitchen
The method uses a product that many households already keep in the cupboard. In British supermarkets, a bottle of white vinegar can sometimes cost only a few cents when converted. Half a bottle is often sufficient for a medium-sized patio, putting the cost at perhaps 20 to 50 cents per clean, depending on the size of the area and the product used.
The acid in vinegar attacks the cellular structure of moss and algae. The plants dry out, detach from the surface and can then be swept away relatively easily. Small weeds in the joints are also affected, which weakens them too.
How to clean a patio with white vinegar, step by step
Anyone wishing to try this approach should follow a clear sequence. The job takes around an hour, with much of that time being left for the solution to work.
1. Clear the surface thoroughly
First, remove furniture, plant pots and decorative items from the patio. The clearer the area, the more evenly the solution can work. Next, sweep firmly using a stiff-bristled broom. Loose soil, leaves and small twigs need to be removed so that no “barrier” remains between the vinegar solution and the growth.
2. Mix the vinegar solution correctly
The basic rule is a 1:1 ratio: one part white vinegar to one part water. Use lukewarm or cold water rather than hot water, so that the vinegar does not evaporate too quickly. Pour the mixture into a bucket or watering can.
- One part white vinegar, such as table vinegar with 5–10% acidity
- One part water
- Stir well, or give the watering can a brief shake
- Optional: a small squirt of washing-up liquid for better coverage
Anyone with sensitive hands should wear rubber gloves, as the solution is considerably more acidic than plain water.
3. Apply generously and allow it to work
Pour the vinegar-and-water mixture evenly across all the slabs. Apply a little extra to heavily affected patches. The aim is for the surface to become thoroughly wet and remain in a “vinegar bath” for a while.
Then wait. An application time of around an hour has proved effective. During this period, you can tackle other garden jobs or simply take a break.
4. Brush again and rinse away
Once the waiting time is over, use the broom again. Scrub the slabs with firm pressure to lift moss remnants, algae films and grey surface deposits. Then rinse the area with clean water, either using a garden hose or buckets of water.
In many cases, the patio will already look noticeably brighter and provide better grip afterwards. Persistent areas can be treated a second time if necessary.
Where vinegar works well-and where it can cause damage
Useful though this kitchen staple may be, it is not suitable for every material. The reason is its acidity, which can affect sensitive stone as well as moss.
| Material | Suitability for vinegar cleaning |
|---|---|
| Concrete slabs | Usually well suited; occasional use is possible |
| Standard concrete block paving | Generally unproblematic, but test a small area first |
| Sandstone | Problematic, as acid can leach the surface |
| Limestone / shelly limestone | Sensitive; use vinegar only after a test if uncertain |
| Old cement joints | May be affected over time |
| Ceramic slabs / porcelain paving | Often resistant, but always carry out a test |
Extra care is particularly important with natural stone. Test a discreet corner first: apply a small amount of solution, leave it briefly, rinse it off, then check for discolouration or rough patches once dry.
Safety for plants, children and pets
Although vinegar is considered comparatively environmentally friendly, it is still an acid that can damage plants. If the solution runs into flowerbeds or across lawns, leaves and roots may suffer. Anyone with sensitive perennials, herb beds or young grass immediately beside the patio should plan the drainage carefully.
It may help to cover drainage channels temporarily or direct the water towards an area without important plants. For pets, the diluted solution on the ground is usually not a problem, provided they do not drink from it directly. Children should not walk barefoot across the wet surface while it is being left to work.
Alternatives: when other methods make more sense
Some gardeners prefer specialist cleaners that offer a longer-lasting effect or are approved for delicate materials. Various products are available that work without high pressure and gradually break down moss and algae over several weeks. They are usually applied with a watering can or sprayer and do not need to be rinsed off.
A pressure washer has advantages of its own: it works purely mechanically and without chemicals. However, it can wash out joints and roughen surfaces. The likelihood of damaging the paving is greater with old block paving or crumbling joints.
How to slow down new moss growth considerably
If you scrub away the same green deposits every year, a few routine habits can save considerable time. The drier and more ventilated a patio remains, the harder it is for moss and algae to establish themselves.
- Drain rainwater quickly by checking the slope and drainage channels.
- Remove leaves and soil regularly in autumn.
- Move large plant pots from time to time so the area underneath can dry out.
- Open up shaded corners where possible, for example by cutting back shrubs.
- Schedule a thorough deep clean once a year in spring.
Many people use the vinegar method specifically for this annual deep clean: they clean intensively once, then only need to sweep and remove heavier dirt during summer. This keeps the risk of slipping low without requiring a major cleaning session every weekend.
What makes vinegar effective
The active component in white vinegar is acetic acid. It disrupts the metabolism of mosses, algae and many other small plants. The low pH upsets the cells’ balance, causing moisture to escape and the plants to dry out.
Unlike many synthetic biocides, acetic acid does not remain stable in soil for long. Microorganisms break it down into carbon dioxide and water. This explains why its effect does not last for months, while also making it accepted as an everyday household product.
One residual risk remains: frequent use at very high concentrations can damage joints and sensitive stone. Those using a moderate mixture once a year and keeping an eye on their material will usually have good results.
Practical everyday examples
Many users report using a single “vinegar Saturday” in spring to treat their entire patio, garden paths and even concrete edging around beds. Others focus chiefly on the areas in front of the front door and garage, where foot traffic is especially heavy and the risk of slipping is greatest.
The same principle can also be used on balconies with concrete floors or rough tiled surfaces, provided that no sensitive natural stone has been installed. A smaller amount of solution and a softer brush are often enough there to avoid damaging the finish.
Those who have tried the method once often return to it the following year, particularly because it is quiet, inexpensive and manageable in terms of time. In a short time, a dull and slippery outdoor space can become somewhere you are happy to walk barefoot across again.


Comments
No comments yet. Be the first to comment!
Leave a Comment