
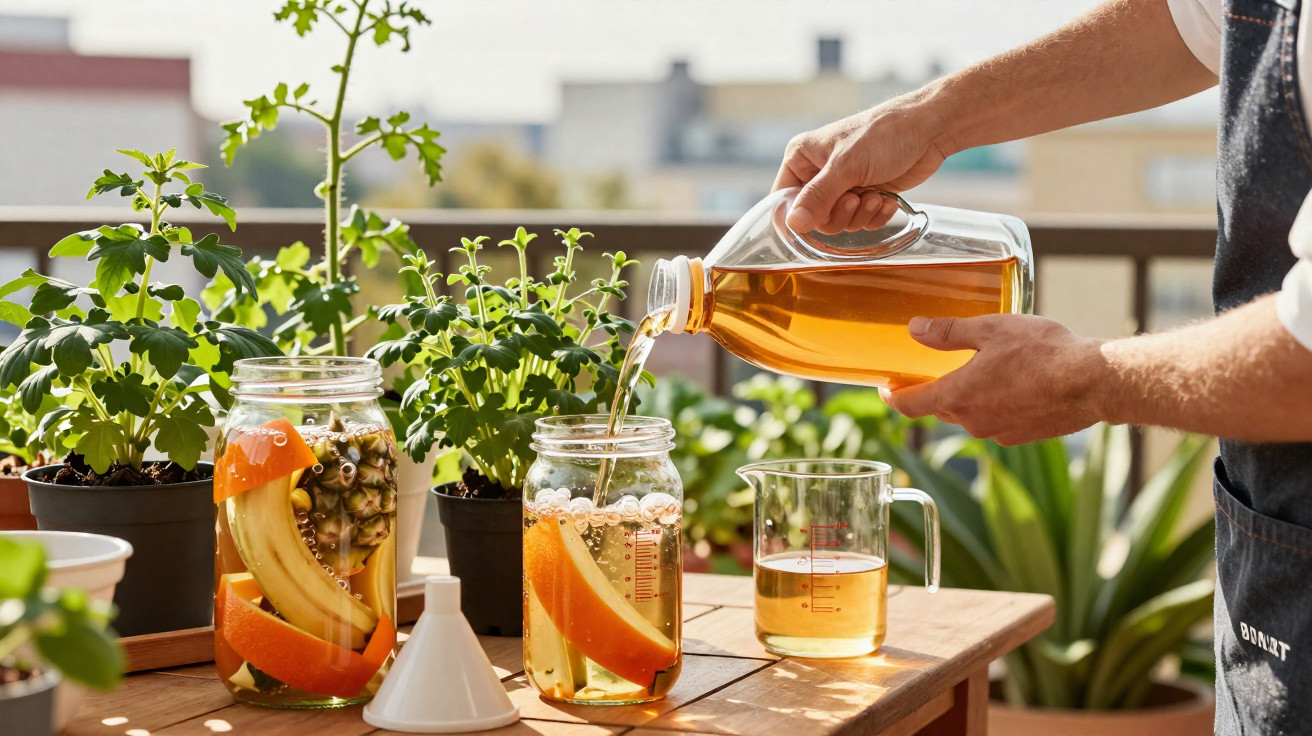
Making a natural liquid fertiliser from fruit peelings has become a popular option for people who want to get more value from household organic waste. The method relies on fermenting these leftovers so that nutrients stored in the peelings are converted into a nutrient-rich liquid. It is best suited to ornamental plants and home vegetable plots, provided a few precautions are followed to prevent strong smells, mosquitoes and an overload of nutrients in the soil.
What is natural liquid fertiliser from fruit peelings and what is it used for?
A natural liquid fertiliser from fruit peelings is produced by leaving fruit waste to ferment in water under controlled conditions, sometimes with a little sugar or molasses added to feed beneficial microorganisms. Over a number of days, bacteria and yeasts break down part of the organic matter and release nutrients into the water, including potassium, phosphorus and small amounts of micronutrients.
Because it is a mild, low-strength feed, this homemade fertiliser works well as an extra boost for pots, small beds and home gardens, supporting greener foliage and steady, balanced growth. It is not a replacement for well-prepared soil or other fertilisers, but it can top up plant nutrition while also cutting down the amount of organic waste produced in day-to-day household life.
How do you make natural liquid fertiliser from fruit peelings at home?
To make natural liquid fertiliser using fruit peelings, start by selecting suitable materials and avoid scraps that are oily or heavily seasoned. Peelings from banana, apple, papaya, mango and melon usually ferment reliably, while too many citrus peelings can throw the process out of balance. Below is a basic method you can scale up or down depending on how much waste you have.
- Lidded container (glass jar or plastic bucket)
- Mixed fruit peelings (banana, apple, papaya, mango, melon, etc.)
- Water (tap water left to stand or filtered)
- Brown sugar, molasses or regular sugar (optional, to speed up fermentation)
- Sieve or fine cloth for straining
- Chop the fruit peelings into smaller pieces to help microorganisms work more quickly.
- Put the peelings into the container, filling it to no more than half its capacity.
- Pour in water until the material is fully submerged, leaving some air space at the top.
- If you choose, add 1 to 2 tablespoons of sugar for each litre of water, stirring until it dissolves.
- Close the container loosely, or open it briefly once a day to release built-up gases.
- Keep the container in a well-ventilated spot out of direct sunlight for about 7 to 15 days, then strain the liquid.
How does fruit-peeling fermentation work during preparation?
Fermentation happens because microorganisms found in the environment-and on the fruit peelings themselves-feed on available sugars and organic matter. As they break complex substances into smaller molecules, nutrients become soluble and move into the water, producing a lightly acidic smell or an aroma similar to fermented fruit.
In most cases this is a mixed fermentation, involving both bacteria and yeasts in a low-oxygen setting, which is why bubbles and gases appear. Warmer temperatures tend to speed the reaction, small amounts of sugar encourage microbial activity, and thicker peelings-such as pineapple-usually take longer to ferment fully.
How should you apply liquid fertiliser from fruit peelings, and how often?
Liquid fertiliser made from fruit peelings should always be diluted before use so nutrients do not sit too strongly against the roots. A commonly used dilution is 1 part fertiliser to 10 parts water for watering the soil, and up to 1:20 for foliar spraying in the early morning or late afternoon, taking care not to saturate the compost in small pots.
In home growing, it is typically applied every 10 to 15 days to plants that are actively growing, and every 20 to 30 days to stable, mature plants-adjusting according to how the leaves and soil respond. If signs of excess appear, such as sudden yellowing or a very strong smell from the pot, it is advisable to increase the interval between applications, water more with clean water, and monitor how the garden responds over the following weeks.
Comments
No comments yet. Be the first to comment!
Leave a Comment