
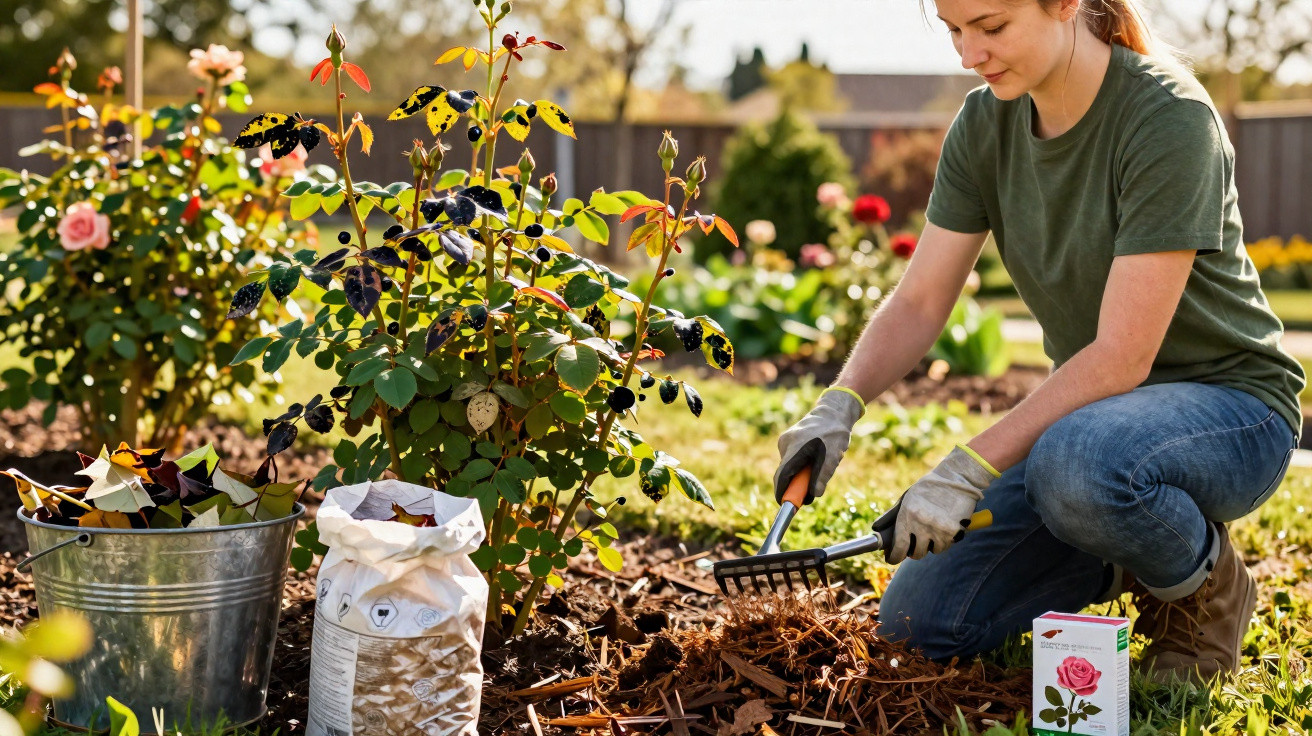
When roses become bare in summer and produce only sparse blooms, the cause is often a silent enemy that becomes active as early as March.
Many amateur gardeners are frustrated year after year by yellow leaves, dark spots and lacklustre rose bushes. The usual culprit is black spot, a fungal disease that sets the course early in the year – often without being noticed. By allowing for three simple tasks in March, you can protect your roses remarkably well and later enjoy strong, healthy flowers.
Black spot: the summer symptoms begin in spring
The pattern is familiar: by June or July, some roses suddenly look depleted. Their leaves lose their rich green colour, develop round dark patches, turn yellow and drop off. Before long, the bush looks bare, while blooms stay small or fail to appear altogether.
Black spot weakens roses over time and leaves them more vulnerable to drought and pests.
The problem is caused by a tiny fungus that survives the winter on dead leaves and plant debris on the ground. As soon as spring becomes milder and wetter, it “wakes up”.
Conditions in which the fungus thrives include:
- temperatures of roughly 13 to 30 degrees
- leaves that remain wet for several hours
- dense planting with little air circulation
Rain, watering and wind spread the spores from leaf to leaf and from bush to bush. One infected plant in a bed can often be enough to affect an entire row of roses. The fungus does not kill a rose directly, but it drains so much of its strength that the plant can barely build up reserves.
Why March is so crucial for roses and black spot
March marks the start of the gardening season in many areas: the sun grows stronger, days lengthen and the first fresh shoots emerge. At precisely this transitional time, fungal spores are sitting ready in old foliage, waiting for moisture.
Taking action now breaks the infection cycle before the roses have properly started growing. In essence, three steps are enough to send plants into summer in a much more resilient state.
Step 1: Clear the soil around roses thoroughly
The most important task is to remove all old foliage from around the base of each rose. The fungus particularly likes to overwinter on these leaves and other dead plant material.
Work methodically:
- Wear gloves and collect all old leaves and pieces of twig from the ground.
- Check the centre of the bush too, looking for dried leaves that are still caught in the branches.
- Clear an area with a radius of at least 30 to 40 centimetres around the plant.
Important: this material belongs neither on the compost heap nor in garden-waste collections. Fungal spores would survive there and could later return to the garden.
Always dispose of diseased rose leaves with general waste or through local authority disposal services; never compost them.
If you have several rose beds, deal with them one at a time and briefly clean your tools in between so that spores are not carried from one bed to another.
Step 2: Use a mulch layer to slow the spores down
Once the ground around the roses is clean, apply the next form of protection straight away: a protective layer of mulch. It provides several benefits at once.
Suitable materials include:
- mature compost
- bark mulch or fine pine bark
- well-rotted farmyard manure, which roses particularly appreciate
- leaf mould made from healthy leaves
The layer can be one to two finger-widths deep. It should cover the entire area around the rose without piling directly over the graft union.
This mulch layer serves several purposes:
- It stops raindrops from splashing fungal spores out of the soil and onto new leaves.
- It keeps the soil moist for longer and cools it slightly during summer.
- It suppresses weeds that would otherwise take nutrients from the roses.
- Organic mulch breaks down gradually and releases nutrients.
Mulching in March is rather like a protective shield for new rose shoots – providing both physical protection and nourishment.
Step 3: Feed roses purposefully in late March
Strong plants cope better with disease, and this is especially true of roses. It is therefore worth applying the first feed in late March, or by early April at the latest.
Which fertiliser makes sense for roses
Many gardeners choose a specialist rose fertiliser. It generally contains the right balance of nitrogen, phosphorus and potassium, often with added magnesium and trace elements. Organic fertilisers such as horn shavings, dried cattle manure or dedicated organic rose blends are also well suited.
The key point is not to place fertiliser directly against the stem. Instead, work it lightly into the soil around the root area, then water thoroughly. Liquid fertiliser is simply diluted with water and poured around the rose.
| Type of fertiliser | Benefit | Use in March |
|---|---|---|
| Organic rose fertiliser | Slow acting, improves soil | First basic feed for the season |
| Mineral rose fertiliser | Quickly available, easy to control | A “starting boost” for severely weakened plants |
| Liquid fertiliser | Simple to apply, fast acting | Ideal for potted and balcony roses |
Many experienced rose growers also use plant-strengthening tonics alongside fertiliser, applying them with the watering. These are intended to improve the rose’s resistance and support recovery after an outbreak.
Additional care tips against black spot
The three measures taken in March create the foundation. A few further habits throughout the year can substantially improve protection.
Give roses air and water them correctly
When roses are planted too closely together, their leaves take longer to dry. That suits the fungus perfectly. When planting new roses, it is therefore worth allowing adequate spacing and thinning bushes regularly. Old shoots growing inwards can be removed in late winter or early spring.
When watering, apply water at soil level wherever possible instead of spraying the foliage. A slow watering directly at the roots in the early morning is ideal. This keeps the leaves largely dry and allows the plants to dry off during the day.
Choose resilient varieties
Anyone planting new roses can look for varieties with good leaf health. Many modern cultivars are considerably less susceptible to fungal diseases. Garden centres provide relevant descriptions, such as “particularly resistant”, as well as quality marks from rose trials.
If you love sensitive old varieties, give them the best possible position: sunny, with good air movement and soil that does not become waterlogged.
How black spot differs from other rose diseases
Not every mark on rose leaves is automatically black spot. Powdery mildew tends to appear as a white coating, while rust forms orange pustules on the undersides of leaves. Black spot is chiefly identified by:
- irregularly round, dark brown to black spots
- a yellowish halo around each spot
- leaves that fall relatively quickly
A mild outbreak in summer does not mean the plant is finished. Promptly removing affected foliage and continuing to care for the rose well will support its recovery. The crucial point is not to leave that foliage in the bed until the following spring.
Why the effort in March is truly worthwhile
The three tasks described take little time but have a considerable effect. Clean soil, a protective mulch layer and well-planned feeding remove key opportunities for the fungus to attack and give the rose a stable starting point.
Anyone who makes these March tips part of their regular routine will see a noticeable difference over the years: more foliage, a longer flowering period, stronger colours and far less trouble from diseased, defoliated bushes. That is what an ornamental garden is about – robust plants that manage without harsh chemicals and provide enjoyment throughout the summer.


Comments
No comments yet. Be the first to comment!
Leave a Comment