
Many amateur gardeners feel genuinely alarmed when this happens.
Anyone who cares about their Photinia hedge will recognise the shock: by late winter, glossy foliage has been replaced by black spots, entire leaves become discoloured and drop off, and what was once a dense screen turns into a patchy, hole-filled hedge. A fungus that thrives in damp springs is usually behind the issue - but a surprisingly straightforward, entirely natural action can greatly slow it down if taken in time.
How dangerous black spots appear on Photinia
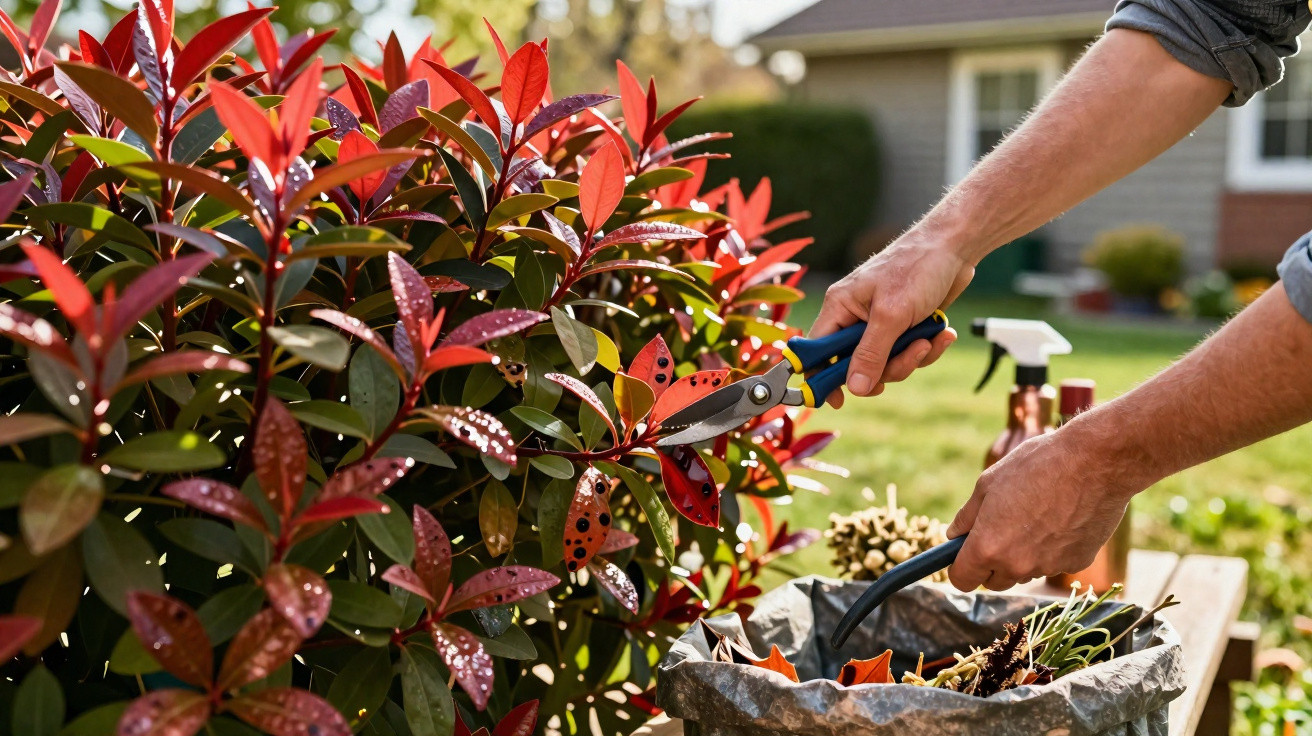
The popular Photinia × fraseri ‘Red Robin’ features in many gardens. Its red new shoots are particularly striking - until fungal disease takes hold. Infection commonly starts inconspicuously at the very bottom of the hedge.
- Small brown to almost black spots appear on the leaves first.
- They often have a reddish edge and are fairly sharply defined.
- The marks expand, while their centres later tend to turn greyish.
- Leaves yellow, dry out and eventually fall.
Finding whole “handfuls” of discoloured leaves beneath the hedge is a serious warning sign. This is no longer a matter of the plant naturally shedding a few old leaves; it indicates a substantial infestation.
A normal leaf change is more likely to produce evenly yellow leaves without round, clearly edged marks. Thick, almost crust-like blackening over large areas points more towards other fungal conditions, such as tar spot or sooty mould. The familiar Photinia leaf spot disease is characterised by the combination of distinct circular spots and heavy leaf loss beginning on the hedge’s lower levels.
“Anyone who sees round, sharply defined spots and large numbers of fallen, speckled leaves on the ground is very likely dealing with the well-known Photinia leaf spot disease.”
Why spring makes the spots spread rapidly
The cause of a severe spring outbreak is often right underfoot: a deep layer of diseased, speckled leaves left beneath the hedge throughout winter. This may be due to convenience, lack of time, or simply because gardeners do not realise what they are leaving there.
The fungus’s spores overwinter precisely in this brown leaf litter. Specialists believe that most of the infectious material is contained in these fallen leaves. This unremarkable pile acts as a reservoir from which the disease rebuilds itself every year.
The real attack begins in spring. Raindrops hit the infected leaves on the ground, splash upwards and propel spores onto the fresh, succulent young growth in the lower part of the shrub. This creates a true “splash infection cycle”. It is especially effective in a dense hedge with little air movement and heavy soil that remains wet for a long time.
Wet years make the problem worse
After particularly rainy winters, the risk of a Photinia hedge developing black spots rises considerably. The fungus favours persistently damp conditions. The longer leaves stay wet, the more readily spores germinate and penetrate the plant tissue.
This is exactly where the key natural countermeasure comes in - using a tool already found in every garden.
The one natural step that protects your Photinia
Before considering sprays, specialist fertilisers or other products, there is a far simpler task: thoroughly clear the ground beneath the hedge. This needs to be done early enough, before the buds begin to break properly.
“The most important protection for your Photinia hedge is clean ground free of old, infected leaves - and it costs nothing more than some time and a rake.”
The right way to do it
The best time is usually between late February and early March, on a dry day:
- Put on gardening gloves.
- Work from the stems outwards, using a rake or your hands.
- Remove every speckled or suspicious leaf from the ground, including those caught deep within the base of the shoots.
- Do not put the material on the compost heap; place it in sturdy bags instead.
- Dispose of the bags with household waste or via the local authority’s green-waste collection point.
This removes most spores that would otherwise be splashed back up with every shower of rain. The disease’s “trampoline effect” is therefore greatly reduced.
What you should never do
- Leave infected leaves lying on the soil.
- Put the material into ordinary garden compost.
- Use a fine sprinkler to water over the foliage in spring.
Fine overhead watering in particular intensifies splash infection. Water around the roots instead, keeping the leaves as dry as possible.
Helpful extra protection: copper, herbal preparations and more air
Once the ground has been thoroughly cleared, extra protection can be useful, particularly in areas that experience frequent rainy periods. Many gardeners use traditional copper-based treatments, such as the well-known Bordeaux mixture. Applied to the leaves in a low concentration, it forms a film across their surface.
Those preferring a gentler approach can use herbal preparations, for example:
- Horsetail decoction (which strengthens plant tissue)
- Nettle liquid feed (which generally supports plant vigour)
These treatments do not replace clearing up; they only support the plant’s defences. The rake remains the most important tool.
Thin the hedge lightly
While working beneath the hedge, it is worth checking the density of its growth as well. If it is completely overgrown, foliage dries more slowly after rain. A few carefully placed cuts in the lower section will bring in more light and air.
Just a small number of well-planned cuts with secateurs is enough to improve air circulation. The leaves then dry faster, which noticeably slows the fungus.
Keeping your Photinia healthy in the long term
Removing old leaf litter thoroughly every year in late winter noticeably lowers the likelihood of severe infection. A few basic rules also help make the hedge more resilient:
- Avoid planting too closely - leave some space between shrubs.
- When planting, ensure the soil is free-draining rather than prone to waterlogging.
- Fertilise moderately, so plants grow strongly without producing overly soft growth.
- Ensure there is at least some air circulation, especially near the bottom of the hedge.
In springs that are exceptionally wet, occasional spots may still appear despite good care. What matters is that the hedge remains vigorous overall and does not become bare across large areas. A healthy, robust Photinia copes far better with a light infection than a shrub that is already weakened.
Frequently asked practical questions
Can I really never compost infected Photinia leaves?
Home compost heaps generally do not reach temperatures high enough to kill every fungal spore reliably. Many pathogens survive, particularly if the heap is small or turned infrequently. To protect the hedge, dispose of infected leaf litter consistently outside your own composting cycle.
Is hard pruning the answer?
A complete, severe cut-back may remove infected material in the short term, but it also places considerable stress on the plant. A moderate prune combined with leaf removal and suitable care is more sensible. Only branches that are clearly damaged or dead should be removed directly at their base.
How quickly will I see results?
Gardeners who clear up thoroughly in late winter will generally see far fewer new spots on fresh growth the following spring. No garden will ever be entirely “spore-free”, but the hedge is given a genuine opportunity to recover and produce dense new growth.
Despite its fungal problem, Photinia remains an appealing hedge shrub for gardens in German-speaking regions: it is hardy, evergreen and produces spectacular red new growth. By keeping an eye on the leaf trap beneath the hedge and deliberately reaching for a rake once a year, gardeners can usually enjoy a healthy, richly coloured hedge for a long time.
Comments
No comments yet. Be the first to comment!
Leave a Comment