
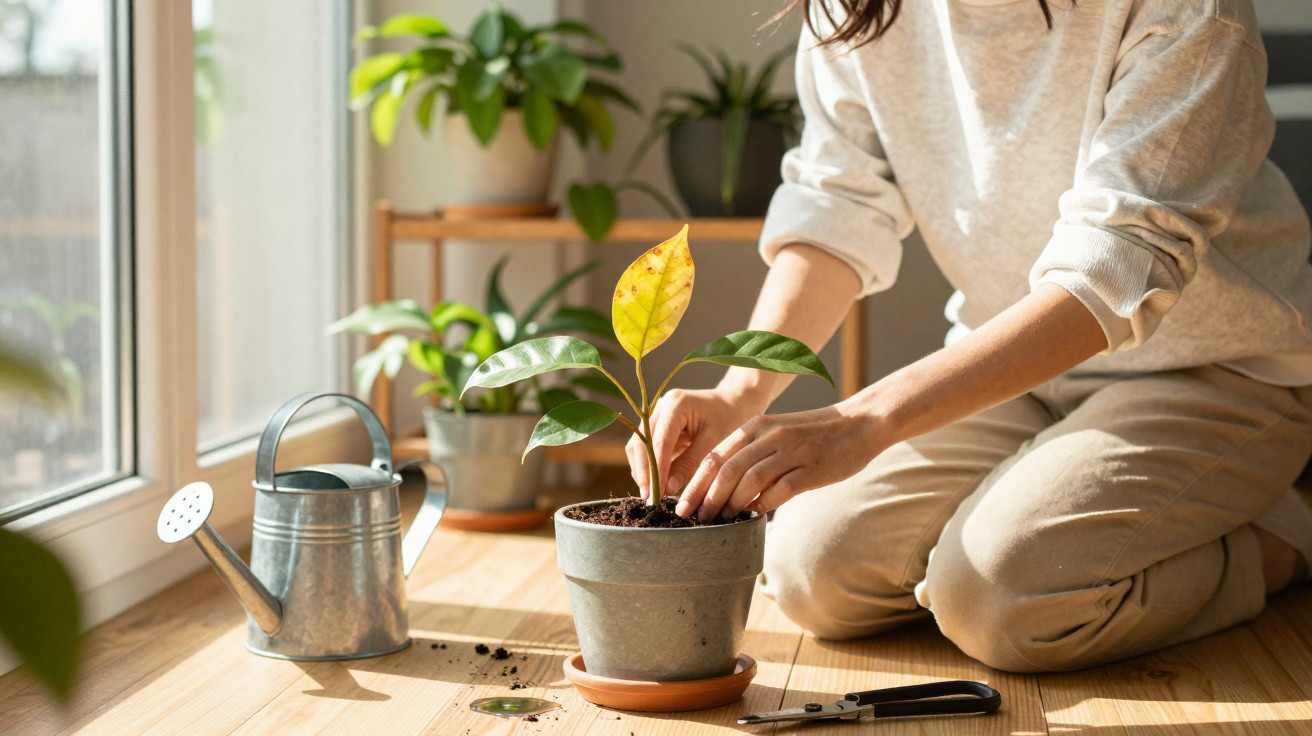
That gradual slide often begins in midwinter, when the house feels dim and chilly, we convince ourselves our plants need saving, and we pick up the watering can at precisely the worst time.
Why your “loving care” keeps turning leaves yellow
The stubborn myth of the always-thirsty plant
A belief clings on for many indoor gardeners: if a plant looks miserable, it must need a drink. A leaf sags, the colour dulls, and instinct takes over. Add water. Then add a bit more. But in centrally heated homes in January, the truth is usually the opposite.
Through winter, most familiar houseplants shift into low gear. Growth slows or stops, roots become less active, and the need for water drops sharply. If you keep watering as though it were July, the compost gets overwhelmed. The plant simply cannot take up moisture at that rate because it has almost stopped “feeding”.
Yellow leaves in winter rarely signal thirst. Far more often, they reveal roots suffocating in water they cannot use.
Because people need regular hydration, we often assume plants work the same way. Yet plenty of indoor plants come from places where water drains quickly, or where brief dry spells are normal. They hold onto moisture, tolerate breaks between showers, and do not want their roots sitting in an ongoing swamp.
When extra love becomes a slow death sentence
Watering feels like care in action. Standing back and letting the compost dry can feel like you are failing them. That mindset wipes out countless monsteras, fiddle-leaf figs and peace lilies every winter.
Every “just to be safe” top-up re-saturates the compost. Air spaces collapse, the mix packs down, and roots start to struggle. Ironically, the most attentive owners are often the ones who drown their plants-slowly, with repeated small waterings.
For indoor plants, restraint is a skill. The bravest move, many days, is to put the watering can back on the shelf.
What really happens under the soil: a quiet suffocation
When water pushes out oxygen
A good potting mix works because it holds three things in proportion: solid material, moisture and air. Roots rely on those tiny pockets of air like lungs, taking in oxygen, releasing carbon dioxide, and moving nutrients up to the foliage.
Water too frequently and the liquid fills the gaps. Oxygen is forced out. The mix becomes dense and heavy. Roots enter a kind of enforced breath-holding: they cannot “breathe”, cannot move minerals properly, and begin to shut down.
From the surface, it can look baffling. The compost is wet, yet the plant behaves as if it is parched-yellow leaves, limp stems, growth that stalls. This “thirst in a flood” is a classic hallmark of roots being deprived of air.
Rot: the hidden collapse at the base
When the pot stays waterlogged, oxygen remains scarce. That environment is ideal for fungi and anaerobic bacteria, and rot follows. Roots that were once firm and white turn beige, then brown, then black and slimy. They snap with light pressure. They often smell like stagnant water or mould.
By the time large sections of foliage turn yellow, a big part of the root system may already have rotted away, out of sight.
This time lag throws owners off. The harm builds quietly for weeks in the lower part of the pot, and only later do the leaves reveal that the supply system underneath has failed.
Is it thirst or drowning? How to read your plant’s clues
Soft versus crisp: the leaf texture test
To tell under-watering apart from over-watering quickly, start by feeling the leaves.
- True drought: leaves look dull, edges go crisp, the tissue becomes thin and brittle; they may even crunch between your fingers.
- Waterlogging: leaves turn yellow but remain soft or droopy; they can feel heavy and may show dark, mushy patches.
If a leaf drops away from the stem while still moist and pliable, it usually means the roots are no longer supporting it properly. That points to rot rather than straightforward thirst.
The finger test: the low-tech moisture meter that works
Before you water, press a finger 2–3 centimetres into the compost. Don’t judge by the surface alone; indoor heating dries the top quickly while the centre can stay wet.
If it feels cool, damp, or sticks to your skin, hold off and keep it dry. If it feels dusty and your finger comes out clean, you can water-but only enough to moisten the mix, not flood it.
The real rule is simple: you water when the soil says so, not when your calendar does.
The decorative trap: cachepots and hidden puddles
Water lurking at the bottom of the pot
Home styling trends favour weighty ceramic covers, woven baskets and metal containers. They photograph well and look great on social feeds. Many of them have no drainage holes. Inside, a plastic nursery pot with drainage sits hidden from view.
After watering, surplus runs out of the inner pot and gathers in the bottom of the decorative cover. The roots can then sit in that unseen puddle for days or even weeks. Many people only realise something is wrong when leaves yellow and stems sag.
Standing water attracts bacteria, algae and fungus gnats. It also keeps the lower layer of compost soaked long after the top looks dry, which tricks anyone doing a quick surface check.
Good drainage: the non‑negotiable rule
For houseplants, one factor outweighs nearly everything else: water must have a way to escape the container.
- Choose pots with drainage holes.
- If you use a cachepot, tip out any collected water 10–15 minutes after each watering.
- Put a layer of coarse material (clay pebbles, gravel, chunky bark) under the pot or in the base to create an air buffer.
A plant that briefly dries between waterings recovers. A plant standing in permanent runoff rarely gets a second chance.
Emergency protocol when your plant is already flooded
Drying fast and changing the substrate
If you suspect waterlogging and the pot feels unusually heavy, waiting is not enough. Ease the root ball out of the pot. If water drips out or the compost clings like mud, you need to act straight away.
Wrap the root ball in kitchen paper or newspaper to wick out moisture, swapping the paper as soon as it becomes saturated. Next, mix a fresh, airy medium: good-quality potting compost plus a loosening material such as perlite, pumice or orchid bark, with a small portion of coarse sand.
| Component | Role in the mix |
|---|---|
| Potting soil | Holds nutrients and base moisture |
| Perlite or pumice | Keeps air pockets open, speeds drainage |
| Coarse sand or bark | Prevents compaction, supports root aeration |
Repot into this blend when it is only lightly moist, not dripping wet. Then do not water again until the finger test shows genuine dryness.
Root surgery: cutting away rot to give the plant a chance
Once you have removed the old compost, inspect the roots. Healthy roots are pale, firm and bendy. Rotten roots are brown to black, soft, and may slide away in a slimy outer layer.
Using clean scissors, cut away every dead section back to sound tissue. You may end up removing more than you expected. It can look harsh, but leaving rot behind allows infection to spread.
A small, clean root system can rebuild. A large, infected one keeps collapsing from the inside.
After pruning, some growers dust the cuts with powdered charcoal or ground cinnamon as a gentle antifungal barrier. Replant carefully, support the stem with a stake if necessary, and reduce light slightly for a week while the roots try to regrow.
Learning a new way to water: from routine to observation
Dropping the fixed schedule
“Once a week” sounds tidy and organised, but it rarely suits plants. Watering needs shift with temperature, humidity, pot size, pot material, compost type and light. A small terracotta pot in a bright south-facing window will dry far faster than a large plastic pot in a hallway.
One practical habit is to lift the pot before and after watering. Over time, your hands learn the difference between a light, dry pot and a heavy, wet one. Combined with the finger test, this gives a dependable read without any gadgets.
Adjusting for season and light
In winter, shorter days reduce photosynthesis, so plants take up less water. You can often extend the gap between waterings by several extra days and use less each time. In brighter months, as days lengthen and new shoots appear, demand rises again and watering intervals naturally shorten.
It also depends on the species. A monstera, a succulent and a calathea do not thrive under the same rules. Grouping plants with similar water needs on the same shelf can simplify care and stop one thirsty plant from dragging its drier neighbour into overwatering.
Going further: building a healthier indoor “climate” for green leaves
Humidity, drafts and other quiet stress factors
Overwatering is rarely the only issue. Dry heat from radiators, cold draughts from poorly sealed windows, and sudden temperature changes all put extra pressure on a plant already weakened by root stress, making yellowing accelerate.
Small changes can help: keep pots several centimetres away from radiators, avoid pressing them against icy glass, and shield them from doors that open onto cold corridors. A simple humidity tray-pebbles with water beneath the pot-can raise local moisture without soaking the roots.
When to accept a yellow leaf – and move on
A yellow leaf is not always an emergency. Lower, older leaves naturally age and drop, and one leaf turning golden on a very old stem can simply be part of that cycle.
The alarm bells ring when yellowing spreads quickly, climbs the plant, or comes with soft stems and a sour smell from the compost. When that happens, think less about fertiliser, humidity tricks or new containers, and focus on the most ordinary culprit: water lingering where air should be.

Comments
No comments yet. Be the first to comment!
Leave a Comment