
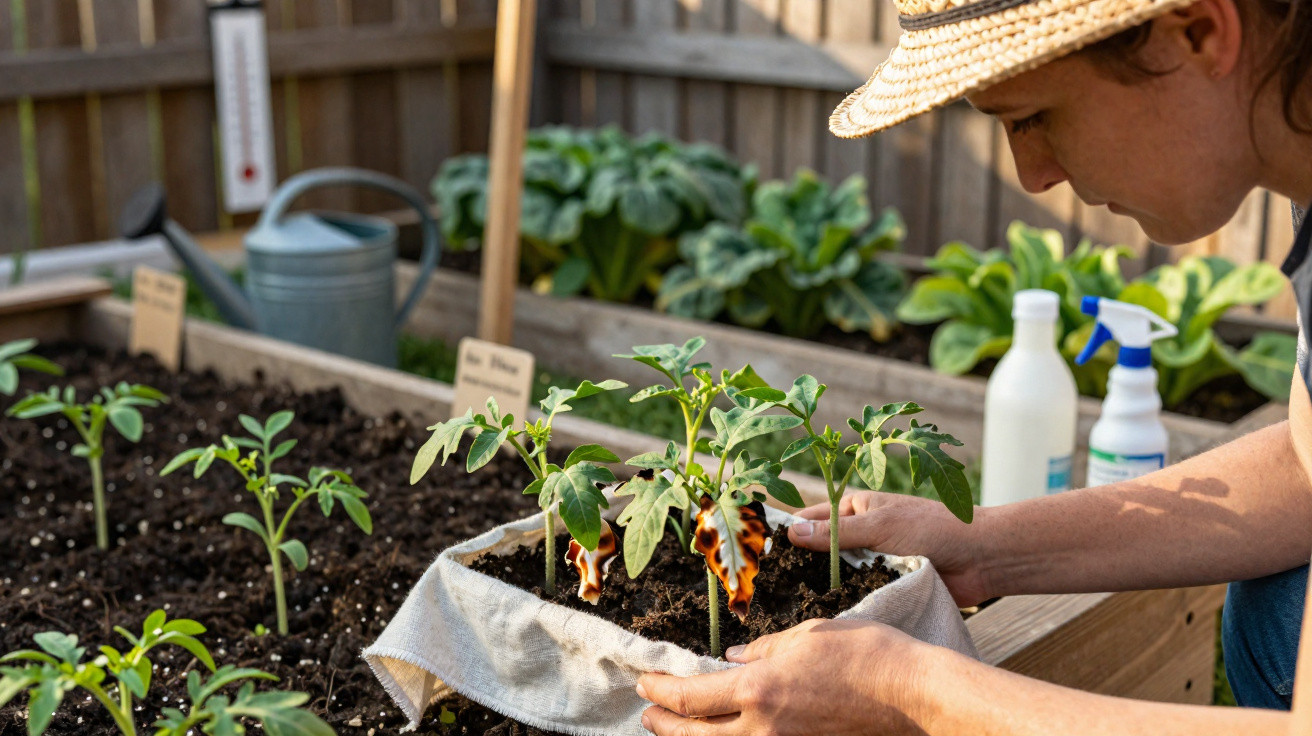
Many hobby gardeners wait for the first properly mild day in April or May and then move their carefully raised tomato plants straight outdoors. The calendar and the weather app both say “go”, so the trays head to the balcony or into the bed. Yet this impulsive change is exactly why, every spring, countless tomato plants get scorched, stall, or even die back - often without anyone realising what actually caused it.
The classic spring mistake with tomato plants
When you start tomatoes indoors, in a greenhouse, or in a conservatory, you’re giving them an exceptionally comfortable start. They develop at steady temperatures of around 20 °C, in softened light, with barely any wind. That produces very delicate foliage, only a thin protective layer on the leaf surface, and a root system that hasn’t had to spread far yet.
In other words, these plants are coming from something like a spa environment. Outside, conditions are far tougher: much stronger UV, gusty wind at times, cool nights, and soil that can still be cold and wet. Moving tomatoes from the living room straight into those conditions overnight asks them to cope with stresses they simply aren’t biologically prepared for.
"The jump from a warm windowsill into full sun isn’t an upgrade for tomatoes – it’s a shock."
Common symptoms of this shock include:
- Leaves turning pale, whitish, or brown within one to two days
- Stems going limp and soft
- A complete halt in growth that can last several weeks
- In severe cases, entire plants dying
Tomatoes aren’t the only crops affected. Other heat-loving vegetables typically raised indoors - peppers, chillies, aubergines, and basil - tend to react just as sensitively. Direct-sown crops such as radishes or carrots rarely face this issue because they germinate outside and adapt to outdoor conditions from day one.
The forgotten middle step: hardening off tomatoes properly
The crucial step that turns tender seedlings into sturdy outdoor tomatoes is hardening off. This is the gradual process of acclimatising plants to stronger sunlight, wind, and fluctuating temperatures. During this period, they build firmer tissue, the leaves develop a more resilient surface, and their water regulation improves noticeably.
A suitable moment to begin hardening off is when daytime highs are consistently around 15 °C and no night frosts are forecast. From there, you can follow a straightforward acclimatisation routine over seven to ten days.
Nine-day plan for robust tomato plants
Here’s an uncomplicated schedule that also works well if you’re busy during the day:
- Days 1 to 3: Put the plants outside for 1–2 hours each day in shade, sheltered from wind - for example, against a house wall or under a table. Bring them back indoors afterwards.
- Days 4 to 6: Increase to 4–5 hours outside. Give them gentle morning sun, then move them into partial shade or shade from midday onwards. Carry them back in during the evening if temperatures drop noticeably.
- Days 7 to 9: Leave them out for 6–8 hours in the position they’ll eventually grow: balcony, patio, or bed. On cold nights, keep bringing them indoors; on mild nights, they can already stay outside under horticultural fleece or in a polytunnel.
Over this period you’ll see clear changes: stems thicken, leaves look a little more “leathery”, and the plants cope far better with brief dry spells and slightly cooler air. After that, they’re ready to be planted into soil.
How to plant tomatoes into the bed with minimal stress
Once hardening off is done, the next step is moving them into the garden or into large containers. Doing this carefully gives tomatoes a genuine advantage from the start.
- Water thoroughly before planting: Let the root ball soak properly so the fine roots are less likely to snap during transplanting.
- Dig planting holes deep enough: Around 20 cm is a sensible depth. You can bury part of the stem, because tomatoes produce additional roots along the covered section.
- Set the stem deep: About 10 cm of stem beneath the soil helps create a stronger root system and more stable growth.
- Support immediately: Put a cane in straight away and tie the plant loosely so wind doesn’t whip it about.
- Mulch: A layer of straw, dried grass clippings, or leaves keeps moisture more even and reduces sharp temperature swings around the roots.
"If you plant tomatoes deeper and mulch straight away, you spare the plants stress and save yourself a lot of watering."
Moisture, fungal diseases, and how milk can help
Tomatoes thrive on sun and warm air, but they strongly dislike leaves that stay wet for long periods. Constant damp foliage and poor air movement create ideal conditions for fungal problems such as late blight, powdery mildew, Botrytis, or bacterial leaf spot.
A few simple habits can significantly reduce the risk:
- Don’t water over the leaves; water directly at the base
- Water in the morning or evening, not in strong midday sun
- Leave enough space between plants so airflow can dry them out
- In wet summers, use a roof, cover, or tomato shelter so plants stay as dry as possible
Many gardeners also use a time-tested home remedy: a milk spray. Mix roughly 10–20% whole milk or low-fat milk with water, then spray it onto the foliage every 10–15 days. The milk proteins and lactic acids can slow fungal growth and may also toughen the leaf surface.
Typical questions from the garden
How can I tell if tomatoes have sunburn?
Leaves affected by sunburn often look milky or glassy at first; later, the damaged tissue dries out and turns brown. These patches usually appear on the upper leaves that receive the most direct sun, while lower growth often stays green. That pattern is a strong sign the move from indoors to full sun happened too quickly.
When can tomatoes stay outside all the time?
It’s less about a fixed date and more about temperatures and conditions. As a rough guide: no frost expected, night-time lows consistently above 8 °C, and daytime temperatures at least in the low double digits. In cooler areas, it’s often worth waiting an extra two weeks or using fleece and a plastic cover.
Why this one neglected phase determines the harvest
If you skip hardening off, you may save yourself about a week and a few trips carrying seed trays. In return, you risk losing several weeks of growth - and in the worst case, losing plants altogether. Tomatoes that suffer a serious start-up shock rarely make up the difference fully. Yields are noticeably smaller or ripening is pushed back, often into the damper autumn period - exactly when fungal diseases are most active.
A few days of gradual acclimatisation therefore pays off twice: plants grow steadily from the outset, and fruits mature earlier during the more reliable high-summer weather. Anyone who tries it deliberately once will rarely put tomatoes outside without hardening them off again.
If you’re new to growing, it can be worth running a simple comparison: set one group outside immediately and harden the other group off using the nine-day plan above. After just a few weeks, the difference is usually so obvious that there’s nothing left to debate. A small springtime step can make your summer tomato harvest both safer and far more generous.

Comments
No comments yet. Be the first to comment!
Leave a Comment