
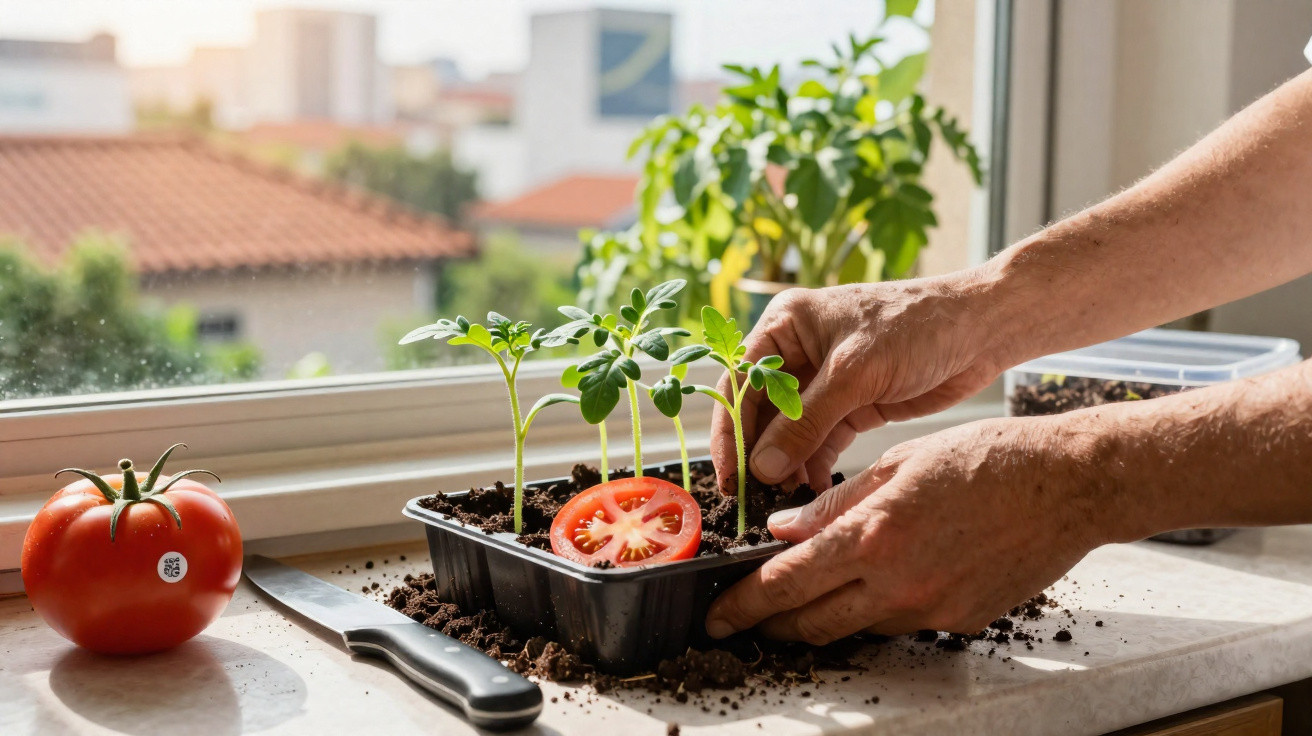
Anyone staring in disbelief at increasingly pricey fruit and vegetable shelves may not realise that the starting point for a generous harvest is often already sitting in their own fridge. A British gardening professional shows how you can turn a single tomato into a whole tray of young plants in no time at all - almost free, and without buying expensive seed.
The simple tomato-slice trick
The concept is almost absurdly straightforward: instead of purchasing tomato seed, you use the seeds already inside the fruit. The key is that you don’t have to scrape them out at all - you simply slice the tomato and lay the slices straight onto the compost.
A single tomato is enough to raise a whole mini greenhouse full of young plants - perfect for a balcony, patio or garden bed.
In a viral video, British gardening expert Simon Akeroyd demonstrates the approach using an ordinary supermarket tomato. He cuts it into several slices and places them into a plastic punnet filled with compost - the sort that grapes or berries are often sold in. These punnets usually have drainage holes in the base, which makes them ideal as a mini propagator.
Step by step: how a tomato becomes a seedling tray
You don’t need specialist equipment for this to work. Most of what you need is probably already at home.
Materials most people already have
- 1 ripe supermarket tomato (ideally a flavoursome variety)
- 1 plastic punnet with holes in the bottom (e.g. fruit or grape packaging)
- seed compost or fine multi-purpose compost
- a spray bottle or small watering can
- a bright spot on a windowsill or in a conservatory
Tomato propagation in detail
Rinse the plastic punnet thoroughly and let it dry. Leftover fruit residue can encourage mould.
Fill the punnet to around two-thirds with lightly damp seed compost, then gently firm the surface.
Slice the tomato into four to five pieces, each about 0.5 cm thick. Very hard end pieces are less suitable.
Lay the slices flat on the compost; it’s fine if they overlap slightly.
Sprinkle a thin layer of compost over the tomato slices - just enough so no fruit is visible.
Mist carefully with the spray bottle until everything is evenly moist, but without leaving standing water.
The trick works because every tomato is packed with viable seeds - you’re simply using what’s already there.
After that, place the punnet somewhere warm and bright, such as a sunny kitchen windowsill. Aim for steady warmth and avoid cold draughts.
What happens in the first two weeks
With good conditions, the first delicate seedlings often appear after around 10 to 14 days - sometimes as a dense “carpet” of tiny plants. The tomato slices gradually break down in the compost while the seeds inside begin to germinate.
At this stage, four factors make the biggest difference between success and failure:
- Light: the brighter the spot, the sturdier the seedlings remain.
- Warmth: 18–22 °C is ideal. If it’s too cool, growth slows.
- Water: keep the compost consistently damp, but avoid waterlogging.
- Air circulation: don’t seal it fully with a lid, otherwise the risk of mould increases.
If you like, you can loosely cover the punnet with cling film and pierce a few small holes in it. That helps retain moisture without trapping so much humidity that mould becomes a problem.
Pricking out seedlings: turning lots of sprouts into strong tomatoes
As soon as the seedlings develop their first “true” leaves - meaning not just the two seed leaves, but an additional pair - it’s time to move the strongest plants into their own pots.
How to prick out properly
Akeroyd advises selecting only the most vigorous seedlings. If you try to save every single one, you can end up overcrowding your balcony and beds - and often with weak plants at the end of it.
A good method is:
- Use a pencil or the handle of a teaspoon to ease gently underneath a seedling.
- Always hold the plant by a leaf, never by the delicate stem.
- Set it into a small pot of fresh compost and firm it in lightly.
- Water in, then keep it bright and warm, but away from harsh midday sun at first.
A few strong plants ultimately produce more than an overcrowded tangle.
The remaining seedlings are best added to the compost heap. That way you keep only the best plants, and you reduce the chances of disease spreading in an overfilled container.
The right timing in the German-speaking region
The start time recommended in the United Kingdom translates well to Central Europe. If you want to raise tomatoes from slices in Germany, Austria or Switzerland, use your region as a rough guide:
| Region | Start of tomato-slice propagation |
|---|---|
| Mild areas / wine-growing regions | late February to mid March |
| Central Germany / cities | early to late March |
| Higher ground / Alpine region | mid March to early April |
What matters most is that the plants are big enough to move outside in late spring, once the last frosts have passed. Until then, keep them on the windowsill or in an unheated greenhouse, and rotate them regularly so they don’t lean too strongly towards the light.
Outdoor care: turning slice-grown plants into real heavy croppers
Once nights are reliably above 5 °C, you can gradually acclimatise the young plants to outdoor conditions. Put them outside for a few hours during the day at first and bring them back in during the evening. After about a week, they should be hardened off.
The most important care points in a bed or pot
- Position: full sun, sheltered from wind, ideally against a warm house wall.
- Soil: loose, humus-rich and free-draining, with no waterlogging.
- Watering: keep evenly moist, ideally in the morning, always at the root.
- Feeding: top up every two weeks with a tomato or vegetable feed.
- Support: stakes or strings provide stability so the shoots don’t snap.
Plants that started life as tomato slices in a plastic punnet can develop into sturdy, productive plants that may produce kilos of fruit in high summer. Whether you grow them in a raised bed, a large pot on the balcony, or directly in the garden, these “slice plants” are no different later on from bought-in young plants.
Risks, limitations and a few honest pointers
As brilliant as the trick sounds, there are a few things gardeners should bear in mind. Many supermarket tomatoes come from F1 hybrids, and their offspring won’t always match the parent plant. The eventual fruit can taste a little different, be smaller, or show differences in growth habit.
Disease is another consideration. If the tomato you start with already carries fungal spores or viruses, these could, in theory, carry over into your propagation tray. If you want to minimise the risk, choose healthy, firm fruit of good quality and keep tools and containers clean.
Mould in the propagation container can also appear from time to time, particularly if the compost is kept too wet or there’s very little airflow. If that happens, remove any covering, water less, and if necessary replace the top layer of compost.
Why the tomato-slice trick is still worth it
Despite a few small uncertainties, the method appeals to many hobby gardeners because it delivers several benefits at once: it reduces the need to buy seed, saves money, reuses plastic packaging, and lowers the barrier to getting started with growing your own.
It also works well for households with children: they can help slice the tomato, place the slices carefully on the compost, and then check daily to see how their breakfast topping turns into a little jungle. It’s an easy way to build awareness of how much work goes into every piece of veg.
Experiments are part of the fun, too. You can test different varieties - such as cherry, Roma or beefsteak tomatoes - and compare which germinate best and taste the nicest. Some hobby gardeners even pair the method with other kitchen leftovers, such as pepper or chilli seeds, which can also root surprisingly easily.
Once you’ve seen a single tomato turn into a tray full of robust young plants, you may look at the supermarket differently. Suddenly, every veg shelf feels a bit like a seed aisle - and the starting gun for a very tasty summer.

Comments
No comments yet. Be the first to comment!
Leave a Comment