
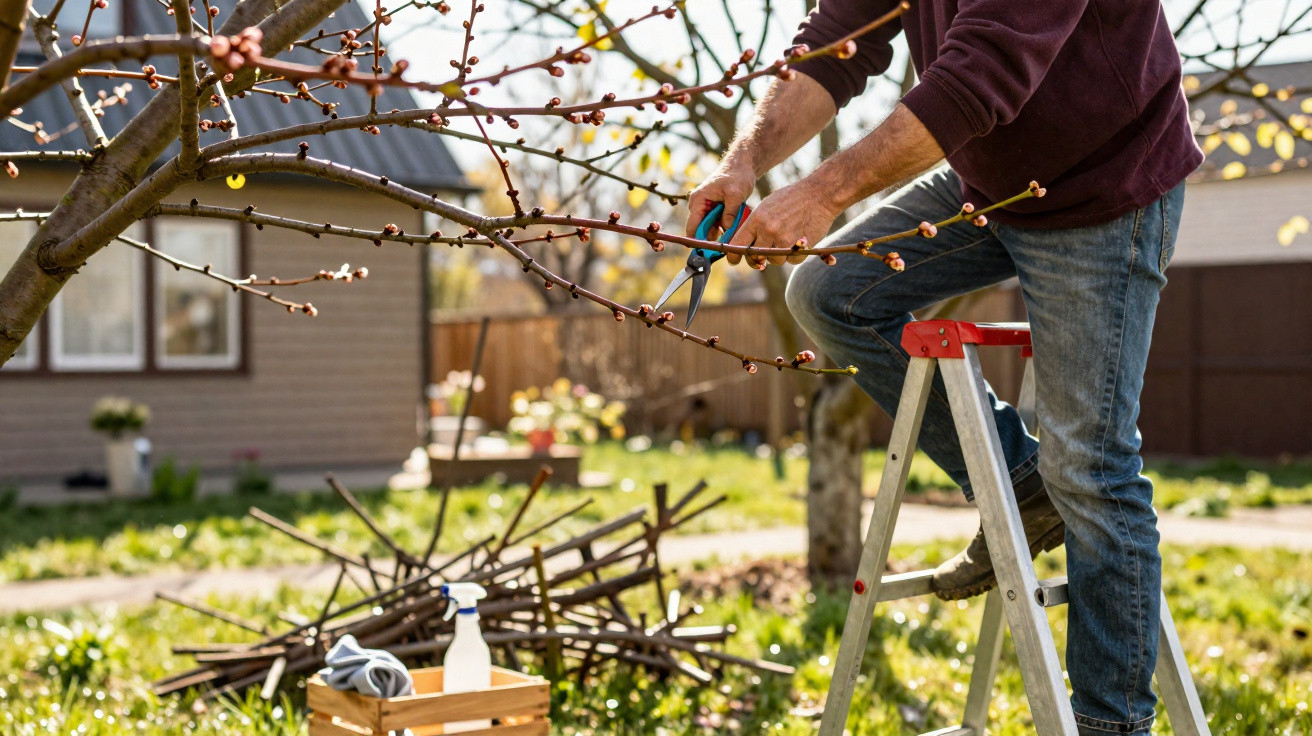
An old gardener’s trick in spring determines whether your cherry tree is laden in summer or produces only a handful of puny fruit.
Plenty of home gardeners look forward to bowls of cherries each year, only to be disappointed by a sparse crop. Often, the reason is simple: in spring the cherry tree is left entirely to its own devices. If you take one specific, straightforward step now, you help the tree channel its strength into blossom and fruit instead of wasting it on unproductive wood.
Why the right moment in spring makes all the difference
Cherry trees get going early. Before the first leaves have properly appeared, the tree is already pushing sap strongly into buds and new shoots. Seasoned gardeners take advantage of precisely this window, because it is when the tree copes best with intervention.
The ideal window: just before bud break
The best time is late winter through very early spring, when:
- temperatures are gradually becoming milder,
- the buds are starting to swell,
- but there are still no leaves, or only a few.
At this stage you can still see the entire structure of the tree clearly. At the same time, sap flow is already increasing, which helps cuts close more quickly. If you cut much later, you remove energy the cherry tree has already invested in leaves and young growth - and that reduces the harvest.
"The decisive step is to thin the cherry tree now in a targeted way so that air and light can reach the crown."
A clear view upwards: why an “airy” tree crops better
A thick, tangled crown can look vigorous at first glance. For fruiting, however, it is a drawback. Where sunlight barely reaches the centre of the tree, blossoms and fruit remain weak. Damp, shaded areas also dry slowly after rain - perfect conditions for fungal diseases.
If you look up through the still-bare crown in late winter or early spring, it becomes obvious whether your cherry tree is too closed in: if hardly any light gets through, it is time for a refresh with the pruning shears.
The old secret: freeing cherry trees from the inside
The key trick from traditional fruit-tree practice comes down to two main actions: remove crossing branches, and cut out so-called “water shoots” (also known as “gourmet shoots”) decisively.
Remove crossing branches and those that rub
Inside the crown, branches often grow that:
- point directly towards the middle of the tree,
- cross over one another,
- or chafe against each other in the wind.
These rubbing points damage the bark. Fungi and bacteria can then settle into the wounds with ease. The result is rot, dying sections of branch, and a weakened tree over time.
The rule is straightforward: if two branches are competing, only one stays. The one that is better positioned, sturdier, and growing outwards remains; the other is removed.
Water shoots: vigorous but fruitless energy thieves
Water shoots are long, steep, upright stems that shoot straight from the trunk or from thick scaffold branches. They look powerful, but they almost never produce cherries. Instead, they siphon off a significant share of nutrients that should be going into blossom and fruit.
Cut these shoots off as close as possible to their point of origin. It can feel drastic, but it noticeably relieves the tree. The energy is redirected to where the cherries will later hang - the horizontal and slightly angled fruiting shoots.
"If you remove the water shoots regularly, you direct the cherry tree’s entire strength into fruiting branches - the crucial difference between a few cherries and full bowls."
Cutting cleanly like a tree surgeon
For pruning to genuinely benefit the tree, you need decent tools and correct technique. Sharp, clean blades shorten healing time and reduce the risk of infection.
Prepare and disinfect your tools
Before you make the first cut, it pays to do a quick check in the shed. Ideally, you have:
- a well-sharpened bypass pruner for thinner branches,
- sturdy loppers or a pruning saw for thicker wood,
- alcohol (at least 70 per cent) to clean blades between trees or after cutting anything that looks diseased.
With blunt or dirty tools, you crush the wood rather than cutting it cleanly. Crushed areas heal poorly, split more easily, and effectively open the door to pathogens.
The correct cut above a bud
Whenever you cut above a bud, stick to a simple principle: cut just above it and at a slight angle. The angle should be set so rainwater runs away from the bud. If water sits there, rot can develop right where the new growth is meant to emerge.
It also matters that the bud points outwards. That way, the new shoot grows away from the centre rather than back into it. Over the years, this naturally creates an open, airy crown where light and air circulate freely.
What changes inside the tree after pruning
Straight after pruning, the cherry tree often looks lighter and more see-through. That is exactly the point: the tree needs to breathe again. Many gardeners use the removed branches to make woodchip and spread it as mulch in the garden.
The three most important effects of spring pruning
| Measure | Immediate effect | Benefit for the harvest |
|---|---|---|
| Thinning the crown | More light inside the tree | Stronger blossom formation, better-ripened cherries |
| Removing water shoots | Energy goes into fruiting wood instead of growth shoots | More fruit per branch, less “blind wood” |
| Clean, angled cuts | Faster wound closure | Lower risk of fungal and bacterial infection |
Light, air and dryness: the natural protective shield
A well-structured cherry tree lets sunshine reach the interior. The fruit ripens more evenly, develops more flavour, and colours more intensely. At the same time, leaves and branches dry far faster after rain. Fungi such as Monilia or leaf-spot diseases find this microclimate much less favourable.
"Spring pruning is basically the cheapest ‘insurance policy’ against fungal diseases - without any chemicals at all."
Practical pointers for home gardeners
If you are unsure how hard you can prune, follow an easy rule: several moderate cuts over the years are better than one severe hack-back. Cherry trees can be sensitive to drastic pruning and often respond by producing even more water shoots.
Common mistakes when pruning a cherry tree
- pruning too late in spring or even in summer,
- removing thin, fruit-bearing twigs instead of old, thick branches,
- leaving stubs rather than cutting cleanly at the point of origin,
- failing to dispose of diseased branches separately and instead leaving them in the garden.
Avoid these traps and stick to the principle of “airy rather than dense”, and you will set up reliable harvests for many years.
How often should you treat a cherry tree like this?
A larger shaping and thinning prune is ideally done every one to three years, depending on the variety’s vigour and the site. In between, a quick check is usually enough: have new water shoots appeared? Are there dead or clearly diseased branches? Remove such issues promptly so they do not spread.
If your tree has been neglected for some time, it is wiser to start gently: take out only the worst in year one, then continue improving in year two. That keeps the cherry tree vigorous without triggering a shock response of tall, fast growth.
More than pruning: what strengthens a cherry tree further
Alongside correct pruning, the tree benefits from a loose soil surface around the root zone with a light mulch layer. A thin covering of shredded branches, leaves, or grass clippings helps retain moisture, supports soil life, and gradually forms humus.
In a home garden, mineral fertilisers are rarely necessary if organic material is regularly worked in or applied. Too much nitrogen mainly drives leaf growth and water shoots - the exact opposite of what you want for a generous cherry harvest.
If you remember this old gardener’s tip and visit your cherry tree in spring with pruners and a watchful eye, you can lay the groundwork in just a few minutes for a summer of full baskets, homemade jam, and freshly picked cherries straight from the tree.

Comments
No comments yet. Be the first to comment!
Leave a Comment