
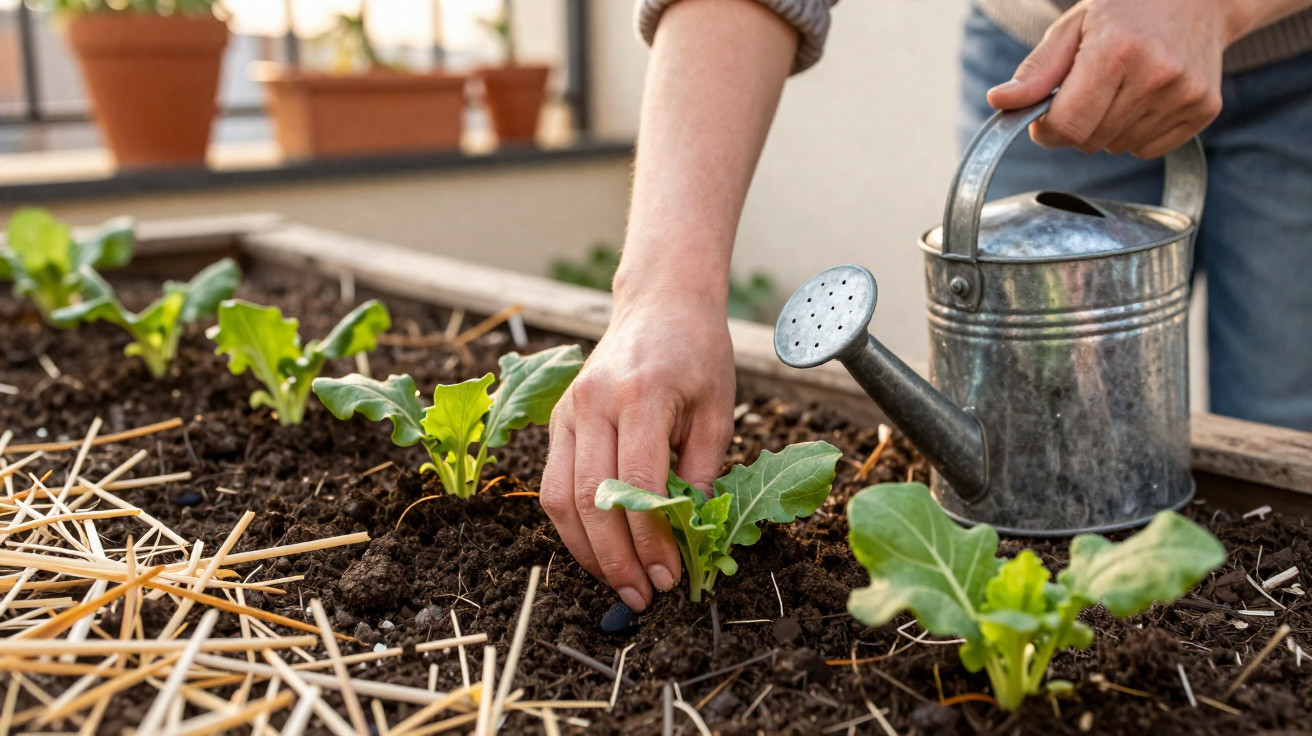
Anyone who moves tomatoes, peppers or flowers from small pots into a garden bed in spring will recognise the familiar scenario: the day before, the young plants look firm and healthy; by the next morning, they are flopped over and limp. In most cases it is not the position that is to blame, but two things that are hard to get exactly right: how much water you give, and when you give it. With one straightforward rule of thumb and a few precise steps, this notorious growth check can be avoided almost completely.
Why young plants go limp so easily after transplanting
Going from pot to soil is not a gentle “move house” for a plant - it is a genuine stress event. As you slide the plant out of its pot and lower it into the new planting hole, the finest root hairs tear.
Those tiny roots are exactly what the plant relies on to take up water. Once they are damaged, seedlings become highly sensitive to any swing in moisture levels. Many respond by pausing growth, drooping their leaves, or failing entirely.
"The real enemy isn’t the transplanting itself, but incorrect watering in the first few days afterwards."
Too little water dries out the injured roots. Too much water pushes air out of the soil and deprives the roots of oxygen. Either way, plants tend to “stall” rather than carry on growing straight away.
The magic number: how much water young plants really need
The ideal first soak: 10 litres per square metre
When professionals water-in newly planted seedlings, they work to a specific amount: about 10 millimetres of rainfall - which equals 10 litres of water per square metre. It may sound technical, but it is easy to apply.
- 1 m² of bed area = 10 litres of water
- 1 standard watering can = usually 10 litres (check the marking)
- With plant spacing of about 30 cm: roughly 1–1.5 litres per plant
This volume pushes water deep enough into the soil without turning the bed into a bog. The freshly loosened soil settles slightly, roots end up in contact with damp soil all round, and the plant can get to work immediately.
"The first watering after planting is like a ‘start button’ - it has to be right, and everything else depends on it."
Why “just a little extra” often makes things worse
Out of concern, many gardeners reach for the watering can again the very next day. That often creates a permanently wet top layer, while deeper down the soil becomes more like sludge than a well-aerated structure.
The result is predictable: plants “learn” that water is always available near the surface, so they produce very few deep roots. When a warm spell arrives, the surface dries quickly - and shallow-rooted plants collapse one after another.
Planned dry spells: how to build strong, independent roots
The finger test: only water once the top centimetres are dry
After the initial thorough watering, stick to a simple rule: do not water again until the top 2–3 cm of soil has clearly dried.
- Push a finger into the soil up to the first knuckle
- If soil no longer clings to your finger, the surface is dry
- If it still feels cool and slightly damp, it is better to wait
That short dry phase forces plants to send roots downwards in search of remaining moisture. This develops a tougher root system that copes far better with heat and brief dry periods in summer.
How daily watering can “spoil” plants
If you water a little from above every day, you effectively train plants to be lazy. Roots stay close to the surface, where moisture keeps being offered. At the same time, soil suffers from constant wetness: it loses structure, waterlogging can develop, and oxygen becomes limited.
"Too much water in a bed is often more destructive than a short spell of dry stress."
Persistently damp soil also creates ideal conditions for fungal problems, including the notorious damping-off disease in young plants. Seedlings suddenly weaken at the base and topple - often within just a few days.
Three crucial steps to make transplanting low-stress
1. Timing: transplant in the evening, not in midday sun
Planting in the late afternoon or early evening gives seedlings a real advantage. The sun is lower, evaporation drops, and plants have the whole night to adjust to the new soil.
Especially in spring, sunlight can be intense even when temperatures feel moderate. Freshly moved plants with damaged roots often cannot draw up enough water to balance what is lost through the leaves.
2. Firm the soil: close air gaps around the roots
A common mistake is filling the hole but leaving the soil too loose. That creates cavities below the surface where roots are effectively “hanging in air”.
- After placing the plant, press the soil firmly against the root ball with both hands
- Shape a shallow watering ring around the plant
- Only then apply the initial amount of water
By firming the soil, you create direct contact between soil and root ball. Water spreads more evenly, and the plant can absorb moisture from all sides.
3. Mulch layer: protect the soil, but keep the stem base clear
A thin mulch layer helps stop the ground drying out and shields it from heavy rain. It acts like a natural parasol for the soil. Suitable options include mature compost, chopped straw, or a light layer of grass clippings.
| Material | Benefit | Note |
|---|---|---|
| Straw | Good insulation, dries quickly | Apply thinly, not right up against the stem |
| Mature compost | Also supplies nutrients | Use lightly around the plant, keep the stem base clear |
| Grass clippings | Quickly available in the garden | Only a thin layer, otherwise risk of mould |
Important: the stem base - the transition between root and stem - must remain uncovered. If moisture collects there, rot and fungal diseases are much more likely.
"Mulch must never touch the stem - a narrow, clear ring around the plant works like a life insurance policy."
How this method can transform the whole vegetable garden
Less watering pressure, higher yields
If you approach transplanting like this - a defined starting volume, controlled dry phases, and targeted protection - you will need to water far less often. At the same time, plants stand more firmly, establish more evenly, and often produce earlier and for longer.
Gardeners report that tomatoes, peppers and brassicas barely “droop” at all after a tidy transplanting routine, instead looking vigorous almost continuously. Leaves stay taut, and the plants quickly put on height and bulk.
Suitable for balconies, raised beds and large gardens
The principle works everywhere: in containers, in raised beds, and in a traditional vegetable plot. In pots or balcony planters the initial volume is obviously smaller, but the approach stays the same: water in thoroughly, then wait until the top layer dries.
A thin mulch layer is particularly worthwhile in containers because the compost dries out quickly. At the same time, excess water must always be able to drain away well - otherwise the pot turns into a bath for the roots.
Background: why 10 millimetres of water works so well
The “10 millimetres” figure comes from meteorology: when a rain gauge shows 10 millimetres after a shower, that is exactly 10 litres of water per square metre. Gardeners use it because it wets the soil deep enough without overloading it.
In loose, well-prepared soil, those 10 millimetres typically soak down about 10–15 cm - precisely where young roots spread after transplanting. That zone stays moist for longer, while the surface starts to dry again. It creates the ideal balance between moisture and air in the soil, which is where roots grow best.
Anyone who sticks to these basic rules can turn delicate young plants into sturdy, productive growers surprisingly quickly - without specialist fertiliser, without high-tech kit, simply with a feel for water, soil and the right moment with the watering can.
Comments
No comments yet. Be the first to comment!
Leave a Comment