
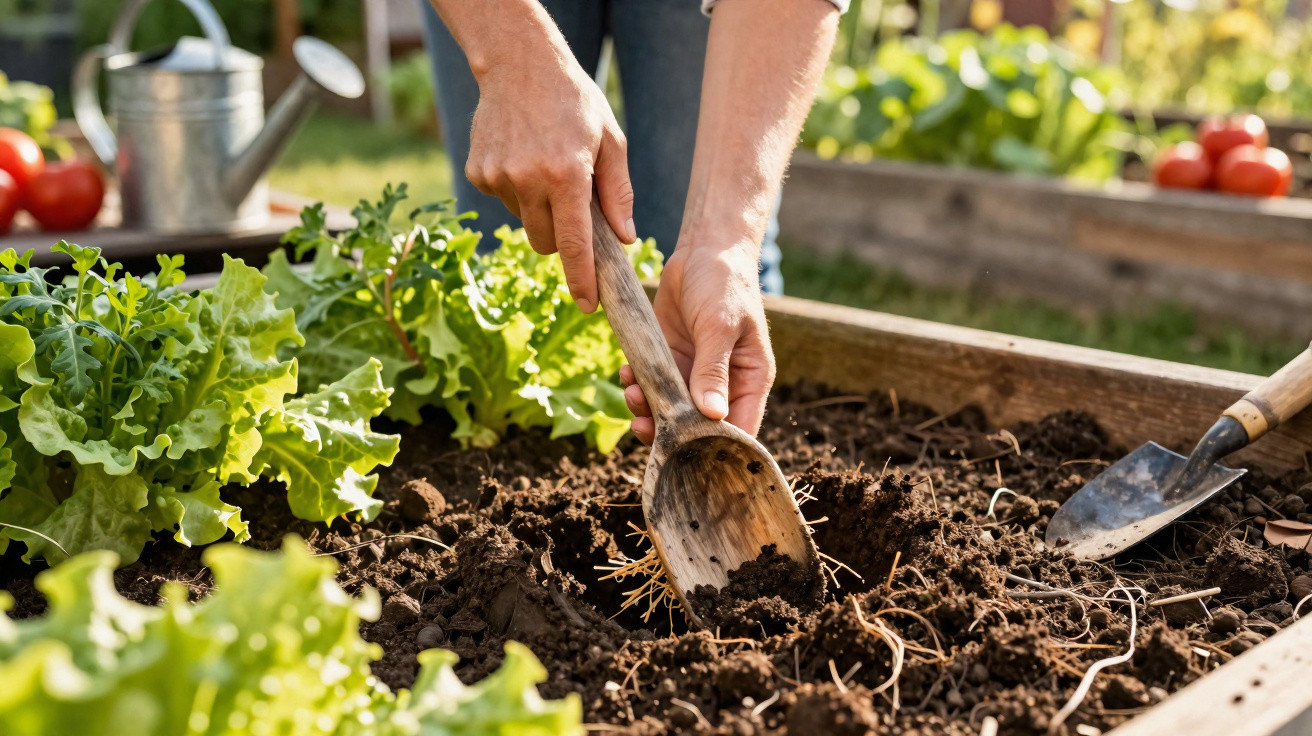
Between tomato vines, rows of lettuce and courgettes, a simple kitchen utensil is turning up in the soil more and more often: an unremarkable wooden spoon. It might look like a joke, but it is actually a practical way to get a better feel for your garden soil - without a lab, apps or pricey meters.
A wooden spoon in the bed - what’s the point?
The thinking is surprisingly sound. Wood is organic material, which is exactly what bacteria, fungi and earthworms are drawn to. If you bury an untreated wooden spoon in the ground, you are effectively offering these organisms a small “test piece”. By checking what the spoon looks like after a few days or weeks, you can read quite a lot about what is happening in the soil.
"A simple wooden spoon reveals whether the soil is alive, suffering from dryness, or suffocating in wet conditions."
In broad terms, the spoon is used for two things:
- Testing soil biology: How active are microorganisms and soil creatures?
- Indicating soil moisture: Is the root zone getting too little water - or too much?
Because the method is so visual, it is spreading quickly through gardening forums, social media and practical guides. It does not replace a professional soil analysis, but it does give you a fast, hands-on sense of what is going on beneath your plants.
How the wooden spoon test works for soil life
For the biology check, the spoon needs to be buried deeper in the bed - down where most roots sit, and where much of the soil life is most active.
Step by step: the soil test
To make the experiment meaningful, it helps to follow a simple set of steps:
- Use only a wooden spoon made from raw, untreated wood - no varnish, paint or coating.
- In the vegetable bed, dig a hole about 15 to 20 centimetres deep.
- Lay or push the spoon in horizontally or at an angle, then cover it completely.
- Mark the spot, for example with a bamboo cane.
- Leave the spoon in the ground for 30 to 60 days.
- Carefully dig it up and inspect its condition closely.
Afterwards, gardeners and professionals typically look for signs such as:
- cracks and breaks in the wood
- a softer, more fibrous texture
- dark staining, chew marks, small holes
- a musty smell or fungal growth
The more “broken down” the spoon appears, the more actively the soil is working. A spoon that looks as if it has been nibbled can be odd at first glance - but it is a positive sign.
| Condition of the wooden spoon | What it indicates about the soil |
|---|---|
| Clearly decomposed, brittle, fibrous | Very active microorganisms, living soil |
| Minor cracks, slightly softer | Decent soil biology, but room to improve |
| Almost like new, hard and unchanged | Little soil life, often compacted or exhausted |
The wooden spoon as a moisture indicator in the vegetable patch
If you do not want to wait that long, there is a second way to use the spoon: place it directly in the root zone, only a few centimetres down. Here, the main question is whether your watering and rainfall match what your plants actually need.
All you need to do is push the wooden spoon about 5 centimetres into the soil, ideally close to the roots of thirsty crops such as tomatoes, peppers or cabbage. After roughly a week, the spoon usually gives a clear signal.
"A dry, pale spoon warns of water stress; a wet, dark spoon warns of waterlogging and root rot."
Typical real-world outcomes include:
- Spoon pale and dry: too little watering, or very free-draining soil.
- Spoon dark, clammy, with mould: consistently too wet; roots are at risk of rotting.
- Spoon slightly damp, no musty smell: moisture levels are in a good range.
How to respond properly to the wooden spoon “diagnosis”
The spoon is heavily decomposed: the soil is alive, keep up the care
If you dig up a spoon that has clearly been attacked, that is good news: the soil is full of bacteria, fungi, earthworms and other helpers. They break down organic matter and make nutrients available to plants.
To maintain this fertility, gardening experts recommend:
- Apply mature compost regularly.
- Keep the surface covered with mulch year-round, for example grass clippings or leaves.
- Avoid deep digging where possible; loosen the soil instead.
- Prevent long fallow periods and rotate vegetables with catch crops.
Living soil holds water more effectively and supports demanding crops such as tomatoes, squash or cabbage more efficiently.
The spoon is intact and dry: the soil is hungry and thirsty
If the spoon stays hard and almost unchanged after weeks, it often points to a poor, low-activity site. If it is also very dry, the soil is missing not just water but also food for microorganisms.
Useful actions include:
- Review your watering routine: water less often but more thoroughly, rather than just wetting the surface.
- Add a mulch layer so moisture does not evaporate so quickly.
- Sow green manure, for example clover, phacelia or mustard.
- Work in well-rotted manure or compost - but without overdoing it.
Over time, this gives soil life more to feed on, helps it become more active, and gradually builds better structure.
The spoon is intact but damp and musty: the soil is suffocating
If the wood is largely untouched but feels wet, slimy or slightly musty, the test is pointing in a different direction: the ground is likely compacted and poorly aerated. Water lingers in the root zone and there is not enough air.
Common countermeasures are:
- Do not walk on the soil when it is very wet - this helps avoid further compaction.
- Loosen with a garden fork or a broad-tined cultivator, instead of turning the soil roughly.
- Incorporate organic material gradually to improve crumb structure.
- Divert excess rainwater or, if needed, install drainage - for instance by adding sand or coarse material in deeper layers.
This allows more oxygen back into the root area, which reduces rot and makes it easier for plants to establish.
How reliable is the wooden spoon trick, really?
The test is sensitive to weather, season and soil type. In a cold spring, microorganisms work far more slowly than in a warm late summer. A sandy garden behaves differently from heavy clay soils.
That is why repeating the experiment makes sense - in different spots and at different times. With regular checks, you can spot trends: does the spoon break down more quickly over the years? After changing your watering, does it end up less often soaking wet?
Many gardeners pair the spoon with additional observations, such as:
- Soil colour: more grey, yellowish or dark brown?
- Crumb structure: does it form stable crumbs, or mainly clods?
- Weed mix: are only a few species present, or a varied range?
- Earthworms: how many appear when you dig over a small area?
Practical tips for choosing the right wooden spoon and alternatives
Not every kitchen spoon is suitable. Varnished or painted models interfere with the test, as coatings and chemicals can slow decomposition and may release substances into the soil. The best choice is a basic, inexpensive spoon made from soft, untreated wood - ideally kept permanently for the veg bed.
If you would rather not sacrifice a spoon, you can try the same idea using other pieces of wood, for example:
- thin, untreated wooden strips
- wooden spatulas from a chemist
- narrow, raw wooden sticks from a DIY shop
Even so, the spoon still has a practical edge: its shape, surface and handle make it easy to retrieve and to assess afterwards.
The experiment is also interesting in a raised bed or a container garden. In those settings, moisture and nutrient conditions often shift faster than in a traditional in-ground bed. A wooden spoon in a pot next to a tomato can quickly show whether the compost stays wet for too long after heavy rain, or dries out too fast during heatwaves.
If you give this small experiment a try, you will soon get better at reading the subtle signals in your garden. The wooden spoon makes visible what normally stays hidden in the dark - and helps you care for your vegetable patch more precisely, rather than watering and feeding on guesswork alone.

Comments
No comments yet. Be the first to comment!
Leave a Comment