
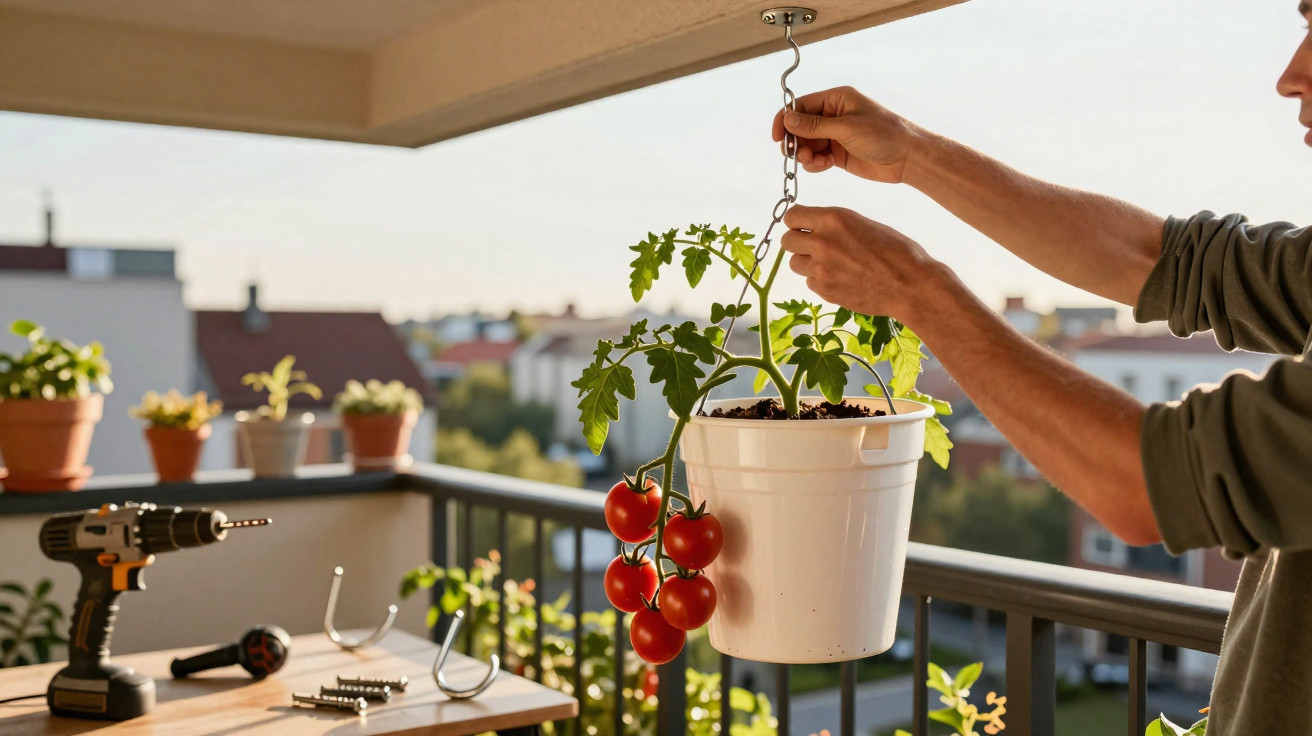
Growing tomatoes upside down in a bucket can look like another internet garden hack at first glance. In reality, it’s a genuinely solid way to save space, reduce waterlogging and create a striking feature. The catch is that a poorly planned hanging point can lead to falling plants, bent brackets or, in the worst cases, damage to the building. With a bit of forethought, those risks are easy to avoid.
Why grow upside down in a bucket? Benefits for balconies and patios
The concept sounds odd, but it works surprisingly well: the tomato grows downwards through a hole in the base of the bucket, while the compost goes in from the top. That way you free up floor space and make use of height.
- Space saving: Perfect for small balconies, narrow patios and roof terraces.
- Less contact with the ground: Fruit doesn’t sit on damp soil, so it’s less likely to rot.
- Less tying in: Many shoots naturally hang down, meaning fewer canes are needed.
- A clearer view of the plant: Pests and diseases are easier to spot quickly.
"The real key point isn’t the plant - it’s the weight of the entire bucket, including water and fruit."
If you’re only thinking about the weight of a young plant, you can underestimate things badly. It’s not until high summer that you find out what the suspension really needs to cope with.
How heavy an upside-down tomato bucket really gets
For upside-down tomatoes, people typically use 18–20 litre plastic buckets. That might sound manageable, but the combination of compost, water and fruit adds up fast.
- Compost in a 20 litre bucket: around 8–10 kg (depending on the mix)
- Water after a thorough watering: easily another 7–10 kg
- Plant with fruit: 1–3 kg, and more for heavy-cropping varieties
In real-world use, a planted bucket quickly reaches 15 to 25 kilograms. If heavy rain is forecast, or you water very generously, it can climb higher still. Fix several buckets side by side and, without noticing, you can create a serious stress test for hooks, balcony railings or roof structures.
Planning the right suspension - before you plant
A common mistake is to drill the hole, feed the tomato through, and then hang the whole thing wherever seems convenient. That’s exactly how trouble starts, because the system keeps getting heavier as the summer goes on.
"From day one, the suspension has to be designed for the final weight - not just the light start-up phase."
Finding load-bearing points on the building
Not every spot that looks handy is suitable for taking a hanging load. Common options - and the pitfalls to watch for - include:
- Gutter: Tempting, but often not designed for extra long-term loads. Brackets can bend and, in the worst case, a whole section can come loose.
- Balcony railing: Sturdy metal railings with proper fixings usually handle individual buckets without fuss. Thin, shaky railings are best not pushed to their limits.
- Wooden beam or rafter: Often a good choice in carports or under canopies - provided the timber is sound and not rotten.
- Solid wall: With heavy-duty wall plugs and suitable wall hooks, tomato buckets can be fixed very securely.
Hooks, wall plugs and chains: what matters
Standard picture hooks or thin screws won’t do. For hanging planters, you generally need hardware from the “heavy-duty” category. As a rough guide:
| Component | Suitable for | Note |
|---|---|---|
| Heavy-duty wall plugs | Concrete or solid brick walls | Very high load rating, ideal for several buckets |
| Screw-in hooks with metric thread | Ceilings and beams | Make sure the length and diameter are sufficient |
| Metal chains | Height adjustment, multiple buckets | Check the safe working load per chain link |
| Carabiners | Quick on/off hanging | Verify the manufacturer’s load rating |
A trade rule of thumb: the suspension should safely handle at least double the expected load. So if one bucket may reach 25 kilograms, hooks, plugs and chain should be rated well above 50 kilograms.
Preparing the bucket itself safely
The bucket matters too. Thin-walled DIY-store buckets can deform or split under load, especially if they hang from a single handle.
Choosing sturdy buckets
Good options that tend to hold up well are:
- Builder’s buckets with a reinforced rim
- Mixing tubs or mortar buckets (often particularly thick-walled)
- Food-grade catering buckets with strong carrying handles
The hole the tomato grows through should be cut cleanly rather than torn. Sharp edges can damage the plant and can also encourage cracks in the plastic.
Reinforcing the bucket’s hanging points
If you want to be extra cautious, spread the load over more than one fixing point:
- Run a metal handle through solid eyelets, secured on the inside with large washers.
- Attach three or four short chains to separate hooks around the rim, then bring them together at the top into a single ring.
- Don’t rely on an old, rusty handle - metal fatigue often only shows up when it’s already too late.
"The more evenly the bucket hangs, the lower the risk of the plastic warping or a handle tearing out."
Practical day-to-day safety checks
Before planting for good, it’s worth doing a quick load test. Fill the bucket with water and hang it up briefly. You’ll quickly see whether anything bends, shifts or feels unsafe.
- If the hook noticeably wobbles, switch to a stronger screw or fixing.
- If paint cracks on the balcony structure or timber, the element may be overloaded.
- Creaking sounds from a gutter are a warning sign - choose a different fixing point.
During the season, a quick check each time you water pays off: are the wall plugs still tight? Has the bucket developed any splits? Has a chain stretched or a carabiner started to open? Catching issues early prevents failures.
Which compost mix and varieties are suitable
Weight depends heavily on what you fill the bucket with. Straight garden soil becomes very heavy and compacts quickly. A better approach is a light, open mix of tomato compost, a little composted organic matter, and a structural additive such as crushed expanded clay (LECA) or perlite.
For upside-down hanging systems, medium-sized, productive varieties are usually the best match:
- Bush tomatoes with compact growth
- Cherry tomatoes that carry lots of small fruit
- Robust varieties with firmer skins that are less prone to splitting
Very heavy beefsteak tomatoes can swing more in the wind, putting extra strain on the suspension. In that case, you’ll need particularly strong fixings or a sheltered location.
Risks many people underestimate
Beyond simple weight capacity, there are a few everyday side effects that matter:
- Wind load: A large bucket behaves like a pendulum. In strong gusts it can swing hard, jolting the hook.
- Rainwater: Open buckets can also fill from above. An overflow hole just below the rim helps prevent excess weight.
- Dripping water: When watering, water drips down. Avoid placing the bucket above delicate decking boards or outdoor seating.
If you live in rented accommodation, check whether you’re allowed to drill into the façade or ceiling. Damage to insulation systems or gutters can become expensive very quickly.
How to combine the method with other ideas
Many gardeners don’t stop at tomatoes and mix different crops in the same area. Above the tomatoes, you can mount herb boxes or small hanging baskets that also provide a bit of shade. Under the buckets, hardy container plants that tolerate occasional drips can work well - lavender or Mediterranean herbs, for instance.
Another approach is to hang several tomato buckets from a single sturdy crossbar, for example between two wooden beams. This creates a kind of “tomato rail” that’s practical and visually striking. Treat these builds like a small shelving system: use sound structural judgement, solid materials, and a clear plan before you fit the first hook.
Comments
No comments yet. Be the first to comment!
Leave a Comment