
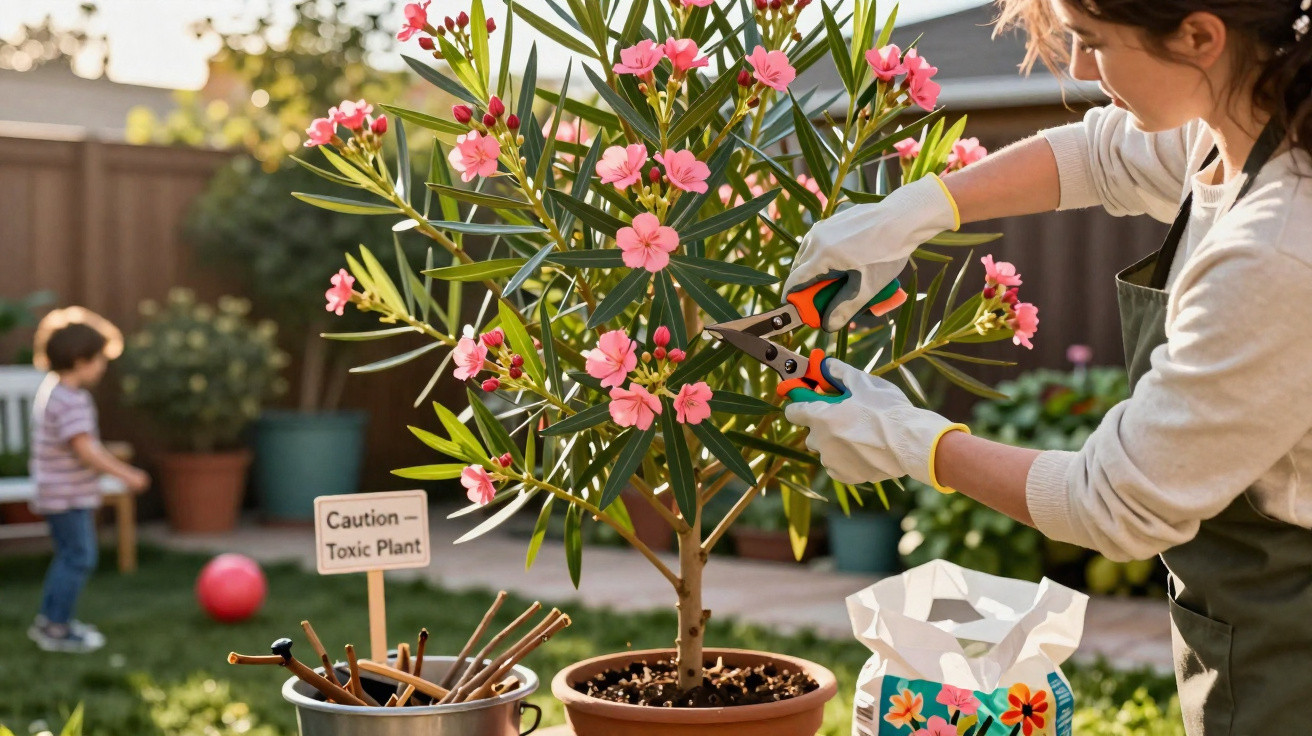
Oleander is a dream shrub for anyone who wants a touch of Mediterranean holiday atmosphere on the patio or balcony. Its evergreen leaves and abundant flowers in pink, white or red can make it feel like a quick trip to the Med. If you want the plant to keep flowering properly through summer, the way you prune in spring matters far more than many people realise.
Why spring pruning decides your summer flowering
Oleander produces most of its flowers at the tips of the current year’s young shoots. Pruning well encourages plenty of strong, well-lit new growth - and later, the buds sit right at the ends of those shoots.
"If you prune too radically in spring, you remove exactly the parts where most flowers would form later."
The key is finding the right balance: you want to refresh the shrub and keep it compact and healthy, while preserving as many developing bud points as possible. In most cases, a gentle approach is enough:
- remove dead or frost-damaged wood
- take out thin, weak shoots and any that grow inwards
- shorten the remaining branches by only about a third
This keeps enough shoot length - and therefore enough bud potential - while stimulating vigorous side shoots. That combination is what later delivers a dense, long-lasting display from June right through to autumn.
The best time in spring - it varies by location
Oleander thrives on warmth and is sensitive to hard frost, so the ideal pruning date depends very clearly on where your garden or balcony is.
Mild regions and sheltered spots
If you live in a mild area near the coast, or in an urban location with little frost, you can usually start earlier. A good window is roughly mid-March to the end of April. By then the worst frosts have typically passed, the plant is moving into its growth phase, and pruning cuts close up quickly.
Pruning during a cold snap carries a risk: freshly cut shoots are even more vulnerable to frost damage. It is better to wait for a few frost-free days before you tackle the shrub.
Colder regions and container plants
Further inland and at higher elevations, everything shifts slightly later. In these areas, late March into April is often suitable, depending on conditions. It is worth checking the longer-range forecast so a cold spell does not hit straight after you prune.
If your oleander is in a pot and has overwintered indoors - in the house, garage or an unheated greenhouse - many gardeners prune soon after moving it back outside. Once the plant is back in the light and fresh air and the first new buds begin to show, a moderate maintenance prune is usually a good idea.
"It’s better to save radical rejuvenation pruning for autumn or for years when you can do without an abundant display of flowers."
Step by step: how to prune oleander in spring
Safety first - oleander is highly toxic
Oleander may look harmless, but it is one of the most toxic ornamental plants you can grow. Every part of the plant contains toxins, including the milky sap released when you cut it. For sensitive people, direct skin contact can cause irritation.
- always wear gloves
- wear long sleeves
- clean tools after finishing
- wash your hands thoroughly with soap
Pets and children should not be left unsupervised near the clippings while you work. Put the cut branches in general waste or the food-and-garden-waste bin (where accepted locally) - not on the barbecue and not on a bonfire.
Basic care: remove diseased and dead shoots
Start with a quick health check of the shrub. First, remove anything that is clearly damaged:
- Cut back any blackened, brown or mushy shoot tips into healthy wood.
- Remove completely dried-out, grey branches right down at the base.
- Cut out branches with spots or signs of fungal disease generously.
This helps stop problems spreading. At the same time, it allows more light into the plant, which supports healthy new growth.
Opening up the crown: get air and light into the centre
Over time, oleander tends to become very dense while going bare inside. For strong flowering, it needs air movement and sunshine reaching into the shrub.
In the second step, remove:
- shoots that cross and rub against each other
- branches growing inwards towards the centre
- a few very old, thick stems right at the base to make room for younger growth
Aim for a looser structure where you could still reach about a hand’s width into the crown. Leaves then dry faster after rain, which helps reduce the risk of fungal disease.
Fine pruning: shorten shoots only moderately
Now you move on to shaping. Reduce the remaining healthy shoots by no more than a third. The cut itself also matters:
- cut just above an outward-facing bud point
- angle the cut slightly so water runs off
- avoid crushing the wood - use genuinely sharp tools
This encourages outward growth so the shrub stays open and freestanding, rather than growing inwards and shading itself.
"The more you cut back in spring, the fewer flowers the oleander will show in the same summer - but it will put on stronger growth."
Hard pruning: when cutting back to 30–50 centimetres makes sense
Sometimes there is no real alternative: after a harsh winter, many oleanders are almost completely killed back above ground. Very old specimens can also end up with bare, woody stems and only produce growth at the very top.
In these situations, a severe cut back to 30–50 centimetres above the ground can be an option. The plant will usually take a year off from impressive flowering, but it can then push out fresh, vigorous new shoots from the base.
If you choose this tougher method, focus on good aftercare:
- high-quality compost for container plants, or free-draining, nutrient-rich garden soil
- from spring onwards, regular feeding - ideally with a dedicated oleander fertiliser or a flowering-plant feed
- plenty of water, without allowing waterlogging
Care after pruning: how to support flower formation
After a successful spring prune, oleander moves into a period of intense growth. A few practical steps help steer that energy into flowers rather than just foliage.
| Measure | Effect on the plant |
|---|---|
| Regular watering | prevents stress and promotes even growth |
| Targeted feeding | supplies nutrients for bud formation and plentiful flowers |
| Sunny position | ensures strong colours and a long flowering period |
| Removing spent blooms | encourages fresh buds and keeps the shrub looking tidy |
Oleander likes it sunny and warm. A spot in full sun against a house wall or on a south-facing patio usually gives the best results. If the plant sits too much in shade, even excellent pruning will still lead to disappointing flowering.
Common mistakes when pruning oleander - and how to avoid them
Many cases of poor flowering can be traced directly back to errors made during spring pruning. Typical pitfalls include:
- pruning too late, when buds are already clearly visible
- shortening every single shoot drastically in spring
- cutting in frosty weather or immediately ahead of a cold spell
- using dirty tools that introduce disease into fresh wounds
Keep these points in mind and you will be far closer to the abundant display you want. When in doubt, prune a little less and rejuvenate the shrub gradually over two to three years.
Oleander toxicity and a family garden - what you should know
Many gardeners hesitate because oleander is poisonous. That concern is understandable, but it does not automatically mean you should avoid the plant. In homes with small children or inquisitive pets, choose a position that is not in the main play area - for example away from a sandpit, or raised up on the terrace.
When pruning, collect all clippings straight away. If you are sensitive to plant sap, you can also wear protective goggles to prevent splashes reaching your eyes.
Practical tip: planning pruning, repotting and feeding sensibly
Many hobby gardeners wonder how to time pruning, repotting and fertilising without putting the plant under too much strain. For container-grown oleander, a proven order is:
- Late March / April: bring the plant out of its winter quarters and do a quick check.
- Immediately afterwards: lightly prune and remove any frost damage.
- Next: if needed, move it into a slightly larger pot with fresh compost.
- After one to two weeks: begin regular feeding.
Following this sequence gives the oleander time to settle into new compost after pruning, and then to grow strongly once nutrients are available. That way, the effort you put in during spring is far more likely to translate into a dense, colourful curtain of flowers a few months later.






Comments
No comments yet. Be the first to comment!
Leave a Comment