
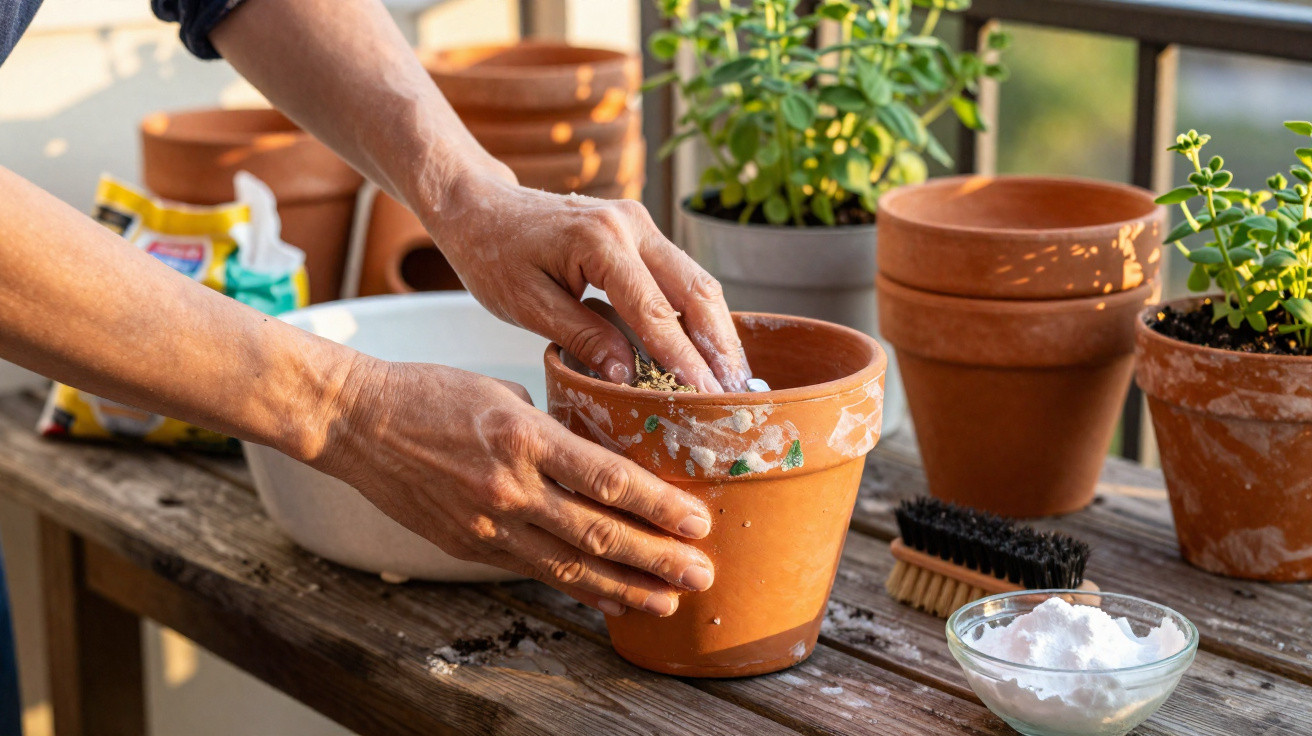
Old clay pots often build up stains, whitish crusts and leftover soil, which can spoil their look and also affect plant health. With a few straightforward steps, you can revive these containers, lower the chances of pests and fungal problems, and bring them close to their original appearance, helping them last much longer in the garden.
How to assess the condition of old clay pots
Before you start any kind of restoration, take a close look at the clay pot’s overall condition. Deep cracks, loose sections or structural breaks may make it unsafe to use and can even lead to the pot splitting after you replant.
In many situations, though, what you can see on the surface is simply mineral build-up, ingrained dirt and organic residue. These external marks are usually reversible and can be lifted with targeted cleaning methods that are gentle on the clay.
How to clean and restore clay pots step by step
Restoring old clay pots begins by clearing out all soil and any dried roots. Doing this first makes it easier to spot stains and crusts and understand the true state of the material, while also allowing water and mild soap to reach the surface properly.
After that initial clear-out, it helps to follow a basic, well-structured routine to refresh the pot:
- Dry scrub first: use a stiff-bristled brush to loosen soil and any flaking material.
- Wash with water and mild, neutral soap: soak or wet the pot, then scrub with the brush, paying extra attention to the inner and outer rims.
- Rinse thoroughly: wash off every trace of soap so nothing is left behind to interfere with the soil later.
- Air-dry in the shade: let the pot dry naturally in a well-ventilated spot before moving on to the next steps.
This first round of care restores some of the clay’s natural look and makes it clearer which marks need a more specific approach, such as white deposits or dark patches of mould.
How to remove stains and crusts without damaging the clay
The most frequent marks on old clay pots are white stains from mineral salts and darker areas caused by mould or algae. To tackle these issues, you can rely on simple household options-while taking care not to soak the clay in harsh products.
Useful, low-risk ways to lift stains and crusts include:
- Mild acidic solutions: combine water with vinegar or lemon juice to help break down salt deposits on the surface.
- Repeated brushing: apply the solution and scrub with a firm brush, reapplying as needed.
- Longer soaking: for very stubborn crusts, leave the pot submerged for a few hours in a bucket of water and vinegar.
- Mould removal: use very diluted sanitising solutions, rinse completely afterwards, and allow the pot to dry in the sun.
How to prepare the cleaned clay pot for replanting
Once they are clean and free of residue, restored clay pots need a little preparation before you add fresh compost. This helps ensure good drainage, cuts down the risk of disease, and makes the most of the clay’s natural porosity, supporting healthier roots.
Check that the drainage hole is clear, then build a layer of small stones, broken tile pieces or expanded clay, and cover the opening with a shard of pottery or a fine mesh screen. With the pot dry, sanitised and structurally sound, all that’s left is to choose the right growing medium for the plant you want and begin a new growing cycle-keeping the rustic charm of clay for many years.

Comments
No comments yet. Be the first to comment!
Leave a Comment