
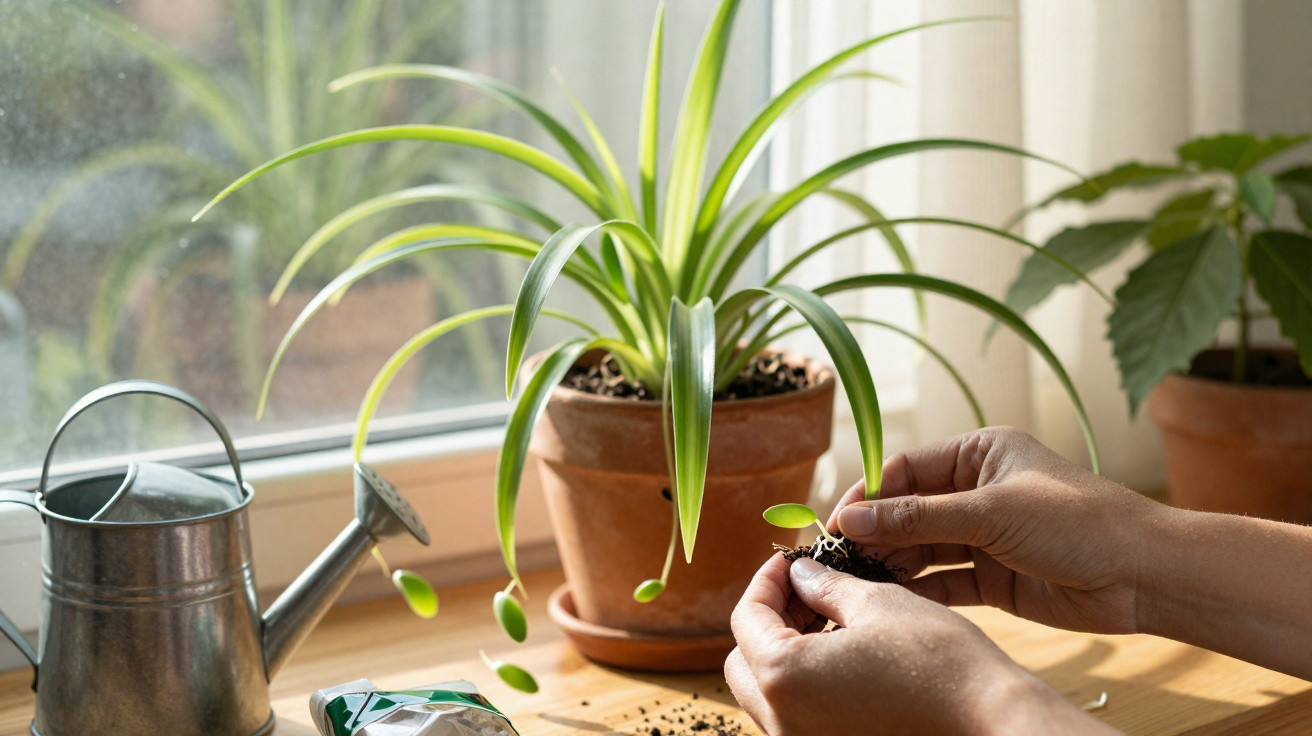
With a few well-chosen tweaks, you can practically coax it into “having babies”.
Plenty of houseplant growers dream of a hanging basket with spider plant plantlets dangling down in long cascades. In real life, you often end up with a perfectly healthy clump of leaves on the windowsill - but not a single “baby”. How can that be, when this species is known for being easy-going? The explanation usually comes down to three care levers that steer the plant specifically towards flowering and runners.
Why your spider plant still isn’t producing plantlets
A spider plant’s “babies” are tiny plantlets that develop at the ends of long, arching stems. Those stems typically appear after the plant flowers, producing small, understated white star-shaped blooms. If no stems form, there won’t be any young plants either.
One common myth is that some plants are “male” and therefore can’t produce plantlets. That isn’t true. The species has bisexual flowers and also multiplies through the young plantlets that form along the stems.
In most cases, a spider plant without plantlets is simply too young, too comfortable, or sitting in too little light.
The same three causes come up again and again:
- Age: Plants under about a year old put their energy mainly into leaf growth.
- Light: If the spider plant lives in shade all the time, it may survive, but it will produce few (if any) flower buds.
- A “luxury life” in the pot: Lots of space and lots of fertiliser encourage leaves, not the production of plantlets.
So start with an honest check: how old is the plant really, where is it positioned, and how generous have you been with pot size and feeding?
The most powerful lever: light and real darkness
Chlorophytum comosum originates from bright areas that aren’t in full, harsh sun. That’s exactly what it prefers on a windowsill too.
Bright, but indirect light
A good spot is:
- right in front of an east- or west-facing window, or
- set back slightly behind a south-facing window, with light protection from strong midday sun.
You can usually spot low light quickly: the leaves look dull, the variegation of striped varieties fades, and new leaves tend to stay narrower. In that situation the plant will “get by”, but it switches to economy mode and largely skips flowering.
Why genuinely dark nights matter
When it comes to producing runners, the spider plant is sensitive to day length. What matters is a period with fewer than twelve hours of strong light per day, paired with nights that are truly dark.
In practical terms:
- Put the plant at a very bright window for three to four weeks.
- After sunset, avoid constant exposure to bright ceiling lights directly above the plant.
- If you need lights on in the evening, use a curtain or choose a position that isn’t right in the room’s brightest zone.
Around three weeks of intense but time-limited light along with dark nights is often enough to trigger the first flowering stems.
Pot size and nutrients: a spider plant needs a little “stress”
Many people are too kind: they pot their spider plant straight into a large container and feed it generously. If your goal is plantlets, that approach works against you.
A slightly snug pot acts like a starting signal
Spider plants produce thick storage roots that hold water and nutrients. Once the root system has properly filled the pot, the plant effectively “realises” space is tightening up. At that point it makes sense - from the plant’s perspective - to invest in offspring.
Here’s how to create that situation:
- Repot only when roots are growing out of the drainage holes or the compost is almost completely displaced.
- When you do repot, move up by one pot size only - not a huge new container.
- Use a loose, structure-stable mix with a pH of about 6.0–6.5, and avoid waterlogging.
Healthy, slightly plump storage roots are the foundation for lots of stems. They keep the plant supplied when it channels energy into flowers and plantlets.
Go easy on fertiliser
Heavy feeding typically produces lots of leaves, but rarely lots of plantlets. If you want a “baby shower”, moderate feeding is enough:
- From spring to late summer, apply a lightly diluted fertiliser for green houseplants about every four weeks.
- In autumn and winter, feed at most every six to eight weeks - or stop altogether.
- Never fertilise dry compost: water so it’s lightly moist first, then feed.
The 3-point plan for a spider plant full of babies
With a simple routine, you can tip the balance towards plantlets in just a few weeks.
1. Quick check of the plant and pot
Gently lift the plant from its pot:
- Is it younger than a year? Then it may simply need more time.
- Are the roots dense and pale, but not mushy? Ideal.
- Is there still lots of loose compost with few roots? Then the pot was likely too large.
Put it back into the same pot, or - if it’s heavily rooted - into a container that’s only slightly bigger. Make sure there’s a drainage hole and a saucer, with no standing water.
2. Adjust position, light and temperature
Move the plant right up to a bright window where it gets several hours a day of strong, preferably indirect light. A typical indoor temperature between 15 and 25 °C is ideal. Long-term draughts and a spot right by a radiator are best avoided.
For around three weeks:
- Daytime: no more than twelve hours of strong light.
- Evening: only subdued light near the plant.
- Nights: as dark as a normal bedroom - no constant glow from a TV or LED strips right next to it.
3. Fine-tune watering and feeding
A spider plant’s storage roots tolerate brief dry spells far better than waterlogged compost. A straightforward routine helps:
- Water when the top layer of compost (about 1 cm) feels dry.
- Water a little less often in winter as demand drops.
- Reduce feeding once your focus is on plantlets.
Over time, curved flowering stems appear, followed by small white flowers and then the plantlets you’re after at the ends of the shoots.
How to propagate the plantlets correctly
As soon as the small plantlets show a few roots or clear root nubs, you can use them to start new pots. Three methods are particularly reliable:
- Pot up directly: Cut off the plantlet and place it into lightly moist compost; keep it in a bright spot, but not in harsh midday sun.
- Root in a glass of water: Stand the stem with the plantlet in a glass so only the root area sits in water, then pot it up after a few days to a few weeks.
- Use a pot underneath: Place a small pot of compost beneath the still-attached plantlet, rest it on the surface, and only cut it from the mother plant once you can see it has rooted.
With this “miniature nursery”, you can quickly turn one established pot into a starting point for lots more plants - perfect for gifting or for other rooms in the house.
Background: why stress pushes plants to make plantlets
For many houseplants, a small, controlled amount of stress - such as a tight pot, slightly limited light, or shorter days - shifts energy away from pure growth and towards reproduction. The spider plant shows this pattern especially clearly.
Its thickened roots store not only water but also various nutrients. Studies describe them as rich in fibre and minerals. For day-to-day care that doesn’t matter much to us, but for the plant it means this: it can conserve energy and later invest in flowers and stems when conditions suggest a slight risk.
Common mistakes that stop plantlets forming
Finally, a quick look at pitfalls that crop up frequently:
- All-night office lighting: The plant sits under fluorescent lights late into the night, so the day-length signal never kicks in.
- A large designer pot plus lots of fertiliser: Great foliage, but few to no flowers.
- Compost that’s constantly wet: Roots rot, the plant struggles to survive, and it has no reserves for plantlets.
- Giving up on young plants too soon: Under a year old, the “babies” often simply haven’t arrived yet - even if everything else is right.
If you keep these points in mind and stick to the 3-point plan, there’s a strong chance that within a few months an unremarkable spider plant can turn into a hanging curtain of young plants - no exotic tricks required, just targeted care.

Comments
No comments yet. Be the first to comment!
Leave a Comment