
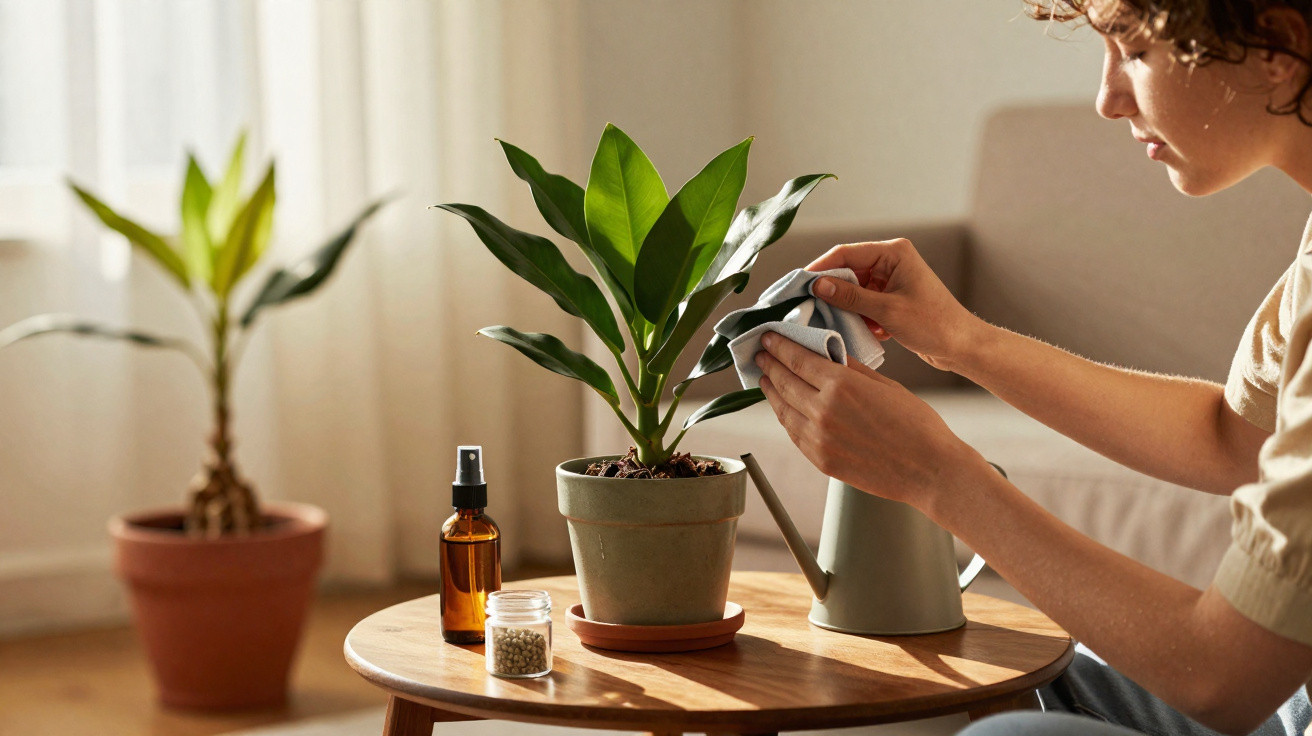
Right now is when it’s decided whether your ZZ plant will really take off this year - or just tick along.
The Zamioculcas, more commonly known here as the ZZ plant, has a reputation for being almost indestructible. That’s exactly why many people leave it where it is and more or less forget about it. But in March it moves into its active growing season - and if you take a few simple, purposeful steps now, you can expect a noticeably stronger, denser and glossier plant by autumn.
What makes the ZZ plant so special
Zamioculcas zamiifolia originates from the dry regions of East Africa. In its native habitat, its tuber-like rhizomes sit below the soil surface and store water, while the fleshy leaves are thick, deep green and naturally shiny.
| Latin name | Zamioculcas zamiifolia |
|---|---|
| Common name | ZZ plant, Zamioculcas |
| Size | About 50–100 cm tall, 40–60 cm wide |
| Position | Bright, indirect light to partial shade, no scorching sunshine |
| Temperature | At least 12 °C, indoor plant only |
| Leaves | Dark green, thick, long-lasting, natural sheen |
If you wake your ZZ plant up in March with six simple steps, you’ll enjoy fresh, strong shoots for months instead of long, weak stems.
1. More light - without sunburn
The ZZ plant is often labelled a shade plant, but in practice it does best in bright, indirect light. Spring is the perfect time to fine-tune its spot.
- Move it closer to an east- or west-facing window, ideally behind a light curtain.
- Shift the pot 20–30 centimetres closer to the light every two to three days, rather than changing its position suddenly.
- Watch the leaves on the window side: pale yellowing or brown patches are a sign the sun is too strong.
If you put it straight into harsh south-facing sun, you risk scorched foliage. A good benchmark is a place where you can comfortably read during the day, without direct sunlight beating down on the plant.
2. Leaf care: less dust, more shine
Over winter, dust builds up on the leaves. That reduces how much light the plant can use and weakens it for no good reason.
In March, it pays to clean it thoroughly but gently:
- Wipe each leaf with a soft microfibre cloth or a lightly damp (well-wrung) sponge.
- Avoid leaf-shine sprays - they leave a greasy film and can block the pores.
- Skip rough kitchen roll, as it can scratch the surface.
A healthy Zamioculcas shines on its own. If the sheen has faded, the usual causes are dust, unsuitable light, or soil that’s too wet - not a lack of spray.
3. Watering in spring: check often, water rarely
In March, increased light and slightly warmer conditions mean more evaporation. Even so, the ZZ plant still needs far less water than many people assume.
The most important spring rule: check with your finger more often than you reach for the watering can.
Here’s how to land on the right watering rhythm:
- Push a finger or a wooden stick 2–3 cm into the compost.
- If soil clings to it, or it feels cool and damp, wait longer.
- Only water once the top layer is clearly dry.
In typical indoor rooms, watering about every 10–15 days is usually enough. Cold, wet compost encourages rhizome rot - and once those rhizomes turn soft, the plant is often beyond saving.
4. Starting fertiliser: small amounts, but consistently
As new growth begins, nutrient demand rises. However, Zamioculcas comes from nutrient-poor soils and thrives with very little feed.
- Use a liquid fertiliser for foliage houseplants.
- Apply half the dose recommended on the bottle.
- Feed every three to four weeks via the watering can - from March to October.
- Never fertilise bone-dry compost, as it can damage the roots.
Too much fertiliser leads to long, soft, unstable shoots. The aim is short, sturdy stems with tightly spaced leaflets.
5. Check the roots and repot correctly
In spring, it’s tempting to refresh every houseplant with new compost. The ZZ plant works differently: it generally prefers being slightly pot-bound.
A quick check in March is enough:
- Gently squeeze the pot and lift the plant out briefly.
- Inspect the rhizomes: firm and pale, with some compost between them, is ideal.
- Clearly visible soft or brownish areas indicate waterlogging - repot into drier compost immediately and water more sparingly in future.
Repotting is only necessary if:
- the plastic pot is visibly bulging or warped,
- the compost is completely dry again after just two to three days,
- roots are growing out of all the drainage holes underneath.
If that’s the case, choose a new pot that’s only 2–3 cm larger in diameter. A thick drainage layer of expanded clay pellets or gravel is essential, along with a loose, free-draining houseplant compost mix.
6. Spring tidy-up for shoots: remove, rotate, observe
The ZZ plant produces new growth from its rhizomes, not from old stems. Cutting stems short won’t make it bushier - it simply leaves bare stumps.
A more effective “haircut” in March looks like this:
- Remove yellow, mushy or badly damaged stems with a clean, sharp knife or secateurs, cutting right down at the base.
- Turn the pot by a quarter turn once a month so every side receives similar light.
- Treat young, light-green, slightly translucent new shoots as a positive sign that conditions are right.
If, instead, it produces very few new shoots and existing stems stretch towards the window, the issue is usually lack of light. In that case, move it a little brighter again.
Common spring mistakes - and how to avoid them
Most ZZ plant problems come down to a few familiar errors:
- Constantly damp compost: causes rhizome rot, floppy growth and yellowing leaves.
- Full midday sun through glass: leads to brown patches and scorched tips.
- Draughts and cold: below 12 °C growth slows dramatically.
- Over-sized pots: large volumes of compost stay wet for too long and the roots “suffocate”.
If you correct these habits in March, you prevent a lot of trouble later on. Healthy roots and a well-chosen position matter more than any specialist fertiliser.
Why the ZZ plant is perfect for busy people
This plant is especially forgiving for anyone short on time or without a “green thumb”. Thanks to its water-storing rhizomes, tough leaves and tolerance of partial shade, it suits offices, hallways and living rooms.
Even so, it responds clearly when the basics are right: more light and the correct amount of water lead to more compact growth, deeper leaf colour and more new shoots. If you pay attention, the first pale new growth in April will show how well your March routine has worked.
A few extra pro tips for even better results
If you want to fine-tune your ZZ plant care a little further, these details help:
- Humidity: it copes well with dry central-heating air, but benefits from occasional airing - without draughts.
- Water quality: lukewarm, left-to-stand tap water or filtered water helps reduce limescale marks on the compost surface.
- Grouping pots: a cluster of two or three ZZ plants in different sizes looks particularly decorative and can help smooth out small care mistakes.
If you stick to these six spring steps, you can turn the famously “unkillable” office green plant into a real statement piece for the living room - with rich green leaves, clean lines and steady growth right through to autumn.



Comments
No comments yet. Be the first to comment!
Leave a Comment