
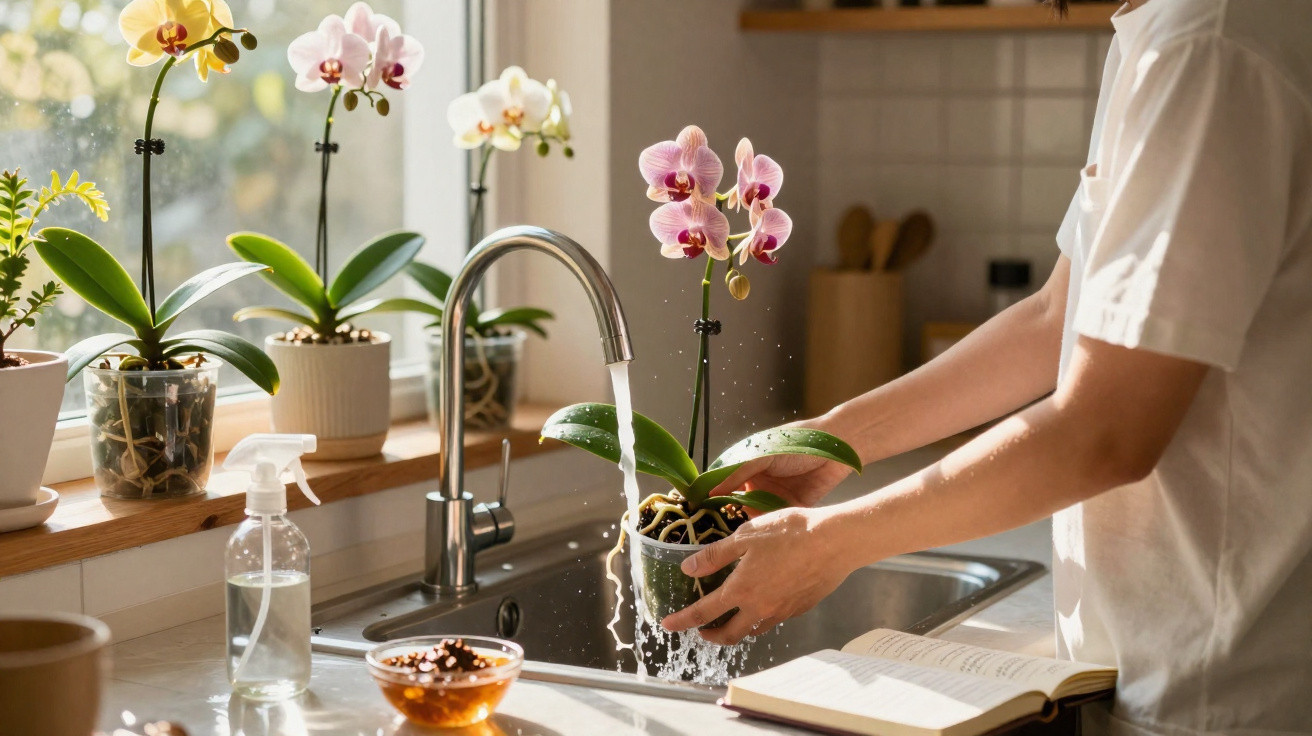
Anyone who keeps a Phalaenopsis or other indoor orchids at home will recognise the pattern: for weeks they look spectacular in the living room, then one bloom after another drops to the floor. What you’re left with is a green plant that seems to “just sit there” for months. This is exactly when many orchids end up in the bin - completely unnecessarily. With a few simple tweaks based on the plants’ natural habitat, flowering can very often be encouraged again.
Why so many orchids are thrown away far too soon
The most common misunderstanding is this: once the flowers have gone, people assume the orchid is unwell or has reached the end of its life. In reality, it’s usually simply taking a resting phase. Green leaves and firm roots are a clear sign the plant is still active.
Most “dead” orchids are actually perfectly healthy - they just need better conditions to form buds again.
In DIY shops and supermarkets, orchids can look as if they bloom continuously. At home it becomes obvious: that intensive flowering doesn’t last forever. Many varieties bloom in waves, with pauses in between. If you understand these natural cycles, you’ll throw away far fewer plants - and save money.
Less fertiliser, more success: what orchids really need
Indoors, orchids are often pushed into a kind of nutrient coma. People fertilise “by feel” - and that is usually far too much. Many species originate in tropical forests, growing on trees and receiving only small amounts of nutrients. There, air, light and humidity matter far more than rich feeding.
What happens when you over-fertilise
Regular heavy feeding can trigger several issues at once:
- salts from fertiliser build up in the potting medium
- fine roots become damaged or “burnt”
- the plant puts energy into leaves rather than flowers
- the risk of root rot increases
A clear warning sign is a white crust on the bark mix or along the rim of the pot. That indicates fertiliser salts have already accumulated.
A fertilising approach that supports flowering
A minimalist routine tends to deliver more blooms:
- fertilise only during the growth period (spring to late summer)
- apply a very weak feed every two weeks, rather than a strong dose occasionally
- use specialist orchid fertiliser at a much lower concentration than stated on the label
- every third watering, use plain water only to flush out salts
Some plant enthusiasts also rely on very gentle home remedies, such as heavily diluted milk (a few drops in the watering water) to provide a little calcium and protein. The idea is not to “stuff” the plant, but to support it in tiny, regular amounts.
The “bath day”: how orchids like their water
Orchids hate sitting in water - but they do love a proper soak. Rather than pouring water over the top and leaving the pot standing in it, the soaking method is both more natural and safer.
Step-by-step: the root bath
- Fill a bucket or bowl with room-temperature water.
- Place the clear inner pot (without the decorative outer pot) into the water up to just below the rim.
- Wait about five minutes for the medium to absorb water.
- Lift the pot out and let it drain thoroughly - every last puddle must be gone.
- Only then put it back into the outer pot.
This short soak lets the roots take up exactly what they need without “drowning”. If you like, you can add weakly diluted fertiliser to this soaking water once a month.
After the bath, there mustn’t be a single drop of standing water left in the outer pot - that’s the most important protection against root rot.
Some enthusiasts mist the leaves, aerial roots and flower stems once a week with a very weak fertiliser solution. This mimics humid rainforest air and can help kick-start new bud formation.
Dark treatment: how an artificial rainy season can trigger new flowers
Another technique follows rainforest rhythms quite closely. Many orchid species experience alternating phases there: humid and bright, then comparatively dry and shaded. That quieter period is often followed by a fresh round of flowering.
How the “dark phase” works
If an orchid forms no new flower spikes despite otherwise good care, experienced growers often try the following:
- move the plant to a noticeably darker room for two to three weeks
- alternatively, cover it with an opaque paper bag
- during this time, water very sparingly; do not keep it wet
- keep the temperature as steady as possible; avoid draughts and any standing moisture
After this artificial “rest period”, return the orchid to a bright position - ideally an east- or west-facing window with no direct midday sun.
The sudden return to light acts like a starting signal: a new flower spike often appears a few weeks later.
It won’t work immediately for every plant, but it significantly increases the chances of a second or third flowering wave within the year.
Position, light, temperature: small adjustments with a big impact
Beyond fertiliser, watering and dark treatment, the right spot in your home strongly influences how readily orchids flower. Orchids love brightness, but they rarely cope well with harsh midday sun through glass.
| Factor | Ideal for orchids |
|---|---|
| Light | bright but filtered light; east- or west-facing windows are ideal |
| Temperature | usually between 18 and 24 °C, with no major fluctuations |
| Humidity | slightly raised, for example via a tray of water or other plants nearby |
| Air circulation | fresh air without cold draughts blowing directly onto the plant |
If you place your orchid directly above a radiator, you risk very dry air and scorched root tips. Keeping a little distance from the heat source - or using a bathroom windowsill - can make a remarkable difference.
Learning to “read” orchids: interpreting signals correctly
Over time, many owners develop a feel for what their plant needs. Visual cues help you adjust before problems develop:
- plump, green roots: good water supply
- silvery-grey roots: time for the next soak
- softening, yellow leaves: usually too wet or too dark
- strong new leaves: the plant is in growth mode, with a good chance of new flower spikes
A new, pointed shoot between the leaves or on the side of an old flower stem is often the earliest sign that flowering is on its way. If you spot it, steady, cautious care can support the process.
Risks, mistakes, and how to avoid them
For indoor orchids, the biggest threats are usually two things: too much moisture and too much “care”. Many people water out of fear the plant might be thirsty - yet orchids tolerate short dry spells far better than constant dampness.
Another issue is pests such as mealybugs or scale insects, which can hide in leaf joints. If you check your plants regularly, you’ll catch infestations early and can control them with gentle methods (for example, an alcohol-soaked cotton pad or suitable sprays).
Why patience with orchids pays off
If you’ve ever watched a supposedly “finished” orchid suddenly push out a new flower spike after months, you quickly understand why these plants win people over. Unlike short-lived cut flowers, orchids can live in a household for years - and each new bloom feels like a small reward for your care.
By combining restrained fertilising, regular root baths, the occasional dark treatment and a suitable location, you can noticeably increase flowering. Many plants then manage to alternate through growth, rest and fresh bud formation almost all year round - without expensive specialist equipment, simply by taking nature as your guide.




Comments
No comments yet. Be the first to comment!
Leave a Comment