
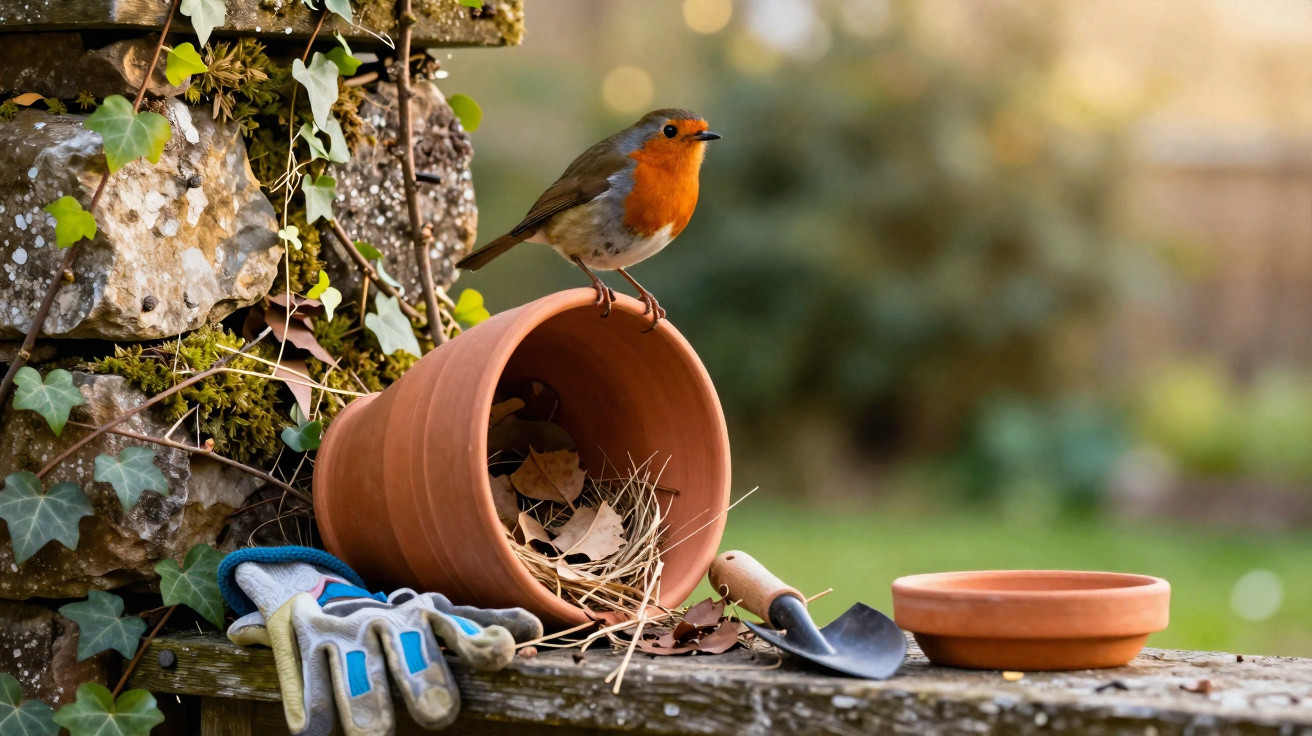
A modest terracotta plant pot can transform everything.
If you’ve got a robin visiting your garden, every appearance feels like a small win. But when a shop-bought nesting box stays empty, frustration quickly sets in. The issue is often not the bird at all, but our assumption of what a “perfect” home should look like. A simple terracotta pot can offer this little songster exactly what it’s actually looking for-provided the placement and set-up are right.
Robins work differently: why the classic nesting box fails
Many people treat robins the same way they treat tits: they hang a sealed wooden box with a small entrance hole about 3 metres up on a trunk and wait for a tenant. That approach doesn’t match what robins need.
The robin is classed as a semi-cavity nester. It likes sheltered recesses, but not tight, dark boxes with a tiny opening. Instead, it looks for:
- a wide, easily reached entrance,
- a very well-hidden spot low down in the garden,
- protection from rain, cold and strong sun,
- cover from shrubs, ivy or deadwood.
On top of that, robins simply don’t nest high up. They stay close to the ground-tucked into hedges, crevices in walls, piles of stones, or even old watering cans left lying in dense growth. A wooden box mounted high is, for them, completely unappealing.
“If you truly want to help the robin, you need to think low, hidden and open-not high, colourful and decorative.”
Why a terracotta pot hits exactly what robins want
An ordinary terracotta flowerpot brings several advantages that line up neatly with a robin’s preferences-and it does so without costing much.
Clay helps balance moisture and temperature
Terracotta is porous. It absorbs moisture and releases it again, creating a steadier microclimate inside the “nest pot”:
- when the weather is damp, the clay helps prevent excessive wetness and dripping water reaching the nest,
- on sunny days, the pot can hold a little warmth and then release it gradually,
- condensation-often an issue in tightly sealed wooden boxes-is greatly reduced.
For chicks, a nest that stays dry and reasonably even in temperature is essential for survival. Too much damp chills them, encourages mould, and leaves the young weaker. This is exactly where a terracotta pot comes into its own.
An open front instead of a small hole
Where tits prefer a small round entrance, robins favour a wide, open access point-so long as it still feels sheltered. A pot set on its side (or slightly tilted) with a generous opening resembles a natural nook among roots or a hollow in a bank.
The opening needs to be at least 15 centimetres across-ideally 15 to 20 centimetres-so the adult bird, and later the chicks, can sit comfortably inside.
Step by step: turning a terracotta pot into a robin home
Choosing the right pot
Go for a plain, unglazed clay pot with no bright coating. The ideal choice is:
- diameter: 15–20 centimetres,
- no glaze, so the pot can “breathe”,
- clean, washed with water only-no detergents.
Remove labels and stickers so there’s nothing shiny or strongly scented. The more the pot disappears into the background, the more naturally it blends in.
Placing the pot properly
Set or lay the pot on its side, angled slightly downwards so rainwater cannot collect inside. It must be completely stable-robins avoid a refuge that shifts or wobbles.
Good ways to secure it include:
- strong wire fixing the pot to a branch or root,
- wedging it in place with sticks or pieces of wood,
- partly bedding it into soil and stones.
The goal is for it to look like a chance gap between roots and twigs-not like a display from the garden centre.
Preparing a simple base inside
Robins will build their own nest, but they often respond well to a small head start. At the back of the pot, place a thin, dry layer, such as:
- dry leaves (with no signs of mould),
- a little moss,
- fine stems or dry grass.
This is only meant to suggest a shallow existing hollow. Don’t overdo it-the robin will remodel the nest to suit its own preferences.
The best spot: where robins are most likely to accept the pot
Height and direction
Position the pot roughly 1 to 1.5 metres from the ground-lower still is fine if the cover is thick. Too much height tends to put robins off.
Aim the opening towards the south-east. That way the nest gets morning sun, while staying more sheltered from strong winds and the heat of midday. Draughty west- and north-facing positions are much less suitable.
Hide it-don’t showcase it
Robins like places where they can vanish into cover instantly. Suitable areas include:
- dense hedges with growth underneath,
- ivy on walls or trees,
- banks, small slopes or slightly neglected corners,
- clusters of shrubs with tall grass around the edges.
Avoid anything overly tidy or exposed: a bright, manicured front garden, large areas of gravel without cover, or a pot in direct view from the patio. It shouldn’t catch your eye immediately. The more you have to search for it, the safer the robin will feel.
“The perfect spot is exactly where you’d rather not reach in yourself: a thorny hedge, wild ivy, a half-overgrown corner.”
Timing matters: when the terracotta pot needs to be ready
Robins establish territories and start scouting nesting sites early in the year. For that reason, the pot should be installed no later than between late February and mid-March.
If you only put the shelter up in April, the territory may already be set, and the new pot may simply be ignored. If you want to maximise the chances, place it out in late winter and then leave it alone.
Once it’s in position, the key is restraint: no constant checking, no torch shining inside. Watch from a distance instead-look for a robin repeatedly moving around the shrub, carrying nesting material, or briefly slipping into the entrance.
If it doesn’t work: common mistakes and how to fix them
If the pot stays unused in the first year, it’s often down to small details. Typical reasons include:
- the location is too open, with not enough cover,
- it’s too close to seating areas, paths, or children’s play space,
- the pot is placed too high,
- strong midday sun shines straight onto the opening,
- the surroundings are being changed and rearranged too often.
In many cases, it’s enough to move the pot deeper into thicker growth, or to let the immediate area become a bit more “wild”. Extra undergrowth, leaf litter and natural untidiness can significantly improve the odds.
More than a nest: what gardeners can also do for robins
A terracotta pot nesting place is a valuable piece of the puzzle, but it isn’t the only requirement. Robins also need food, water and secure places to retreat. If you avoid pesticides and leave leaf piles, twig stacks or untamed corners in place, you can create a genuine robin haven.
Particularly helpful are:
- leaf and brushwood piles as insect hiding places,
- shallow water dishes topped up regularly with fresh water,
- beds with unturned soil where earthworms and larvae are easier to find,
- hedges of native shrubs instead of sterile Thuja screens.
Anyone who’s seen a robin following a spade during gardening quickly realises how closely bird and person can coexist in a wildlife-friendly garden. A terracotta pot nesting place is simply the next logical step: a small gesture with a big impact.
For children and curious neighbours, this is also an ideal project for understanding what garden birds truly need. Rather than colourful ornaments, it’s about hidden, practical structures. In that way, young gardeners learn why “neat and tidy” doesn’t always mean nature-friendly-and how a piece of clay, a little leaf litter and a dense hedge can become a safe nursery for a robin.

Comments
No comments yet. Be the first to comment!
Leave a Comment