
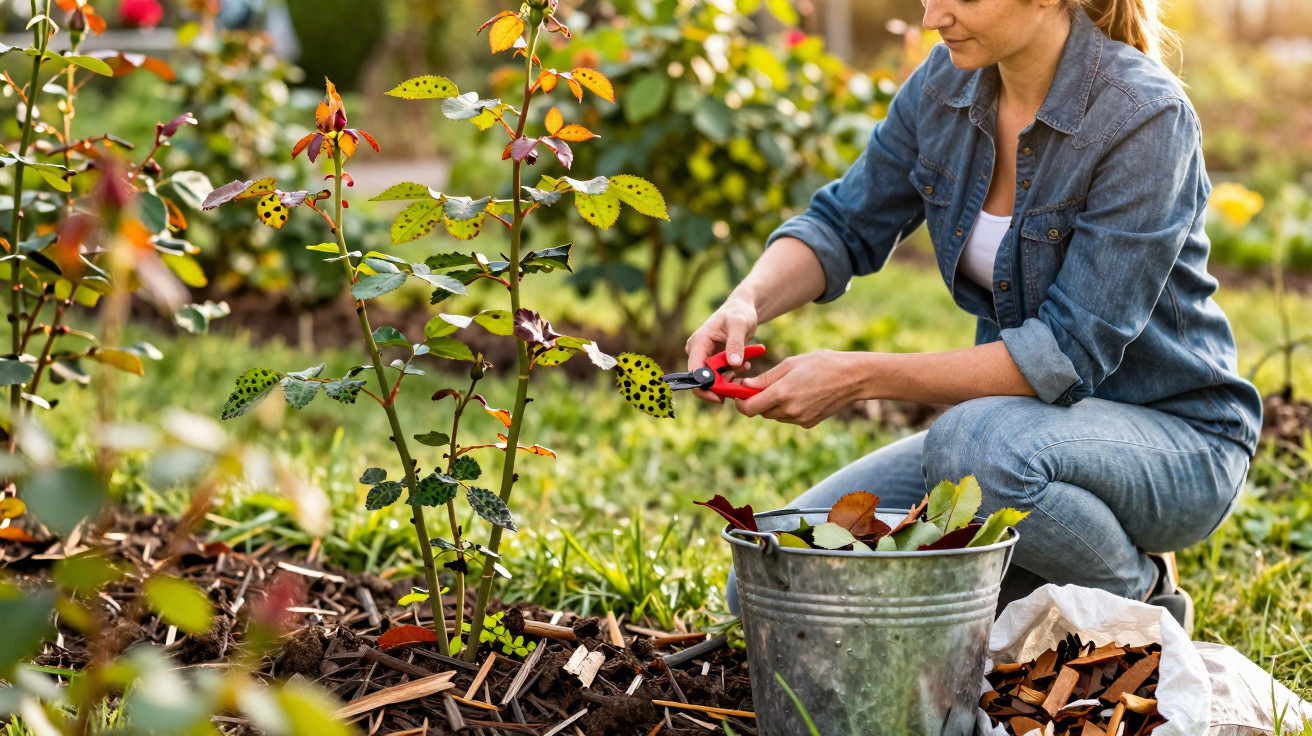
Black spot disease is the nightmare many amateur gardeners dread. Instead of a sea of glorious flowers, by July you often end up with bare, weakened rose bushes in the border. If you act with purpose in March, you can protect your plants surprisingly easily and enjoy noticeably healthier roses later on.
What’s really behind the black spots on roses
Black spot is one of the most common rose problems in central European gardens. Typical signs are round, dark brown to black marks on the leaves, often surrounded by a yellow halo. The affected foliage turns yellow and drops, and the rose quickly looks "stripped" and bare.
The culprit is a fungus (including Diplocarpon rosae), and it survives winter in a very effective way: it overwinters on fallen leaves and plant debris right around the base of the rose. As soon as spring brings milder, damp days, it becomes active again. With temperatures of roughly 13–30 °C and leaves staying wet for long periods, it can spread at speed.
"Black spot rarely kills a rose outright – it weakens it so much that it hardly produces any flowers and becomes more susceptible to drought and pests."
Rain is a key factor here: raindrops splash fungal spores from the soil up onto fresh foliage. From there, the wind carries them on to other rose bushes. Once the disease has taken hold in your garden, it is difficult to shift without preventive action.
Three March jobs to help roses stay healthy through summer
The good news is that, precisely because the fungus depends so strongly on the seasons, March is an ideal moment to break its cycle. Three straightforward tasks are enough to noticeably reduce disease pressure.
1. A thorough tidy-up: remove infected leaves without compromise
The most important step is to remove the fungus’s winter hiding place. Many gardeners leave leaves and dried rose parts in place over winter, sometimes out of consideration for insects – but with roses, that approach is risky.
- Pick up all old rose leaves from the ground, including any that have blown further afield.
- Remove small dead twigs and plant debris caught between shoots.
- Check the centre of the bush – leaves often remain wedged there.
Important: do not put this material on the compost heap. The fungus survives there easily and can be carried back into the bed later with the finished compost.
It’s far safer to dispose of affected leaves in your household waste or take them to a household waste recycling centre, where composting happens at higher temperatures. That way you stop the infection cycle at its source.
2. A protective layer: mulch roses carefully in March
Once the soil surface around the rose is clean, move on to step two: a layer of mulch. It acts like a shield against black spot in several ways.
- It softens the impact of raindrops.
- It reduces spores splashing up from the soil onto the leaves.
- It improves soil structure and adds nutrients (depending on the material).
- It helps the soil hold moisture for longer and slows weeds.
Suitable options include well-rotted compost, bark mulch, chipped bark, shredded prunings, or an organic rose feed that also provides a mulching effect. Create a circular ring around the plant and spread the mulch evenly.
"As a rule of thumb, apply roughly two to five centimetres of mulch around the rose – leave a small gap close to the stem so moisture doesn’t build up."
Don’t let the mulch sit directly against the graft union. Constant damp there can lead to rot. A gap of around two to three finger widths is better.
3. Feed properly: strengthen roses from late March
Weak roses catch black spot much faster than vigorous, well-cared-for plants. A lack of nutrients leads to thin shoots, pale foliage and a weakened immune system. That’s why March also signals the first feed of the year.
A balanced specialist rose fertiliser works well, ideally providing not only nitrogen but also enough potassium and trace elements. If you prefer a more natural route, use organic products or home staples such as well-rotted manure (for example horse or cattle manure, always composted), horn shavings, or an organic-mineral rose feed.
Many gardeners also use liquid plant tonics or homemade feeds. Popular choices include:
- liquid rose tonics from garden centres
- diluted nettle feed (mixed 1:10 with water)
- ready-made biological foliar tonics based on plant ingredients
Using them is straightforward: add a small splash to a watering can, top up with water, and water the soil thoroughly around the rose’s root zone. This delivers the active ingredients directly to the fine roots, where the plant can absorb them most effectively.
Optimal conditions: how to give fungal spores hardly any chance
Alongside the three main March tasks, general care also matters. Black spot particularly thrives in damp, poorly ventilated spots.
A few adjustments can noticeably reduce the risk:
- Keep spacing generous: don’t plant roses too close together so air can circulate.
- Keep leaves dry: water at soil level wherever possible and avoid spraying over the foliage.
- Thin the canopy: in late winter/early spring, remove weak shoots and any growing inwards.
- Review the position: sunny, breezy sites are far less prone to fungal issues.
| Factor | Encourages black spot | Helps prevent it |
|---|---|---|
| Moisture | leaves staying wet for long periods | dry foliage, watering at the base |
| Location | shady, still air | sunny, airy |
| Plant spacing | crowded planting | enough space between roses |
| Soil care | low in nutrients, compacted | loose, humus-rich soil, mulch |
How to spot infected roses – and what still helps
Even with care, early signs can’t always be avoided. If you check your roses regularly, you can respond quickly and limit the damage.
Typical symptoms include:
- round, dark spots on older leaves, often with a radiating edge
- yellowing of leaf tissue around the spots
- premature leaf drop, starting on the lower shoots
- weaker new growth and smaller flowers
Remove infected leaves as early as possible, including those still on the shrub. Cut back heavily affected shoots into healthy wood. Again, don’t compost the cut material – dispose of it the same way as autumn leaves.
In severe cases, approved fungicides from garden centres can help. However, many amateur gardeners now mainly rely on biological products or plant tonics to reduce disease pressure, rather than tackling it with purely chemical controls.
Why March is the most important garden month for rose lovers
If you only look at your roses in summer year after year, it’s easy to conclude they’re "sensitive" or "difficult". In reality, plant health is often decided much earlier in the season. In March, the fungus is not yet at full strength, new leaves are just emerging, and targeted actions have a particularly strong effect.
At the same time, many of the measures described fit naturally into normal spring routines: pruning, loosening the soil, feeding. If you approach these steps systematically, you save yourself a lot of frustration later with struggling roses and bare borders.
It also helps to make a simple March rose checklist and work through it each year. After one or two seasons it becomes second nature – and your roses repay you with strong growth and abundant flowering.
"If you clear up, mulch and feed in March, you remove the foundation black spot needs – and get your roses ready for a long summer of blooms."
One last practical tip: make a note of which varieties in your garden are especially susceptible and which stay healthy even in wet years. Many modern cultivars are much more resistant to black spot. When planting new roses, it’s worth checking the label or asking a well-stocked nursery for advice – it makes the rose bed easier to care for and more resilient in the long run.



Comments
No comments yet. Be the first to comment!
Leave a Comment