
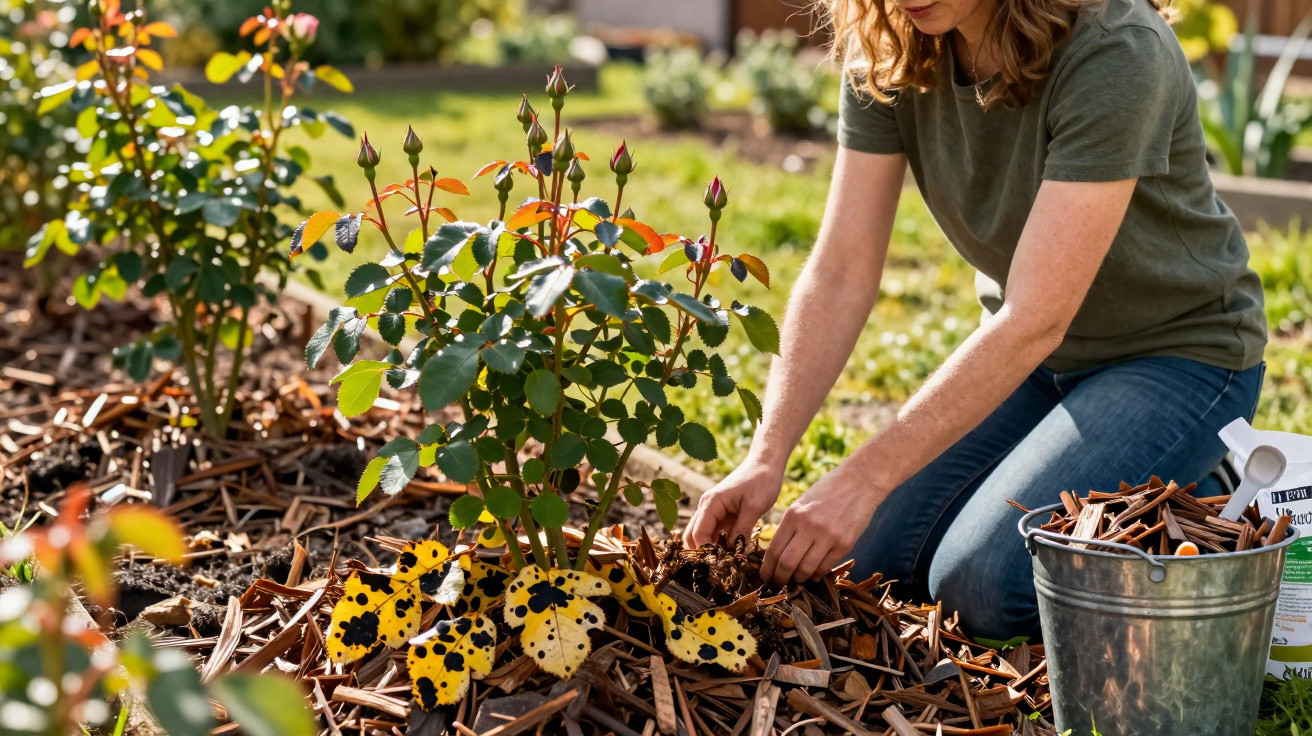
Anyone who wants vigorous, flowering roses in summer rather than brown, bare shoots needs to plan a few targeted jobs in March.
Every year, many home gardeners wonder why their roses are already flagging by midsummer, shedding leaves and producing only sparse flowers. The usual culprit is black spot, a fungal disease that can spread explosively in spring when no action is taken in time. Three straightforward measures in March can prevent the worst damage surprisingly effectively.
What causes black spot on roses
Most people recognise the familiar signs: small dark dots first appear on the leaves, then develop into larger, irregular patches. The foliage turns yellow, looks unhealthy and eventually drops away. What remains are almost bare shoots that produce only a few weak buds.
The problem is caused by a fungus (Diplocarpon, also known as Marssonina rosae). It survives the winter in dead leaves and plant debris directly beneath the shrub. As spring brings milder, wetter weather, it “restarts”.
Between roughly 13 and 30°C, and when leaves remain wet for extended periods, the fungus spreads particularly quickly – in other words, typical spring weather.
Rain splashes spores from the soil on to fresh young shoots, while wind carries them from one rose to another. This explains why an entire collection of roses can appear affected in one area, while plants only a few metres away still look healthy.
Why March is the key month for roses
New growth begins in March, with many buds close to opening. At this point, it is decided whether the fungus will have an easy time or be held back before it can properly establish itself.
The good news is that neither chemicals nor complicated specialist products are needed. Three simple, practical steps are enough to interrupt the infection cycle significantly.
- carefully remove old growth and infected leaves
- apply a thick mulch around the rose
- strengthen and feed the plant towards the end of the month
Step 1: clean thoroughly around the rose bush
Everything starts with hygiene at ground level. Many roses still have leaves from the previous year, small dead twigs or pieces of bark beneath them – precisely where the fungus spends the winter.
A half-hearted job leaves the fungus with the ideal launch pad for spring. It is better to:
- remove every old leaf from beneath and within the rose, including those caught in the middle of the bush
- pick up small dead shoots and plant debris from the ground
- loosen the soil around the base to a depth of several centimetres, ensuring that everything is removed
Most importantly, this material should not go on the compost heap. The fungus can easily survive there and reappear the following year. Garden waste bags, general waste or a local authority green-waste collection point are better options.
Anyone who disposes of infected leaves consistently removes the fungus’s hiding places and breaks the disease cycle at its source.
Step 2: use a thick mulch layer to prevent splashback
Once the soil has been cleared, the next measure is mulching. A layer of organic material around the rose has several effects, all of which benefit the plant.
How mulch slows black spot
When raindrops hit bare soil, they throw tiny particles upwards. Fungal spores are often present in this splashback. Mulch acts as a buffer, reducing this effect and keeping spores on the ground.
Suitable materials include:
- well-rotted compost
- bark mulch or shredded bark
- woodchip from untreated timber
- leaf mould made from healthy leaves
The layer can be reasonably thick: 3 to 5 cm is a useful guide. Keep the base of the rose clear so that the graft union does not remain permanently damp.
As well as offering protection from fungi, mulch provides further benefits:
- It keeps the soil moist for longer, reducing watering work in summer.
- It suppresses weeds that would otherwise compete with the rose for nutrients.
- It gradually improves soil structure as the material decomposes.
Mulching is therefore not only a shield against fungal spores, but also something of a wellness treatment for the root zone.
Step 3: strengthen roses specifically at the end of March
The third element concerns nutrition. Many gardeners underestimate how strongly a plant’s nutritional condition influences its susceptibility to disease. Weak roses lacking nutrients are infected far more often and recover less effectively.
The right nutrient combination for resilient roses
Roses mainly require three key nutrients in balanced proportions:
| Nutrient | Effect on the rose |
|---|---|
| Nitrogen (N) | encourages leaf and shoot growth; too much makes the plant vulnerable |
| Phosphorus (P) | supports flower production and strong roots |
| Potassium (K) | reinforces cell walls and increases resistance to disease |
Specialist rose fertilisers or organic multi-nutrient feeds formulated for these needs are ideal. The end of March, when new growth is visibly starting, is a good time for the first application.
A practical approach:
- Scatter the fertiliser at the recommended rate in the root area.
- Work it lightly into the top layer of soil without damaging the roots.
- Water thoroughly afterwards so that the nutrients dissolve into the soil.
Those who prefer liquid plant tonics can add a small amount to a watering can and apply it directly around the roots. This gives the rose readily available nutrients and trace elements that stimulate its natural defences.
The more vigorous a rose is at the start of the season, the better it can limit fungal infections and quickly replace damaged foliage.
How to give your roses additional protection
Alongside the three March measures, the site and year-round care also play an important role. Many badly affected roses are growing in too much shade or are planted so closely that their leaves stay wet for a long time after rain – ideal conditions for fungi.
A few simple adjustments can make a substantial difference:
- choose a spot that is as sunny and airy as possible
- do not squeeze roses directly against dense hedges or walls
- prune shoots so that light and air can reach the centre of the bush
- water as close to ground level as possible rather than spraying the leaves
Anyone planting new roses can choose varieties described as particularly fungus-resistant. Many modern cultivars include corresponding information on their labels.
Common mistakes that encourage black spot
It is easy for everyday habits to develop that unintentionally favour the fungus. These include:
- regularly wetting rose leaves with a lawn sprinkler
- leaving diseased foliage in place for convenience
- applying very high doses of nitrogen, for example through pure lawn fertiliser
- tightly pruned, “blocked-up” bushes with no air circulation
Keeping these points in mind reduces disease pressure considerably, often without using a single spray treatment.
What black spot does to the plant in detail
Black spot mainly deprives roses of their “solar panels”: healthy leaves. The more foliage a rose loses, the less energy it can produce. The plant must then rely on reserves stored in its wood and roots.
With every season in which it is heavily defoliated, those reserves become further depleted. This results in:
- increasingly weaker shoots
- smaller and fewer flowers
- greater vulnerability to drought
- increased susceptibility to pests such as aphids
This is exactly why early action in spring is so worthwhile: it helps prevent widespread loss of foliage in the first place.
How March rose care pays off in the long term
Anyone who makes the three steps – cleaning, mulching and feeding – a fixed part of every March will gradually establish a more resilient rose bed. Fungal pressure decreases, the plants become older and stronger, and flowering improves noticeably.
The workload remains manageable: a few hours in early spring are usually enough for an entire rose garden. In return, many later emergency measures, expensive specialist products and frustration over bare shrubs can be avoided.
The effect is not always immediate in the first year. By the second or third season at the latest, the difference is clear: roses retain their leaves for longer, infection remains isolated rather than spreading across the plant, and the beds look healthier overall.
Combining this basic strategy with proper pruning and adapted watering gives roses a strong chance of remaining robust and fully clothed in foliage, with far fewer black spot symptoms even in wet summers.



Comments
No comments yet. Be the first to comment!
Leave a Comment