
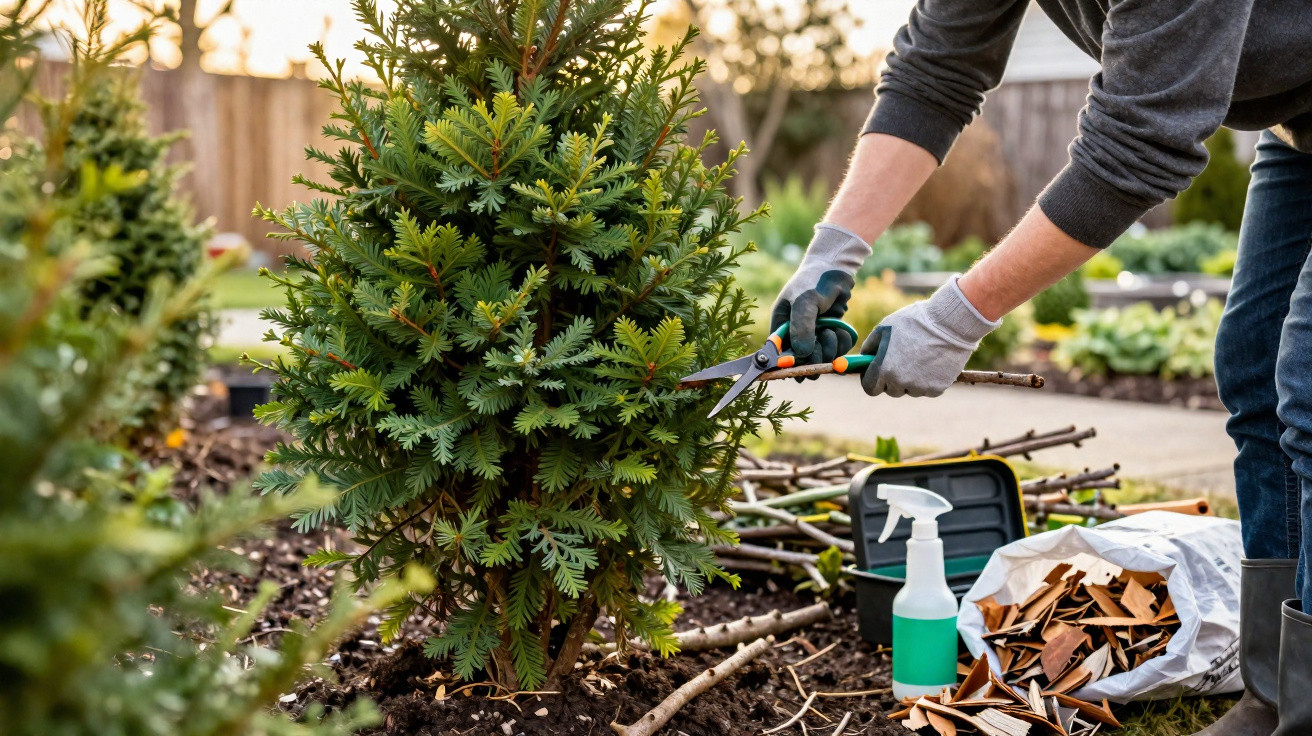
Handled properly, evergreen shrubs can be turned into a dense, resilient green screen in just a few weeks. The secret is not pricey fertilisers or unusual varieties, but a targeted prune using the so‑called one-third rule - carried out at exactly the right moment.
Why late February is the jackpot for evergreen shrubs
Towards the end of February, the gardening year begins quietly: the days are noticeably longer, the sun has more strength, and sap is already starting to rise - yet the buds are still closed.
That narrow window is ideal for a thorough prune on evergreen shrubs such as:
- Cherry laurel
- Viburnum (snowball and laurestinus types)
- Photinia (red robin)
- Osmanthus (sweet olive)
- Elaeagnus (oleaster)
At this point the plant is just about to put on new growth. Because sap flow is getting going, pruning cuts seal and recover far faster, without draining the shrub too much. If you wait until March or April, you remove the most vigorous new shoots and rob the plant of momentum:
"If you prune too late, you cut off the most energy-rich young shoots and slow down the entire development of the shrub."
Pruning in the depths of winter, on the other hand, increases the risk of frost damage on freshly cut growth. Late February - and in some places early March - is therefore the sweet spot: not too cold, not too late, right on the winter-to-spring threshold.
The one-third rule: how the pruning trick works
Many gardeners only trim a hedge “on the top” and along the side edges so everything looks neat again. That does create a straight outline, but inside the shrub slowly becomes woody and sparse - the lower part turns bare, while the top builds an ever-thicker layer that blocks out light.
The one-third rule tackles exactly that problem. Instead of merely correcting the shape, you deliberately rejuvenate the shrub from within.
Step 1: spot the old shoots
Older shoots can usually be identified by the following:
- a thick, woody stem that is clearly harder than younger growth
- darker, cracked, or grey-brown bark
- little branching in the interior, with foliage mainly on the outside
- often little or no fresh growth close to the base
Step 2: remove around one third, consistently
Now for the rule itself: roughly one third of these older, thicker stems are cut out decisively - depending on the shrub, either right down at the base or back to a strong side branch.
"Removing a third of the old wood looks brutal, but it’s the starting signal for fresh, vigorous new shoots from lower down."
Those younger shoots later create a much denser hedge face, rather than just a green “lid” at the top. At the same time, you open up space and light inside the plant, so dormant buds can wake up and start growing again.
Step 3: remove deadwood and weak growth
Alongside the one-third rule, it pays to do a proper “health check”:
- cut out all dead twigs (they snap dry; there’s no green layer beneath the bark)
- remove wind-blown, snapped, or frost-damaged branches
- thin out very thin, stunted shoots
This lets more light reach the centre of the shrub, improves air movement, and helps reduce fungal issues.
Clean blades, healthy hedges: disinfection is non-negotiable
One point that’s often underestimated: every cut is an open wound. If your tools are dirty, you can carry fungi and bacteria from one shrub to the next.
"A single dirty cutting tool can infect several hedges in one afternoon."
How to disinfect your tools properly
- Before you start, wipe off heavy dirt and plant residue.
- Between different shrubs, clean the blades with a cloth and alcohol (for example, methylated spirits).
- Alternatively, use a standard household disinfectant.
- After pruning, dry the blades and, if needed, apply a light coat of oil to prevent rust.
This quick in-between step noticeably lowers the risk of fungal diseases and can save you having to buy expensive plant treatments later.
After the secateurs, it’s the soil: mulch as a regeneration turbo
Once you’ve pruned, the shrub is primed to push out new growth - but it needs energy to do it. Rather than reaching immediately for synthetic fertiliser, it’s worth focusing on the soil. An organic mulch layer around the base works like an all-round support package.
What works well as mulch?
- finely chipped shrub or tree prunings
- an intact layer of leaves, slightly dried
- chopped straw or flax (for example, linseed straw)
- bark mulch, used more sparingly around lime-loving shrubs
Aim for a layer around 5 to 10 centimetres thick, and don’t press it right up against the stem, so nothing rots.
"Mulch protects against late frosts, keeps moisture in the soil and, as a bonus, feeds the life in the soil."
As the mulch slowly breaks down, it forms valuable humus. Soil organisms do the work for you and release nutrients to the shrubs over weeks and months. The soil also stays evenly moist for longer - a clear advantage in dry springs and increasingly hot summers.
What the one-third rule delivers in the long term
If you keep treating evergreen shrubs this way, you effectively build a stable framework. Year after year, young, vigorous stems take over while older wood is removed gradually.
In day-to-day garden terms, that means:
- noticeably denser foliage, including low down in the hedge
- more even new growth without gaps or bare patches
- fewer frost problems, because the new shoots break a little later
- a clearer, tidier silhouette well into mid-summer
- fewer corrective trims needed during the year over the long run
This is especially obvious with privacy hedges of Photinia or cherry laurel: instead of a “mushroom shape” with a bare base, you get a compact, opaque wall that shields patio and garden from prying eyes.
Typical mistakes - and how to avoid them
The same issues show up again and again, and they can be fixed with a few small adjustments:
- Only trimming the top: over time this leads to bare lower stems. Better: regularly remove older stems from the bottom.
- Cutting too hard in frost: avoid heavy pruning in sub-zero conditions; wounds close more poorly and frost damage increases.
- Blunt tools: these crush rather than cut, leaving ragged wounds that rot more easily.
- No mulch: shrubs need extra energy after pruning; bare soil dries out quickly and provides few nutrients.
Practical example of a pruning year using the one-third rule
If you’re new to it, this simple schedule is a good guide:
- Late February: on each evergreen shrub, remove about one third of the oldest stems at the base, cut out deadwood, and disinfect tools regularly.
- March/April: top up or apply the mulch layer, water regularly during dry spells, and watch the new shoots.
- Summer: stick to light shaping cuts only, with no major interventions.
- Late February the following year: remove a different third of the old stems - the shrub rejuvenates step by step.
This keeps the plant in balance long term, without ever needing to cut it right back to the stump.
Why evergreen shrubs respond so strongly to this kind of pruning
Evergreen woody plants hold plenty of so-called dormant buds within their older wood. As long as older stems dominate, those buds stay inactive. Once you take out part of the old wood, the root system’s energy is shared across fewer stems - and that’s precisely when those quiet reserves kick into action.
At the same time, you stop the shrub from putting all its effort into the tips. The one-third rule forces it to become active again in the lower and inner sections too. Particularly with older hedges, this is often the only realistic way to restore density without having to replant from scratch.
If you get the secateurs out before spring really starts, keep your tools clean, and support the soil with mulch, you set the hedge up now to look not just green in summer, but genuinely lush and private - year after year.

Comments
No comments yet. Be the first to comment!
Leave a Comment