
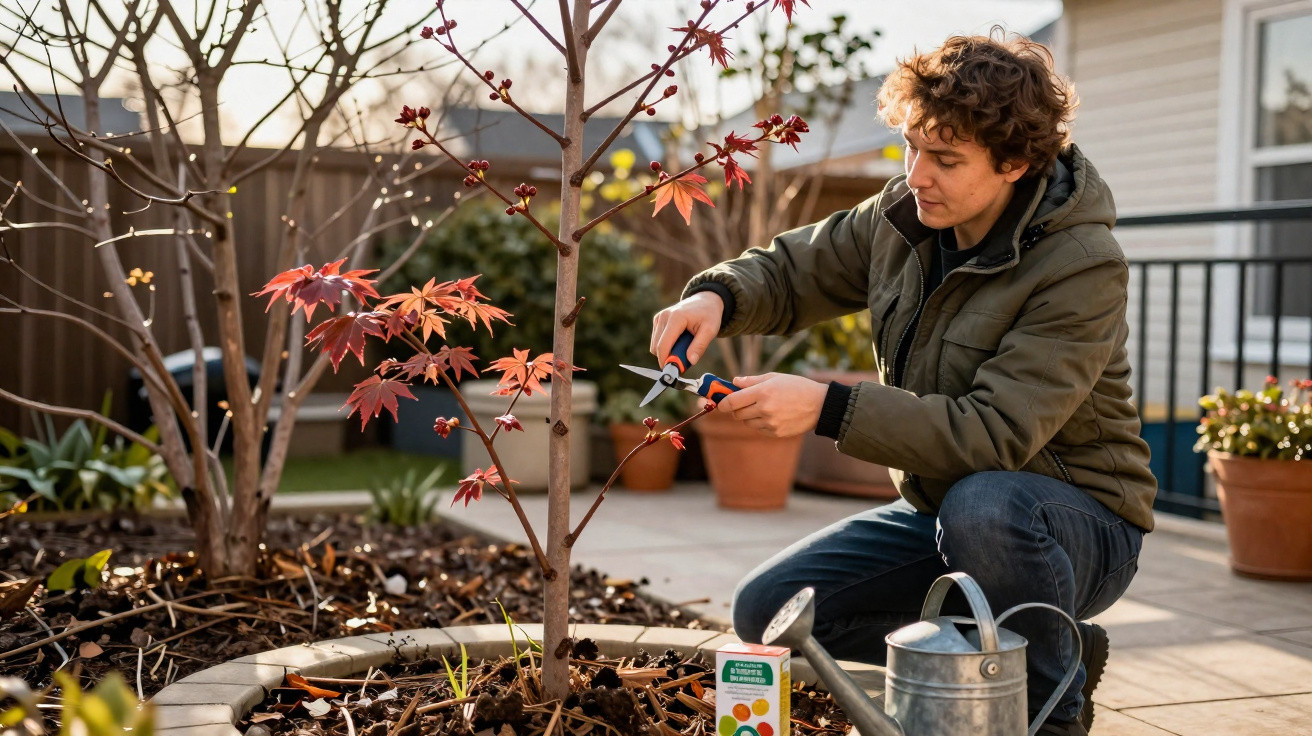
Many gardeners are surprised in March and April: the Japanese maple is still bare, while roses, hydrangeas and perennials are already powering ahead. The reason is rarely fungus or disease. Much more often it comes down to straightforward care mistakes across winter and early spring - and three quick actions can put it right remarkably easily.
Why Japanese maples often “dawdle” in spring
Most Japanese maples (botanical name Acer palmatum) grow slowly and stay naturally compact. That is exactly why each growing season matters. After a tough winter, many trees channel their energy into simple preservation first - not into producing fresh leaves.
The real issue is seldom a couple of frosty nights. More commonly, it is driven by:
- extremely shallow roots that dry out quickly
- cold winds that stress twigs and buds
- old, dead branches that continue to “consume” stored reserves
- soil in pots that is too low in nutrients or completely exhausted
Gardeners describe the same pattern time and again: the compost feels cool at the surface, yet is dry further down. The tree is quietly short of water even though the watering can has been put away. At the same time, dead branches block light from reaching the inner canopy, leaving new growth slow and patchy.
If you tackle three targeted jobs in late winter or the very earliest spring, you shift the tree’s energy from “survival” towards “growth and a leaf explosion”.
Three winter jobs that make the maple explode in spring
1. A gentle shape-prune wakes dormant buds
Japanese maples dislike drastic pruning, but they cope very well with a careful, considered trim. The best moment is when the tree is still dormant but the hardest frosts have passed - depending on where you live, that is usually sometime between February and early March.
The process is straightforward:
- Remove dead and damaged branches
Cut out anything that shows brown (rather than green) when lightly scratched. Tips that have been torn by wind or dried out should also go. These shoots simply drain energy. - Thin out crossing branches
Where branches rub or grow into each other, friction develops and rot often follows. Keep the better-placed branch and remove the weaker or more awkwardly positioned one. - Let light into the centre of the crown
Aim for an open, airy canopy that sunshine can penetrate. That encourages buds to form inside the crown as well, rather than only at the outermost tips.
For thicker branches, cut close to the trunk but leave the slight swelling - the branch collar. Wounds close fastest there, and the tree’s characteristic, elegant outline stays intact.
A useful rule of thumb many professionals follow: remove no more than a quarter of the canopy in any one year. Taking more can shock a Japanese maple and trigger emergency shoots that create fresh problems later.
Dead is dead: dead stems can be removed at any time of year. They only waste energy, and cutting them out consistently does not harm the tree.
2. Feed intelligently instead of overdoing it
Japanese maples grown in pots, in particular, often have very little nutrition left by late winter. But pushing out new leaves takes serious energy. A thin or weak canopy in April or May is therefore often a clear sign of nutrient deficiency.
In early spring, it is worth using a dedicated, fairly gentle fertiliser for ornamental shrubs, ideally a slow-release type. Sprinkle it around the root zone and water it in. That gives the maple an even supply over several weeks without “forcing” soft growth.
- In most cases, fertilising once at the start of the growing season is enough.
- Stop no later than the end of summer so that young shoots have time to ripen.
- Use liquid feed sparingly, especially in containers - salts build up faster in pots.
If you are worried about overfeeding, use compost instead: a thin layer of mature, crumbly compost over the root area releases nutrients more slowly, but very gently.
3. Mulch and water: a lifeline for shallow roots
Japanese maples develop a dense network of very shallow roots just beneath the surface. That layer is the most vulnerable in winter and early spring - it dries out quickly in wind even when the air feels cold and damp. Many trees then suffer from “silent thirst”.
The counter-strategy is a simple two-step approach:
- Apply a mulch layer
Spread a 3–5 cm layer of bark mulch, leaf compost or fine pine bark over the root zone. It helps retain moisture and buffers temperature swings. Keep mulch off the trunk itself to reduce the risk of rot. - Adjust your watering routine
Morning watering works best. The soil can take up moisture during the day without sitting waterlogged overnight. Use a finger test in the root zone: if it feels dry 3–5 cm down, it is time for a thorough watering.
Mulch works like a natural blanket: it keeps moisture in the soil, slows weeds and protects sensitive surface roots from cold and wind.
Extra tips for potted Japanese maples on balconies and terraces
Many Japanese maples are grown in containers rather than planted in the ground. In pots, every issue is amplified: the root ball freezes more quickly, dries out faster, and nutrients are depleted sooner.
- Check the pot size: roots that are already circling the edge will hold growth back. In late winter, carefully repotting into a slightly larger container can make a dramatic difference.
- Make sure drainage is good: a layer of expanded clay or coarse gravel in the base helps prevent waterlogging - the maple dislikes “wet feet” just as much as it hates drought.
- Create shelter from wind: placing the pot in a protected spot by a wall, or behind screening, is often enough to cut evaporation and frost damage noticeably.
Even without a garden, these tweaks can help you build an impressive maple canopy on a small balcony - and in spring it can genuinely burst into yellows, oranges and reds.
Typical mistakes - and how to avoid them
In chats with amateur gardeners, the same issues crop up repeatedly. These are the problems that most often set a Japanese maple back:
- too much direct midday sun for sensitive varieties, especially when paired with wind
- frequent small waterings that only dampen the surface
- heavy pruning in summer, which can lead to unruly, stressed regrowth
- heavy, compacted soil with no drainage
Watering less often but more deeply encourages stronger roots. Let the compost dry slightly between waterings, but never allow the root zone to dry out completely. A loose, humus-rich mix with a little sand or pumice helps water drain well while still holding enough moisture.
How the right position affects the leaf display
Alongside pruning, feeding and watering, the site you choose largely determines how spectacular the spring flush will be. Many varieties prefer bright but softened light - morning or evening sun, with protection from harsh midday glare.
If the tree sits permanently in a draught, tips and delicate new shoots dry out quickly. A spot with a bit of shelter - for example near a house wall or behind taller shrubs - makes a huge difference. In cool, windy areas, even a temporary windbreak using bamboo screening through winter can significantly reduce stress.
If you position your maple so that fresh spring leaves are backlit - for instance in front of a light-coloured wall - you maximise the showy effect of the new foliage.
Why small winter tricks can pay off for years
Japanese maples often stay with you for decades. Any season in which the tree can grow rather than struggle helps it build reserves in the wood and root system. The three winter jobs - gentle pruning, smart nutrition, and well-managed moisture - contribute to that year after year.
Keeping up this routine does not only mean stronger growth next spring. Over the following years, the maple tends to become denser, more resilient, and better able to cope with the occasional missed watering or an unexpected cold snap. Step by step, a sparse, bare shrub can turn into the glowing focal point that defines the whole garden.


Comments
No comments yet. Be the first to comment!
Leave a Comment