
Professional vegetable growers never skip one crucial in-between step.
The first warm days of spring pull you towards garden centres: your fingers itch to get started, and the young tomato plants are waiting. But if you plant them straight out in the bed, you can end up with flimsy stems, scorched leaves and a tiny harvest. Professional gardeners rely on a specific routine that gives plants noticeably more strength in just a few days - and it’s exactly what’s missing in many hobby gardens.
Why tomatoes suddenly slump in the bed
Temperature shock: from cosy warmth to bitter cold
Most tomato plants are raised somewhere warm at first: on a windowsill, in a greenhouse, or inside a sheltered polytunnel. Conditions there are often around 20 °C, with barely any temperature swings, no cold wind and no night frost.
Move those plants outdoors in one go and they’re thrown into a completely different world: perhaps 15 °C and sunshine during the day, then only 5 or 6 °C at night, plus wind and damp. For young plants, that’s a serious climate shock.
"This abrupt change triggers severe stress in tomatoes - growth collapses, and the plant ‘freezes internally’."
Common results of this cold shock include:
- Leaves droop limply or turn dark green to purple
- Growth stalls for days or even weeks
- The plant stays permanently small and weak
- Flower trusses appear later - or not at all
Wind and zero training: why stems topple over
Indoors, the air is still. Even in a greenhouse there’s usually only the faintest movement. That might sound ideal, but it comes with a drawback: the stems never get conditioned.
Without regular movement, plants remain soft, watery and thin-stemmed. When a brisk spring breeze hits them for the first time outside, they have no stability. Many tomatoes then bend almost to the ground, and some even snap right at the base.
That’s exactly where the professional growers’ routine comes in.
The pro trick: “harden off” plants instead of planting them straight out
Final hardening off: short trips outside, a little longer each day
Gardeners call it “hardening off” (or hardening off young plants). The principle is straightforward but extremely effective: the plant is gradually taught to cope with real outdoor conditions.
This is how the routine works day to day:
- Day 1–2: Put tomatoes outside in the afternoon for 1–2 hours, in a sheltered, semi-shaded spot.
- Day 3–4: Increase to 3–4 hours, allowing a bit more light and a bit more wind.
- Day 5–7: Leave them out for most of the afternoon, avoiding only the fiercest midday sun.
- Afterwards: Keep them outside all day, but still place them somewhere protected overnight - in a garage, shed, or under a temporary cover.
During this gradual adjustment, something crucial happens inside the plant: it produces more lignin - a natural fibre that thickens and strengthens the stems.
"After just three to four days of short outdoor spells, tomato stems look noticeably stronger, thicker and more upright."
Avoiding light shock: sun protection for delicate leaves
Many hobby gardeners focus on temperature and forget about light. Outdoors, sunlight hits the leaves without any filtering. That’s a completely different intensity compared with the softer light behind glass.
If newly moved tomatoes get direct midday sun, their leaves can scorch within hours. What you see afterwards are pale, dry patches - much like sunburn.
That’s why young plants initially need “suncream in the form of shade”:
- Start them in bright shade under a tree or beside a north-facing wall
- Alternatively, stretch a light horticultural fleece over a simple hoop
- Extend their time in direct sun a little each day, beginning with morning or late-afternoon sun
This allows the leaf tissue to toughen gradually into a more resilient surface that can handle full summer sunshine without problems.
Hidden danger in the garden: cold damage to fruit blossom
Morning checks in the orchard are worth it
While tomatoes are being prepared for outdoor life, a second time bomb can be ticking at the same time: fruit trees. Cherry, plum or apricot trees often flower early - and late frosts can do real damage right then.
A quick glance out of the window isn’t enough. If you want to protect your crop, you need to look closely: early in the morning, while dew or hoar frost is still visible. Each blossom becomes a small warning sign.
Spotting frost damage and taking action
If a blossom looks slightly glassy or brown inside - especially around the pistil - it’s been too cold. A fine black or brown tinge in the centre of the flower usually means: that fruit is lost.
If you catch it early, you can still respond before the next cold night:
- Cover smaller fruit trees with purpose-made winter protection hoods or fleece
- Loosely wrap sensitive bushes (e.g. blackcurrants) with blankets or plastic sheeting
- Move pots with citrus or peach tight against a house wall and protect them with fleece
It can feel like a lot of effort, but it often saves a large part of the coming harvest.
Spring routine: how to organise the tomato transition
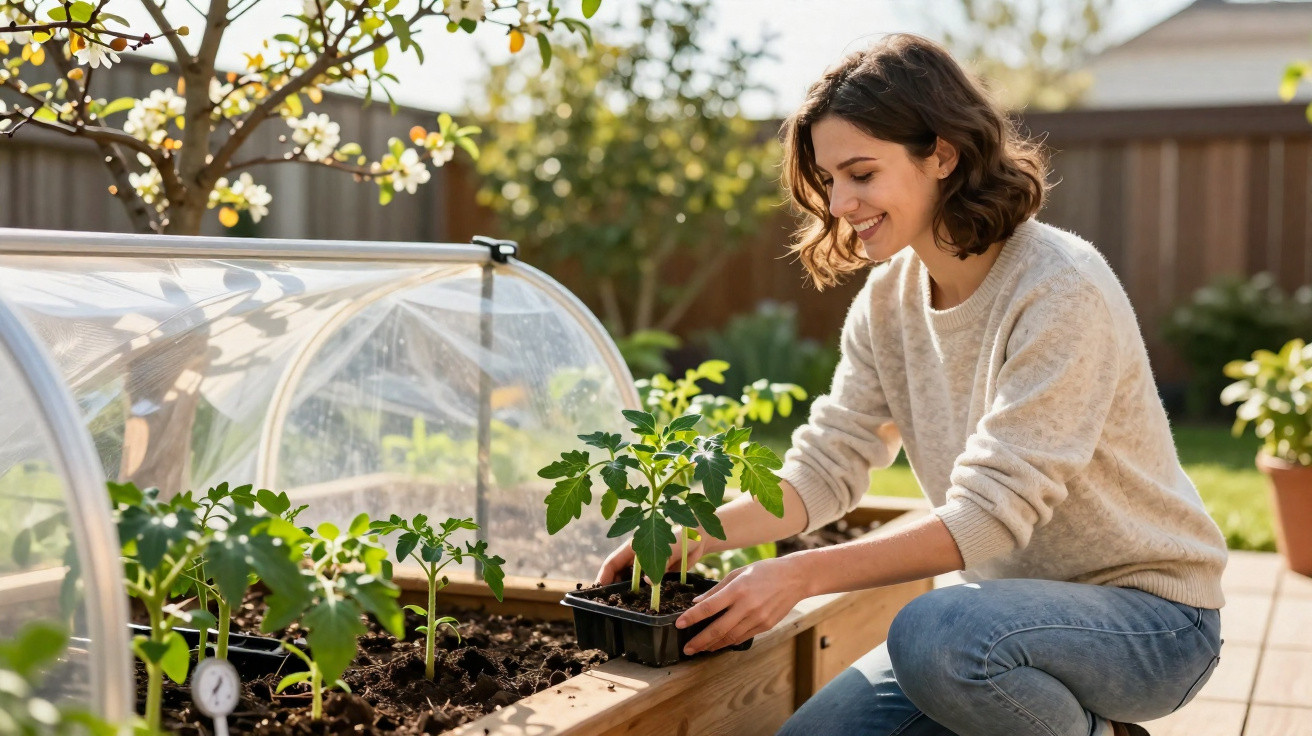
Anyone can put together a simple cold frame or mini greenhouse
Constantly carrying plants in and out quickly becomes a chore. Many gardeners solve it with a makeshift shelter: a low frame with a transparent lid, an old window frame, or a small polytunnel.
During the day, the lid stays open so air and light can get in. In the evening, it’s closed to stop the plants from chilling. This creates a useful buffer zone between the living room and the open bed.
Practical options at a glance:
- An old wooden frame with plexiglass or a window sash as a lid
- Metal hoops made from reinforcing steel, covered with horticultural fleece or polythene
- A raised-bed/pallet collar frame with a clear sheet placed on top
Keep the rhythm: ten to fifteen days of discipline
The adjustment period usually lasts ten to fifteen days. During that time, plants repeatedly move between sheltered and more exposed conditions. Consistency pays off: don’t skip a night just because the evening looks clear and mild.
"Only when nights stay consistently mild and the period of the Ice Saints has passed can tomatoes move into the open ground for good."
Get the timing right and you avoid bent stems, frost-nipped tips and scorched foliage - and you begin the season with strong, vigorous plants.
When tomatoes are genuinely ready for the bed
Follow the signals, not just the calendar
Experienced gardeners don’t rely on a date alone. Instead, they weigh up several indicators:
- Night-time temperatures no longer drop below 8–10 °C
- The soil still feels slightly warm late in the evening
- Forecasts show no ground frosts for the next few days
- The young plants are compact, dark green, and have sturdy stems
When these points line up, it’s time for the final planting. The tomatoes can then send roots into the soil without extra stress.
How to plant hardened-off tomatoes properly
If you’ve prepared your plants carefully, you won’t want to lose ground at planting time. A few simple steps add an extra boost:
- Plant tomatoes deeper so part of the stem sits below soil level - it will form additional roots there
- Add a generous handful of well-rotted compost or tomato compost to the planting hole
- Water thoroughly after planting so soil and roots make good contact
- Put a sturdy cane or a string support in place straight away for tying in
If you want maximum reassurance, drape fleece over the newly planted tomatoes for the first few days. That way, unexpected cold snaps are far less likely to cause serious harm.
Why patience pays off twice with tomatoes
Hardening off may sound like extra work, but it saves time and stress later on. Plants that get going without shock grow more evenly, fall ill far less often, and frequently crop earlier and more heavily.
Once you’re in the groove, it’s easy to pair the routine with other jobs: check fruit blossom in the morning, put tomatoes out at midday, then secure everything again in the evening. Over a handful of spring days, you build a garden that doesn’t need to fear summer.

Comments
No comments yet. Be the first to comment!
Leave a Comment