
Spring is the best season for plant rescue.
As the days begin to stretch out, the spider plant – botanically Chlorophytum comosum – gradually shifts up a gear again. Right now, a few well-chosen actions can decide whether it becomes a lush, green centrepiece in the living room over summer or simply limps along in the background. A quick springtime check-in helps you head off trouble early and get this classic houseplant back into peak condition.
Why spring is the turning point for the spider plant
From March onwards, spider plants move into their main growth period. Fresh leaves start to emerge, the roots become more active, and the plant copes with intervention far better than it does in winter. Jobs that would feel like stress in January can work like a mini fitness programme in spring.
At the same time, this is when common mistakes crop up more often: the pot gets left in harsh sun, watering becomes too frequent or too infrequent, and tired old compost has little left to give. The result is familiar-yellowing leaves, dry edges, and hardly any new growth.
"If you give your spider plant a quick check in spring, you’re setting the foundation for a thick, healthy mop of leaves right through to high summer."
Checklist: these 6 steps get the spider plant back in shape
A full “service” takes less than an hour, yet the benefits can last for months. Rather than putting it off until “sometime”, it’s worth doing a focused care session in spring.
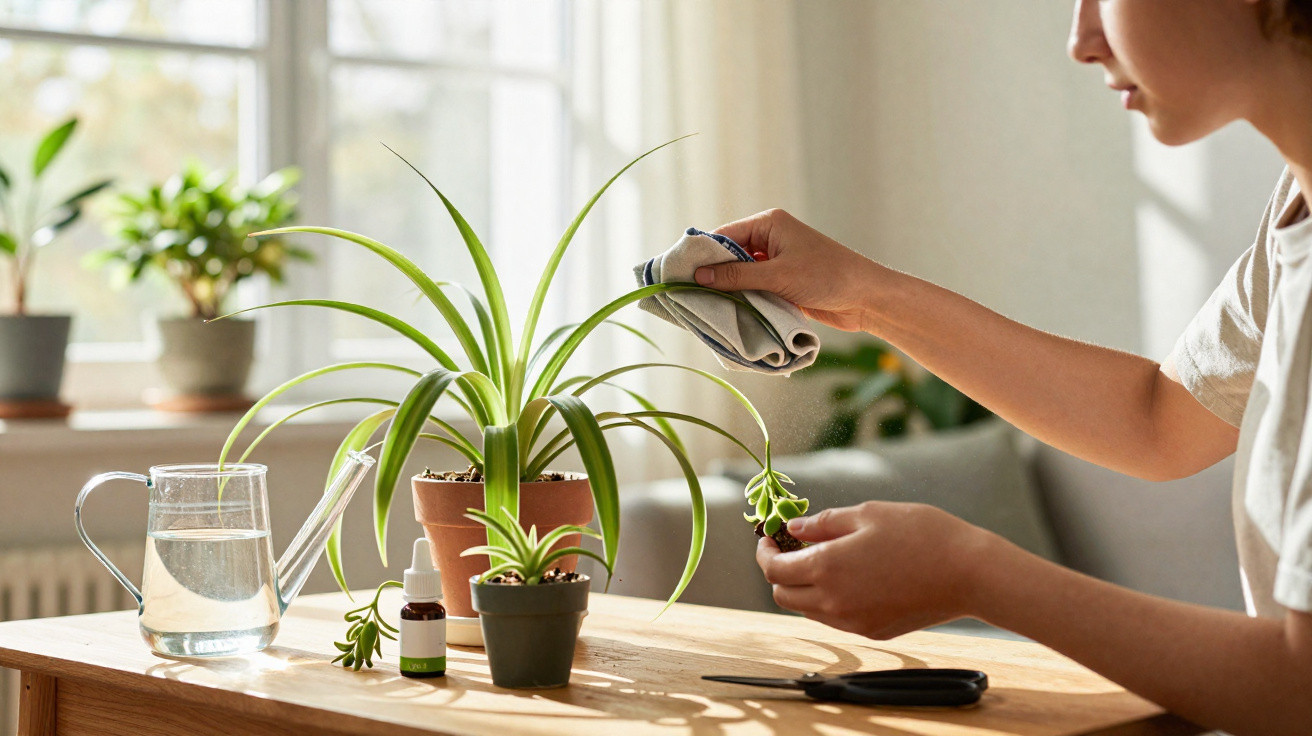
1. Dust the leaves properly
A layer of dust stops light reaching the leaf surface and can clog the pores the plant uses to breathe. So the first task is straightforward:
- Use a soft cloth that’s slightly damp
- Wipe each leaf on both the top and underside
- For very narrow leaves, gently draw them between two fingers
Afterwards the plant can take in more light again and typically looks noticeably brighter.
2. Trim brown tips and remove dead leaves
Brown leaf tips are almost a trademark of spider plants. Usually the causes are hard (limescale-heavy) water, dry air from heating, or depleted compost. In spring, it’s fine to be confident with the scissors:
- Only use sharp, clean scissors
- Remove fully dried leaves entirely
- Snip off just the brown tips at a slight angle, leaving the green section intact
Cutting on a slant makes the trim less obvious and the leaf appears much neater.
3. Water correctly instead of constantly topping up
As temperatures rise, spider plants do need more water-but they do not like sitting in soggy compost. The best watering routine follows the compost, not the calendar:
- Check with a finger whether the top layer of compost has dried out
- Only then water thoroughly, until water runs out of the bottom
- Empty the saucer or cachepot after a few minutes so no standing water remains
Smaller amounts at regular intervals tend to work better than occasional, very heavy soakings.
4. Improve the water quality
Many spider plants respond to hard tap water with brown edges. If you can, switch to a softer option:
- Collect and use rainwater for watering
- Or leave tap water to stand for at least 24 hours so some limescale can settle
"Simply switching to softer water noticeably reduces brown tips for many spider plants and helps the foliage look glossy again."
5. Feed lightly – less is more
After a long winter, the compost’s nutrient reserves are often depleted. In spring, the spider plant appreciates feeding, but it can be sensitive to overdoing it:
- Use a liquid fertiliser for leafy houseplants
- Use half the dose recommended on the bottle
- Add it to the watering can about once a month
This encourages denser, rich green growth without risking “burnt” roots.
6. Watch for pests and fine webbing
In dry winter conditions, mealybugs or spider mites can get established. Spring is the right time for a careful inspection:
- Check the base of the leaves and the leaf joints
- Look at undersides for pale speckling, sticky deposits, or delicate webbing
A light infestation can often be wiped away with lukewarm water and a little mild washing-up liquid. For heavier outbreaks, specialist products from a garden centre can help.
The ideal spot: plenty of light, but no sun scorch
With the stronger spring sun, the light in your home changes. A position that was comfortable in January can become like a frying pan by April. Spider plants do best with:
- Bright, indirect light
- An east- or west-facing window
- Around 1–2 metres back from a south-facing window, ideally with a sheer curtain
Typical warning signs include washed-out leaves or dry, pale brown patches on the upper surface-often a sign of sunburn. Move the pot a little further into the room, or add a thin fabric screen at the window.
When a bigger pot becomes necessary
In spring, it’s worth taking a quick look underneath the pot. If roots are growing out of the drainage hole, or if lifting it reveals a tight mass of roots and compost, it’s getting cramped.
In that case, the spider plant benefits from moving up:
- Choose a pot only one or two sizes larger
- Use a loose, well-structured compost for houseplants
- Mix in a little sand or perlite to improve drainage
"A fresh pot with airy compost stimulates new root growth – and that, in turn, drives lots of strong new leaves."
Using plantlets: grow young spider plants and take pressure off the mother plant
Those distinctive long stems with small rosettes at the ends are not only decorative, they’re also a practical gift. Each of these “babies” can become a plant in its own right. At the same time, removing plantlets means the mother plant puts less energy into them and more into dense foliage.
How to grow new spider plants from plantlets
- Pick a healthy, well-developed plantlet, ideally with small visible root nubs
- Fill a small pot with loose compost
- Leave the plantlet attached to the mother plant at first, and simply sit the rosette onto the new pot
- Water lightly and keep the compost evenly moist
- Only once it has clearly rooted in, cut the connecting stem to the mother plant
If you like, you can place several plantlets into one wider pot. That quickly creates a full, trailing “green fountain” – perfect for shelves or hanging planters.
Quick guide: temperature, humidity and common mistakes
Spider plants originally come from milder climates and can be sensitive to cold. Temperatures between 18 and 24 °C are ideal; below 10 °C it becomes critical. The plant also dislikes cold draughts right by a windowsill.
| Factor | Ideal | Problem |
|---|---|---|
| Temperature | 18–24 °C | Staying below 10 °C long-term weakens the plant |
| Humidity | Medium to slightly increased | Very dry air encourages brown tips |
| Light | Bright, without direct midday sun | Strong sun causes spots and scorching |
| Water | Lightly moist compost; allow to dry slightly between waterings | Waterlogging leads to root rot |
One frequent mistake is changing the plant’s position too often. Spider plants are hardy, but constant moving can still stress them. Better: choose a good spot in spring-and keep it there.
More greenery day to day: how the spider plant improves your home
The spider plant is considered beginner-friendly because it tolerates minor care slip-ups and doesn’t demand much. At the same time, it improves indoor air by producing oxygen and, thanks to its dense leaves, filtering dust from the air. That’s why it works especially well above desks, in children’s rooms, or in bright hallways.
If you keep several, they pair well with other easy-care options such as devil’s ivy or snake plant. Together they create a small, low-maintenance “green corner” that noticeably boosts comfort without needing attention every day.
"With a few targeted actions in spring, a tired spider plant turns into a lively, dense mop of leaves that visibly lifts the room well into summer."

Comments
No comments yet. Be the first to comment!
Leave a Comment