
What’s going on here?
Plenty of keen home gardeners carry their tomato plants outside on the first genuinely sunny spring weekend, full of anticipation - only to realise days later that the plants have taken a real battering. The calendar date looks right and the variety choice is fine, yet one crucial step before planting out is missing, and it can cost you the whole season.
Why tomatoes suddenly droop after the first spring weekend
Indoors, young tomato plants live like they’re on a wellness retreat: a sheltered windowsill, a heated greenhouse, a snug warm garage, or a bright conservatory. Temperatures stay steady at around 20 °C, there’s barely any air movement, and the light is softened.
That comfortable setup produces very delicate plants:
- the foliage is soft and easily damaged
- the protective waxy layer on the leaves is still extremely thin
- the stomata can barely regulate the plant’s water balance
- the roots have not yet fully colonised the compost
These young plants from heat-loving crops such as tomato, pepper, chilli, aubergine, or basil are used to comfort - not the harsher reality of the garden. If they go straight from one day to the next into full sun, wind, and chilly nights, the whole system can collapse.
Outdoors, they face a completely different set of conditions:
- UV radiation is far stronger than behind glass
- wind dries out leaves and soil
- temperatures swing widely between day and night
- in spring the soil is often still very wet and cold
The damage shows up quickly: leaves turn milky or whitish, shoots become limp, the plant stops growing, and some specimens even die. All of this can happen even when the sowing and planting-out dates are, objectively, spot on.
"The mistake is rarely just the date, but almost always the brutal switch from living-room conditions to full exposure to the weather."
The forgotten key phase: hardening off tomatoes properly
The make-or-break step is what gardeners call “hardening off”. It means easing young plants into real outdoor conditions gradually - much like an athlete builds up training loads in stages.
You can begin once daytime temperatures reach about 15 °C and no night frosts are forecast. From there, start the plant “training programme” roughly seven to ten days before the final planting out.
Nine-day plan for hardening off tomatoes
A simple, tried-and-tested routine looks like this:
- Days 1 to 3: Put the plants outside for 1–2 hours in a bright but shaded spot, sheltered from wind. Then bring them back indoors or into a protected environment.
- Days 4 to 6: Increase the outdoor time to 4–5 hours. In the morning, tomatoes can have a little gentle sun; at midday and in the afternoon, move them back into partial shade or indoors.
- Days 7 to 9: Leave them at the future planting spot for 6–8 hours at a stretch. Only if nights are still on the chilly side should the plants come back indoors overnight.
Over these days, leaves and stems adapt: the protective layer on the foliage thickens, the tissues toughen up, and plants learn to regulate water loss more quickly. Take this stage seriously and you’ll end up with noticeably sturdier tomatoes once they’re in the ground.
"Hardened-off tomatoes often carry on growing immediately after planting out - without the usual one- to two-week ‘shock stop’."
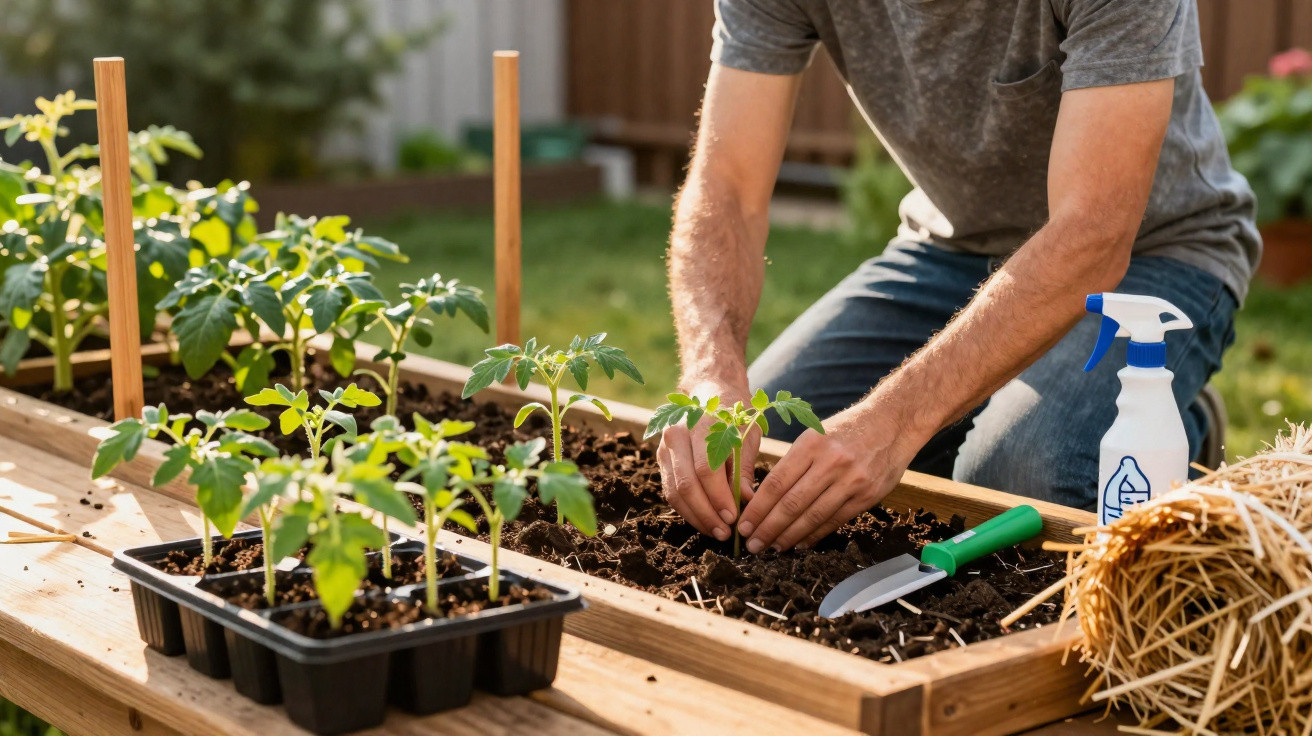
How to plant tomatoes out without stressing them
Once the plants are accustomed to outdoor conditions, it’s time for the actual planting. Here too, a few small details decide whether they truly take off.
Preparing the planting hole
Before you plant out, a quick check is worthwhile:
- the soil is not waterlogged, just lightly moist
- the ground has warmed up a little already
- no strong wind; ideally choose an overcast or lightly sunny day
Then work through it step by step:
- water the plant well so the root ball is thoroughly moistened
- dig a hole about 20 cm deep
- set the tomato so that roughly 10 cm of the stem ends up below the soil surface
Tomatoes form extra roots along buried sections of stem. That creates a stronger root system, improves water and nutrient uptake, and helps the plant cope better with dry spells.
A stake and mulch aren’t decoration - they’re protection
Put in a sturdy stake straight after planting. If you try to add it later, you can easily damage the roots. Use soft ties or clips to secure the main shoot loosely so it doesn’t whip back and forth in the wind.
Afterwards, apply a generous mulch layer around the root area. Grass clippings, chopped straw, leaf mould, or a blend of these all work well. Mulch stabilises soil moisture, reduces rain splash, and buffers temperature swings.
"Mulch acts like a natural air-conditioning system for the still-young tomato roots."
The biggest enemies after planting: wetness and fungal diseases
After moving into the bed, tomatoes do need enough water - but they’re sensitive to persistently wet leaves and standing moisture. Tight spacing and frequent overhead watering are especially likely to cause trouble.
Common diseases under these conditions include:
- leaf spot caused by fungi or bacteria
- types of powdery mildew with a white coating
- grey mould, particularly on damaged plant parts
- the well-known late blight, which can wipe out whole plants
Prevention is far easier than rescue later on. A few basic rules make a huge difference:
- water tomatoes at soil level only, never over the leaves
- water in the morning or late evening, not in midday heat
- leave enough space between plants so air can circulate
- grow under cover (tomato roof, polytunnel) if your site is very rainy
Milk as a gentle protective treatment for tomato leaves
An old gardener’s trick has been making a comeback in recent years: spraying with diluted milk. Whole milk - or lower-fat versions - is mixed with water and sprayed on the foliage at regular intervals.
A common dilution is 10–20% milk, with the remainder water. Applied every 10–15 days, this film on the leaves can do two things:
- slow the spread of fungal spores on the surface
- reduce certain deficiency symptoms on the fruit, such as brown, sunken patches on the blossom end
It’s not a replacement for good hygiene and sound growing practices, but it can support them. Important: mix it fresh each time, and don’t spray in strong sunshine so droplets don’t scorch the leaves.
Why tomatoes are particularly sensitive to stress
Radishes, carrots, or peas are sown straight into the bed and experience wind, rain, and temperature changes from day one - they effectively harden themselves off. Tomatoes, by contrast, often begin life in a bedroom, living room, or on a windowsill in a mini greenhouse. That leap outdoors hits them far harder than robust direct-sown crops.
Once you understand that, you can plan accordingly: better to grow fewer, strong, compact plants that are carefully hardened off than lots of leggy, soft young plants that buckle at the first bout of sun scorch.
It’s also worth noting how this ties in with other crops: peppers, chillies, and aubergines should, sensibly, go through the same hardening-off programme as tomatoes. In the bed, companion planting with onions, garlic, or marigolds can also help lower disease pressure a little, because different plants attract different pests and can improve airflow.
If you keep these points in mind and treat the short but decisive phase before planting out as non-negotiable, summer often brings a pleasant surprise: instead of miserable, pale plants, you’ll have sturdy tomato plants in the bed that crop almost on their own - without the drama after the first lovely spring weekend.
Comments
No comments yet. Be the first to comment!
Leave a Comment