
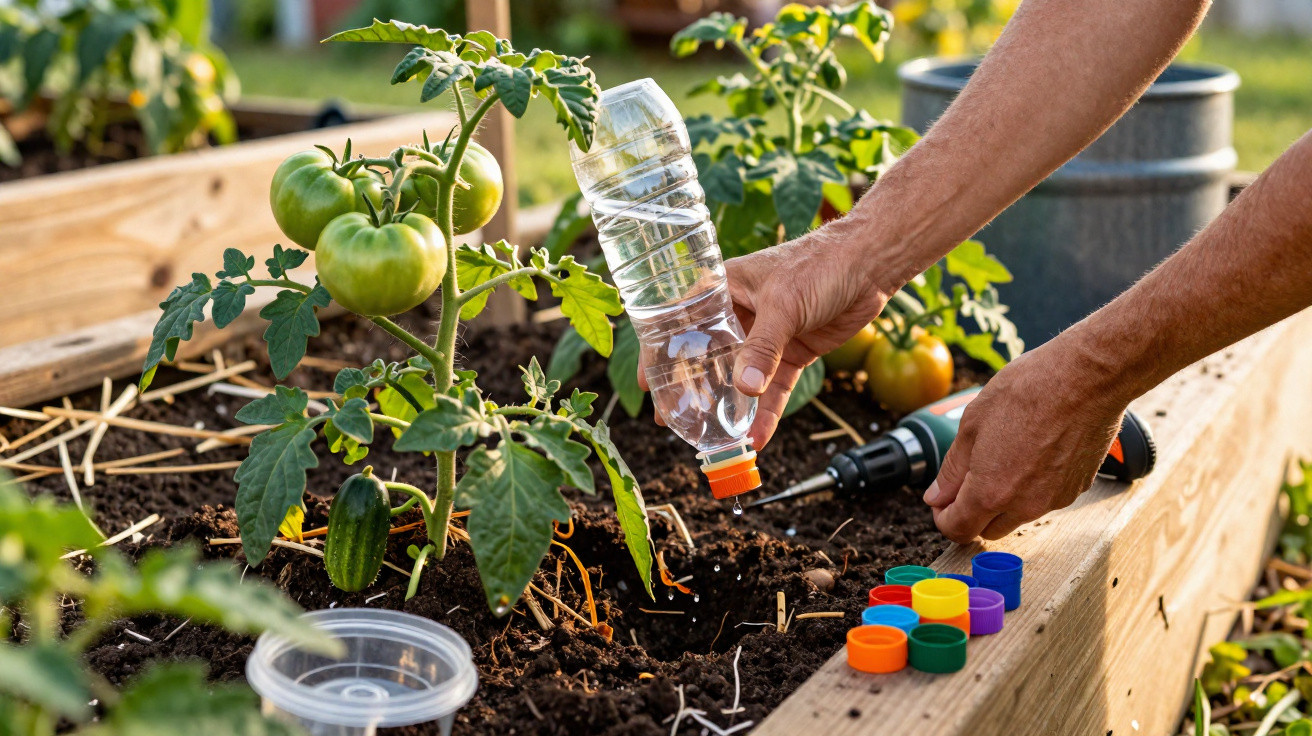
Between empty plastic bottles, colourful caps and the recycling sack lies a small watering trick that many keen gardeners simply miss. Try it once and you’ll stop tossing caps away without a thought, because they can be turned into a straightforward system that keeps tomatoes, peppers and the like reliably watered - with hardly any effort and almost no cost.
Why bottle caps suddenly become worth their weight in gold in the vegetable garden
Most days they go straight into recycling on autopilot: twist the bottle open, have a drink, rinse it out, into the bin. Yet those small plastic caps have exactly what you want in tough little garden aids: they’re rigid, weather-resistant and just the right size to work with. They don’t warp quickly in strong sun, they don’t rot, and they’ll keep going for months.
"With just a few simple steps, a basic cap becomes a mini watering system right at the roots."
So rather than disappearing immediately into industrial recycling, caps can do a useful stint in your beds first. In a raised bed, a balcony planter or a traditional plot, they help deliver water precisely where it matters: down into the soil, right to the roots.
The end of dried-out young plants
As soon as spring sunshine has real strength, a familiar issue appears: water applied from above evaporates quickly or runs off across the surface. The soil looks damp for a moment, but underneath it stays dry. Young plants suffer most - one hot day can be enough for them to flop.
That’s exactly where repurposed bottles with a pierced cap make a noticeable difference. Instead of pouring over the top in one rush, the water drips slowly and purposefully downwards. That means no waterlogging, no wet leaves, and far less evaporation.
The tried-and-tested upside-down bottle method
What you actually need
To put together a simple watering set-up from household leftovers, you only need a few items that most people already have at home:
- 1.5-litre plastic bottles (or a similar size)
- the matching screw caps
- a sturdy needle, a thin nail or an awl
- a sharp craft knife or kitchen knife
- optionally, a lighter to warm the needle
With this minimal kit, you can make a drip irrigation system in minutes, keep it running for several days, and top it up again and again.
How to make the perfect drip cap
The real secret is in the cap, because it controls how quickly the water moves. If the hole ends up too large, the bottle empties in no time. Too small, and the soil stays dry even with a full bottle.
Do it step by step:
- Warm the needle or nail briefly with a lighter (don’t let it glow).
- Carefully pierce a hole through the centre of the cap.
- Fill the bottle with water, screw the cap on, and test it over the sink.
A good target is around one drop every two to three seconds. If it runs faster, swap to another cap and make a smaller hole. If hardly anything comes through, enlarge it with a careful second pass.
"You can control the water flow surprisingly precisely through the hole size in the cap - without any technology at all."
Next, use the knife to cut the base off the bottle neatly. That open end (facing upwards later) makes topping up easy, without having to pull the whole set-up out of the soil.
How to position the system correctly in the bed
Where to place the bottle for tomatoes, cucumbers and peppers
It’s easiest to install when planting, or shortly afterwards. Place one bottle upside down in the soil next to each plant. The ideal distance is roughly a hand’s width - around 10–15 centimetres from the stem.
Detailed method:
- Use a small trowel to dig a hole at that distance, about as deep as half the bottle.
- Put the bottle in upside down with the drip cap screwed on, so the cap points down into the soil.
- Firm the soil carefully around the neck so there are no air gaps.
The bottle should sit securely and not wobble in the wind. Only the cut-off base remains above the bed and acts as the fill opening - effectively like a small funnel.
How often you should top it up
In spring, filling the bottles once a week is usually enough. The soil hasn’t dried out completely and temperatures are still moderate. From early summer, when hot spells arrive, the pattern changes: topping up every two to three days is a realistic guide.
The drops seep down gradually. Thanks to capillary action, the moisture spreads through the root zone. The surface stays comparatively dry, which noticeably reduces fungal issues on leaves and fruit.
"If you water deeper, you encourage roots to grow downwards - plants become tougher and more heat-resistant."
More than watering: clever uses for plastic caps
Making mini traps for slugs
Empty screw caps and shallow lids also work as tiny dishes. With very little effort, they can be turned into traps for slugs that love to attack lettuce, courgettes or young beans.
How it works:
- Press shallow caps or small cups into the soil around vulnerable plants.
- Fill them with a splash of beer or sugary syrup.
- Check regularly and refresh as needed.
The smell attracts the slugs, and they end up in the containers instead of in the salad bed. This can significantly reduce - or even eliminate - the need for chemical slug pellets.
Covering dangerous pole ends safely
In beds full of supports and canes, there’s another risk: sharp ends of bamboo canes, metal rods or wooden stakes at eye height. One distracted moment on a walk around the garden can be enough to take a painful knock.
A simple fix takes the edge off: push caps onto the tips. The rounded plastic covers are easy to spot, soften impacts and remove the sharp point. Especially in compact city gardens and on balconies, this adds a noticeable boost in safety.
How the vegetable garden benefits from drip irrigation
Healthier plants through targeted moisture
Anyone who tries this method for a season usually spots changes quickly. Plants that receive steady, deeper watering tend to grow more vigorously. They develop stronger roots, droop less, and cope more calmly with heat.
At the same time, foliage stays dry because water is no longer poured over the leaves from above. That lowers the risk of fungal diseases such as powdery mildew or blight. The dreaded splitting of tomatoes or cucumbers after heavy rain also happens less often, because the soil is less exposed to extreme swings between dust-dry conditions and sudden flooding.
"If you supply your plants with water evenly, the harvest is often less dramatic - but more reliable and of better quality."
More yield, less waste
The environmental side-effect is clear: every bottle and cap you reuse means fewer new purchases, less plastic waste, and even a lower water bill. Instead of spraying litres across the soil with a hose, the water goes exactly where it’s needed.
Many gardeners pair bottles in the bed with rain barrels. That way, rainwater is used especially efficiently, and the amount of mains water you need drops sharply. The monthly saving may feel small, but over the years it becomes noticeable.
Practical tips, common mistakes and smart combinations
Typical beginner mistakes - and how to avoid them
Especially on the first attempt, the same issues crop up again and again:
- Hole too large: the bottle is empty within a few hours. Fix: use a new cap and pierce more carefully.
- Hole blocked: soil gets into the cap. Fix: place a small piece of fleece or a coffee filter inside the cap.
- Bottle too close to the plant: roots get damaged during installation. Better to keep a few centimetres’ distance.
- One system for a whole row: for thirsty crops like tomatoes, it’s worth using at least one bottle per plant.
Get even more out of it with mulch and rainwater
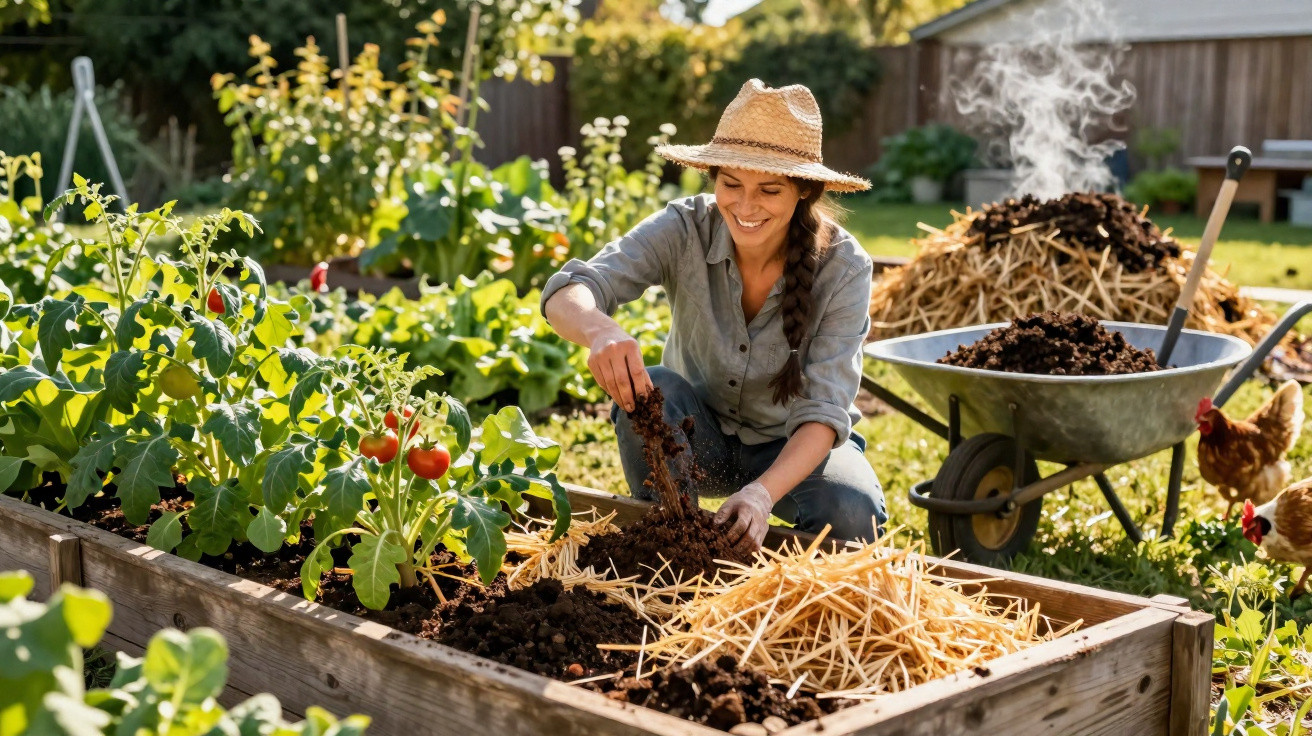
To strengthen the effect, combine drip irrigation with a layer of mulch. Grass clippings, chipped prunings or straw keep moisture in the soil for longer and help prevent overheating.
The method also pairs perfectly with rain barrels or a cistern: pour collected rainwater straight into the bottles with a watering can, so every litre ends up at the roots. That protects drinking water resources and often improves growth too, because rainwater is usually less chalky than mains water.
Once you start using bottles and caps in the garden, you quickly realise how useful “waste” can be. With a bit of creativity, not only can the yield improve, but so can the satisfaction of using resources sensibly - and getting your garden ready for drier summers.
Comments
No comments yet. Be the first to comment!
Leave a Comment