
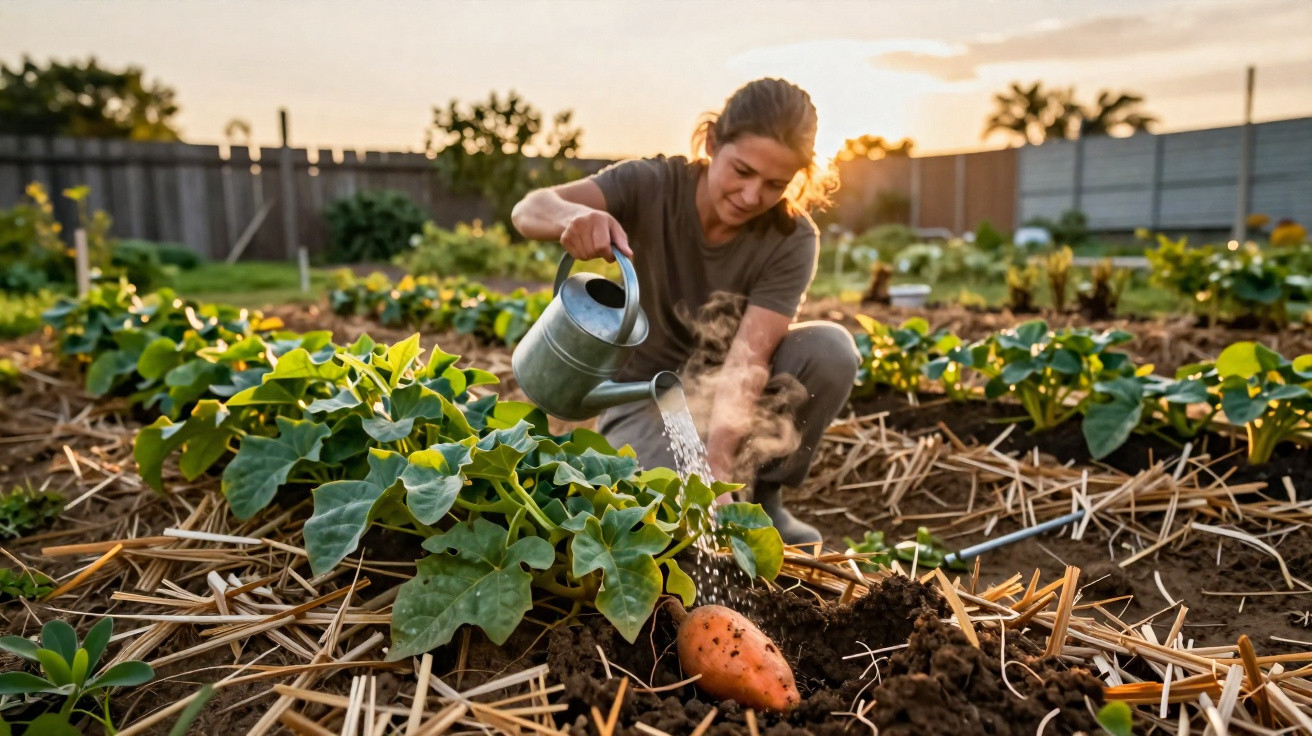
Anyone hoping to lift aromatic, chunky sweet potatoes from their own garden doesn’t need a tropical winter or specialist fertilisers. In many cases, the deciding factor comes down to one everyday habit: watering at the wrong time. Specialists estimate that up to 60 percent of the potential harvest can be lost due to a particular watering routine. The upside is that a few simple changes are usually enough to prevent it.
Why sweet potatoes react so sensitively in the garden
Sweet potatoes originate from warm parts of South America and behave far more delicately in the bed than ordinary potatoes. Below 10 °C they stop growing, cold winds put them under stress, and heavy soils slow down tuber formation. That’s why many beds in central Europe offer only average conditions-unless you adapt them deliberately.
For the roots to really get going, the soil needs to be open-structured and well aerated. If the ground is compacted, the tubers can’t push down properly. The result is lots of thin, stunted roots rather than plump, storable tubers. For that reason, experienced gardeners recommend wide, well-built raised ridges.
"If you grow sweet potatoes on loose, raised ridges and consistently adjust your watering, you can achieve remarkable harvests in a home garden."
These ridges should be around 15 to 20 cm high and spaced roughly 90 cm apart. They warm up faster, rainwater drains away more easily, and the roots can spread without obstruction. In cooler areas, that head start is close to essential.
From slips to planting out: strong young plants are the foundation
Cultivation rarely starts with ready-to-plant young plants from a garden centre; instead, many people begin with so-called “slips”. These are shoots that emerge from a pre-sprouted sweet potato. A common method uses a simple set-up with a glass jar and cocktail sticks: the tuber is suspended so it sits half in water and half in air, placed somewhere bright and warm.
Several leafy shoots will form. These are cut off and stood in a glass of water until a dense network of roots develops. Only then are the slips robust enough for outdoor planting. If you plant out too early, you’re likely to end up with weak plants that struggle to establish in the bed.
Planting outside should wait until the soil is consistently at least 18 °C and there’s no longer any risk of night frost. The rooted shoots are set deep into the ridges, with only the leaf tips left showing. A spacing of 30 to 40 cm between plants has proved effective.
The big watering trap: why daytime heat can cost 60 percent of the harvest
The most common mistake happens after planting-when it comes to water. Many gardeners automatically reach for the watering can when the sun is high and the leaves look limp. For sweet potatoes, that habit can do serious harm.
"Studies show: poor timing when watering during warm summer weeks can destroy up to 60 percent of the potential harvest."
If you water in blazing midday sunshine, a large share evaporates immediately. At the same time, the plant is forced to cope with both heat and moisture, which visibly stresses it. Foliage scorches more readily, fungal diseases spread more easily, and tubers develop unevenly. Instead of uniformly thick sweet potatoes, you often get cracked, split or spongy roots.
The best moment: why evening watering makes the difference
A thorough soak in the evening is far more effective. Evaporation is lower, and the plant can take up water calmly overnight. The roots work without heat pressure, the leaves dry off as the evening goes on, and the risk of leaf diseases falls.
During the first weeks after planting, the soil should stay evenly moist without becoming waterlogged. Sweet potatoes dislike standing water just as much as drought stress. Later, once tubers are already forming strongly, you can extend the gap between waterings. Too much water at that stage quickly leads to cracking.
- Never water in midday heat-water late in the evening instead.
- In the early stage, keep soil moisture steady.
- Towards the end of the season, reduce water to avoid cracking.
- Always water at soil level, not over the leaves.
Boost tuber formation with earthing up and mulch
As soon as the shoots reach around 20 cm in length, the next key step begins: earthing up. This means pulling soil up around the stems to create a small rise. These “mini mounds” provide extra space where new tubers can develop.
Then add a layer of dry grass clippings or leaves. This mulch keeps the soil moist, protects it from capping and stops rain from washing soil away again. At the same time, it suppresses weeds, leaving sweet potatoes with more light and nutrients.
"Earthing up plus mulch creates additional starting points for tubers and stabilises the moist, warm microclimate around the roots."
A light pass with a hoe is enough to keep the spaces between rows loose and weed-free. Aggressive digging, on the other hand, is risky because the delicate roots are easily damaged. Sweet potatoes often respond with growth disruptions or rot where injuries occur.
Harvest timing, storage and ‘curing’ the tubers
Around 100 days after planting, the foliage begins to turn yellow. That’s the sign the tubers have matured. At this point, avoid “stabbing” around with a spade; instead, carefully feel for the sweet potatoes using a fork or your hands.
Straight from the soil they taste noticeably less sweet. Full flavour develops only after a ripening step often called “curing”. To do this, keep the tubers for two weeks in a warm, sheltered place out of direct sun-for example, in a box in a dry shed.
During this period, a thin protective layer forms on the skin, small injuries heal, and the sugar content rises. Properly cured sweet potatoes can then be stored for several months in a cool, frost-free spot.
Common mistakes-and how to fix them quickly
Alongside poor watering practices, other issues often creep in and reduce yields. Most can be corrected with straightforward adjustments.
| Problem | Likely cause | Solution |
|---|---|---|
| Thin, long roots | Soil too heavy or too cold | Build ridges, loosen more, choose a sunnier site |
| Cracked tubers | Switching between drought and too much water | Water more evenly, reduce watering towards the end of the season |
| Rotten patches | Waterlogging, constantly wet soil | Improve drainage, water less, only water in the evening |
| Weak growth | Planting too early, cold soil | Plant only from 18 °C soil temperature, start later |
Why the effort is worth it for home gardeners
Anyone who has tasted well-grown, home-produced sweet potatoes quickly understands why many gardeners stick with them despite the extra work. The tubers are versatile in the kitchen, keep well, and add colour to meals-from orange to cream to purple, depending on the variety.
For families short on space, they can even be grown in a large raised bed, provided soil and water can be managed reliably. In that setting, consistent evening watering is especially effective: the water goes straight to the roots without running off the sides of the bed.
It also pays to keep an eye on plant care throughout the summer. If you regularly look under the leaves, you’ll spot chewing damage, fungal marks or cold injury early. The sooner you respond, the more effectively the plants can redirect energy into tuber production rather than stress management.
Overall, success with sweet potatoes depends less on exotic varieties or special fertilisers and more on simple routines: warm, loose soil, well-spaced ridges, timely earthing up-and, above all, watering consistently in the evening instead of in the heat of the day. If you keep those levers under control, you’ll get far more from your bed than these tender plants might suggest at first glance.
Comments
No comments yet. Be the first to comment!
Leave a Comment