
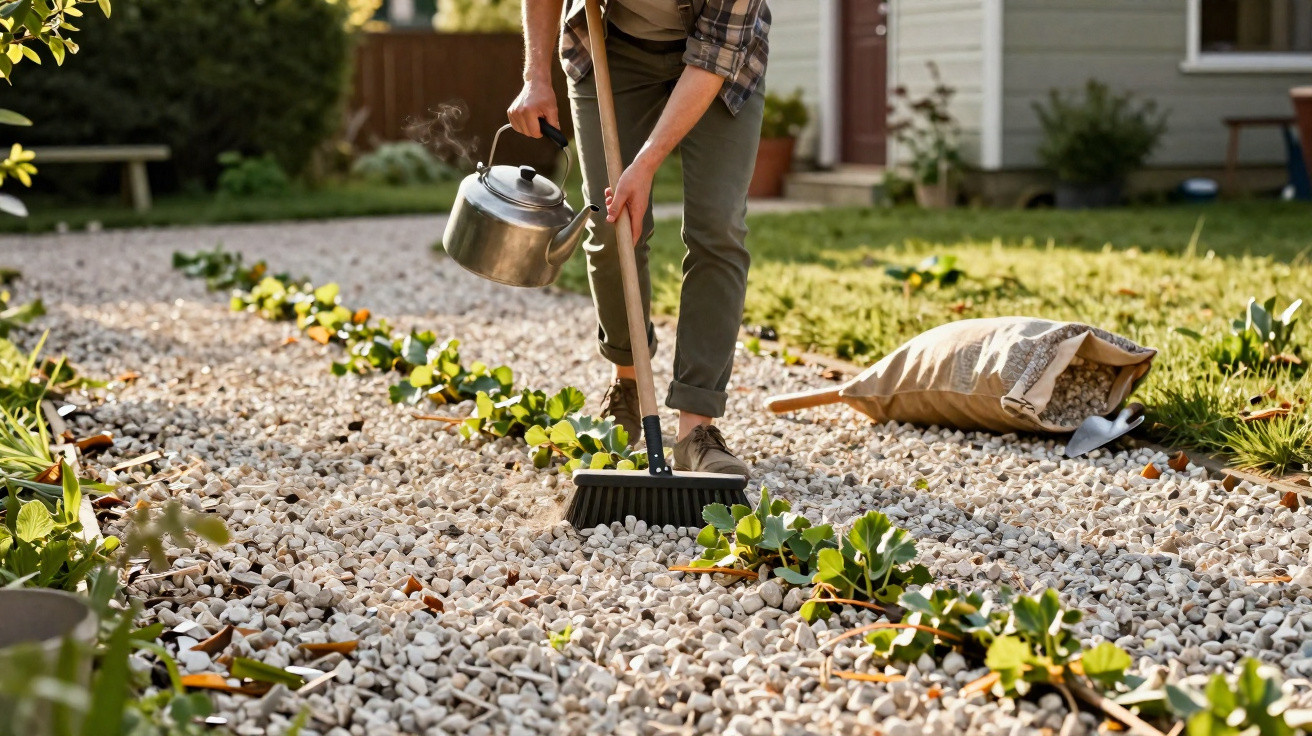
Many keen gardeners face the same annoyance every year: in spring the driveway looks tidy, but as soon as the first warm days arrive, dandelions, chickweed and the rest start pushing up between the stones. If you don’t want to rely on weedkiller long-term, and watering is limited because of water restrictions, you need a different approach. Three natural, hands-on steps-done at the right time in spring-can remove weeds’ basic conditions for growth and save a lot of frustration in midsummer.
Why your gravel driveway suddenly becomes a weed haven
A gravel driveway can look modern and well kept. The downside is that gravel doesn’t form a sealed surface. Over time, fine dust, fallen leaves and plant debris collect between the stones. Together, they create a thin, fertile layer where seeds can take hold extremely quickly.
Those seeds arrive on the wind, with birds adding to the problem. If the gravel layer is too shallow or the stones are too large, plenty of light reaches the ground-ideal conditions for wild plants. Species such as dandelion and couch grass exploit every gap.
Summer is when it really accelerates: heat, brief thunderstorm downpours, a little lingering moisture in the ground-and suddenly the greenery takes off. If it’s left unchecked, the roots mat together, trap moisture and can eventually turn parts of the driveway into muddy patches. The surface looks neglected and, in the worst case, can become more slippery.
That’s why many people, out of sheer frustration, reach for chemical products containing active ingredients such as glyphosate. Those substances end up in the soil and can leach into groundwater. Beneficial organisms like earthworms and insects are particularly affected. With three purely mechanical methods you can achieve the same outcome-more sustainably, and without the nagging guilt.
"If you prepare your gravel driveway wisely, you’ll barely need to reach for the joint scraper in midsummer-without chemicals and with almost no water."
Three natural strategies against weeds in gravel
1. The base matters: a mineral surface instead of a stage for weeds
Before the weather turns hot, it’s worth taking a proper look at what’s happening beneath the surface. The key is a stable, well-planned build-up:
- Remove all existing weeds completely: dig out roots as thoroughly as possible so strong remnants aren’t left behind in the soil.
- Lay geotextile: a water-permeable membrane blocks light while still letting rain soak through. Seedlings then dry out as their roots fail to establish.
- Use crushed gravel: a grading of around 6–14 millimetres is ideal. Angular stones lock together better and allow less light through.
- Get the depth right: roughly 5–7 centimetres of gravel helps keep the ground underneath in darkness.
- Edge it neatly: kerbs, metal edging or plastic edging stop grass and roots creeping into the gravel from the sides.
If you do this properly once, you cut down the work later on. What matters then is a small but consistent routine: remove leaves, seed heads and other plant debris once or twice a month. Otherwise a thin “soil” layer forms on top of the gravel again-and the whole cycle starts over.
2. Brush power: quicker than hand weeding
The second element is very straightforward, but often underestimated: a sturdy brush. Purpose-made wire brushes for paths, or a hard-bristled brush on a handle, are far more comfortable than working with a hand hoe.
Timing is the real secret. The best results come when you work:
- Early in the morning or in the evening: it’s cooler, and the task feels much easier.
- With slight moisture: morning dew or a very light dampening the day before softens the surface. Young shoots and moss then release from the gravel far more readily.
- Using circular movements: this loosens the top layer and pulls out fine roots along with it.
A brushing session every two weeks is usually more than enough. The crucial point is to remove the loosened plant material afterwards rather than leaving it there. It may dry out, but the next rain turns it into fresh humus-creating new growing conditions all over again.
3. Boiling water for the stubborn cases
Some plants refuse to give up even after brushing-older dandelion rosettes, couch grass and broadleaf plantain, for example. This is where the third trick comes in: boiling water.
Using a watering can or a saucepan with a pouring spout, apply the water directly to the base of the plant. The heat destroys cell structures and fine roots within seconds. Annual weeds with shallow roots are reliably killed this way.
Hardier species sometimes need a second treatment. During peak growth, an interval of about 10 to 15 days can make sense. Important: use it only in dry weather and keep a safe distance from lawns, perennials or beds-otherwise the heat will damage plants you actually want to keep.
"Boiling water hits the plants precisely-without toxic residues in the soil or groundwater."
How to combine the three methods for best results
This approach becomes truly effective when you treat the three components as a system. The mineral build-up with membrane prevents weeds from establishing in the first place. The brush keeps any young newcomers in check. Boiling water is then reserved for the few persistent clumps.
In day-to-day terms, a yearly plan could look like this:
- Spring: check the structure, top up gravel and add more membrane if needed, and reset edging neatly.
- From April/May: brush over the surface every two weeks and remove any loosened plant debris.
- From the first heatwave: intervene only in problem spots, treating stubborn plants with boiling water.
Working this way stops the driveway ever reaching a “jungle” stage. The effort is spread across short, manageable sessions instead of one exhausting day of catch-up.
What else you should know: risks, alternatives and small extras
Boiling water sounds harmless, but it does have drawbacks. On paving stones or concrete it’s generally fine; with more delicate materials such as some patio surfaces, rapid temperature changes can encourage fine cracks. On gravel areas the risk is low because the water disappears quickly into the ground.
Some gardeners also swear by household remedies such as vinegar or salt. Specialists strongly advise against both. Over time they can damage the soil, and in some areas they may even breach local regulations. Mechanical methods and heat remain the cleanest option.
If you want to improve the look of your driveway, you can deliberately allow a few plants between joints-hard-wearing thyme varieties or low cushion perennials at the edges, for instance. However, these need to be placed and maintained intentionally; otherwise the surface can quickly look messy.
There’s another benefit, too: a well-maintained gravel driveway directs rainwater into the ground rather than into the sewer system. That reduces pressure on drainage networks during heavy rainfall and helps stabilise groundwater reserves-an argument that matters more and more in places with water restrictions.
If you turn the three steps above into your own routine, you’ll soon notice the difference: the weed battle shifts from frantic emergency measures in July to short, calm sessions in spring. The gravel driveway stays stable, safe to walk on, and looks-right through midsummer-as if it has only just been laid.

Comments
No comments yet. Be the first to comment!
Leave a Comment