
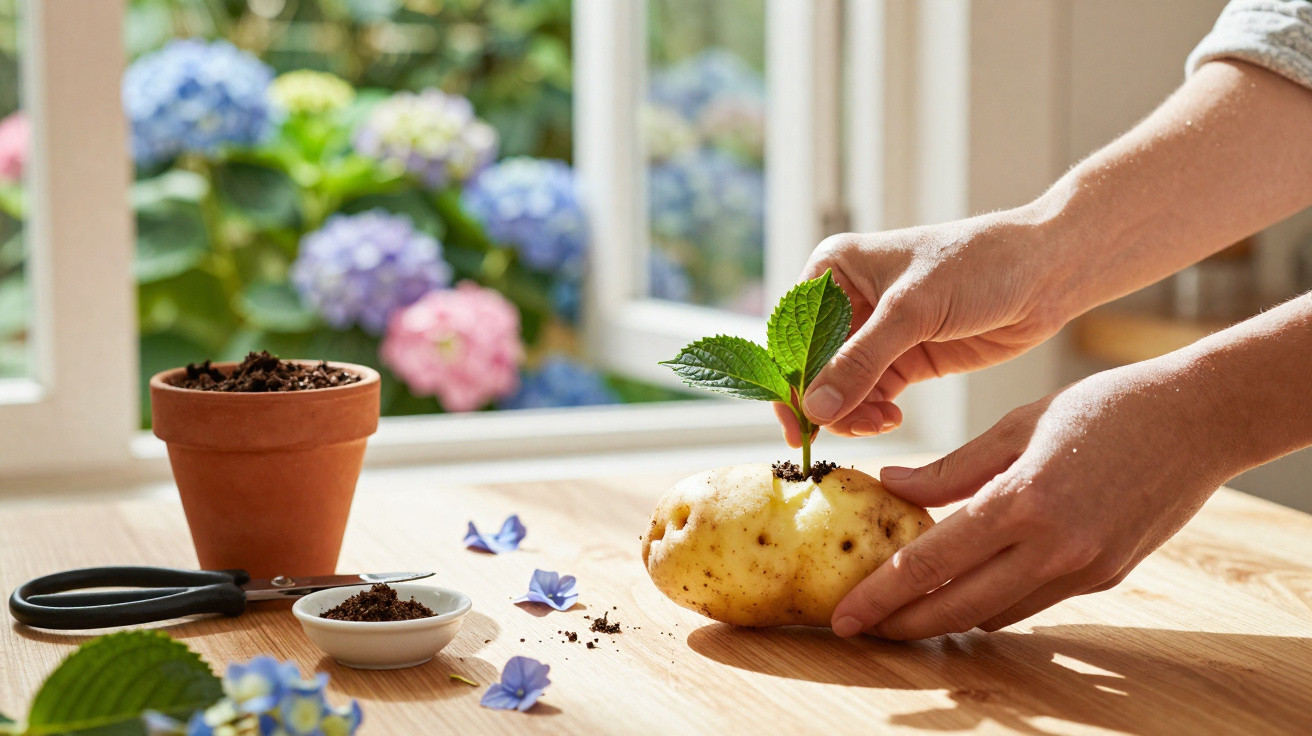
Many amateur gardeners give up on their hydrangeas far too quickly when, after the cold months, the shrub looks limp and lifeless. Yet the branches often still hold enough strength and “will to live” to raise a new plant. Most intriguing of all: an everyday vegetable from the kitchen cupboard can significantly improve your chances of success.
When your hydrangea is struggling: don’t dig it up straight away
After harsh winters, the same scene often appears in gardens: brown shoots, yellowing leaves and hardly any fresh buds. It’s easy to think, “The hydrangea is done for.” In many cases, that simply isn’t true.
Hydrangeas are tougher than they look. Even when the outer growth has suffered, a few shoots inside the plant can remain alive. Those living stems are ideal for producing new plants. Professionals refer to this as propagation from cuttings. In the best-case scenario, a weakened, partially frost-damaged hydrangea can become several young, vigorous shrubs.
If you don’t throw your hydrangea away too quickly, you can get several new plants from a shrub that looks ill – and do it almost for free.
The kitchen trick: why a potato helps
Here’s the unusual part: rather than putting the cutting straight into compost, you insert it into a potato first. Gardening experts stress that this extra step can be the difference between a cutting that “dies off” and one that “takes”.
The reasons are straightforward:
- Moisture reservoir: Potato flesh stays damp for a long time, keeping the base of the cutting evenly surrounded by moisture.
- Protection from drying out: Fresh cuttings can dehydrate quickly. The potato acts like a small protective jacket.
- A gentle source of nutrients: The tuber provides a little starch and minerals – not a replacement for fertiliser, but a mild head start.
- Stable support: Because the potato is fairly firm, the cutting sits securely and is less likely to snap or work loose.
Hydrangeas respond particularly well to this kind of gentle “all-round package”. Much like roses, their shoots benefit from an environment that stays consistently moist (but not waterlogged) until the first roots have formed.
The best time for hydrangea cuttings
Timing makes a big difference. This method works best from late spring through to summer, when the shoots are:
- green and flexible,
- not yet woody,
- ideally without flower buds.
Young, non-flowering shoots put their energy into rooting rather than blooming – which is exactly what you need for successful propagation.
Step by step: rooting a hydrangea with a potato
1. Choose the right shoot
On the weakened hydrangea, look for a healthy, green shoot with no visible damage. It should be about 10–15 cm long and have at least two nodes (leaf joints).
Proceed as follows:
- Using clean, sharp secateurs, cut the shoot off just below a node.
- Remove the lower leaves completely so they won’t rot later in the compost.
- If necessary, cut the upper leaves in half to reduce moisture loss.
2. Use rooting hormone if you wish
Some gardeners dip the bottom end of the cutting into rooting powder. This can speed up the start of root growth, but it isn’t essential. Even without it, you can get good results as long as moisture levels and placement are right.
3. Prepare the potato
Now the vegetable comes into play. Use a firm, medium-sized potato that is neither sprouting nor soft. The key point is that it mustn’t fall apart.
- With a pencil or a thin wooden stick, make a hole around 5 cm deep.
- Keep the hole narrow so the cutting fits snugly.
- Carefully push the base of the cutting into the hole.
At this point, the potato acts as a natural “rooting container”, surrounding the cutting from day one.
4. Plant the potato and cutting
Next, put the whole thing into compost. A free-draining medium is essential, for example:
- quality multipurpose compost mixed with a little sand, or
- a dedicated hydrangea compost with an open, loose structure.
Bury the potato completely, leaving only the top part of the cutting above the surface. Firm the compost gently so there are no large air pockets that could dry out.
Water, wait, test: how to tell when roots have formed
In the first few weeks, the right moisture level determines success or failure. Keep the compost evenly moist, but not wet. A pot that stays constantly soggy quickly leads to rot – first in the potato, and later potentially in the cutting too.
After about three to four weeks, try a small “tug test”:
Gently pull on the cutting. If you feel resistance, roots have very likely formed.
If the cutting slides up easily or even comes out, that means there are no roots yet (or only a few). In that case, it needs more time – or it may be worth trying again with a fresh cutting.
How the young hydrangea shrub develops
Once the cutting starts producing new leaves, it has established itself as an independent plant. From here, you’ll quickly see whether the position suits it. Young hydrangeas don’t cope well with strong midday sun. Better options are:
- a bright but partially shaded spot,
- a sheltered position out of the wind,
- avoiding intense heat next to house walls.
A pot with good drainage is ideal. In the first year, the young plant is usually better protected in a container before moving to its permanent place in the garden the following spring.
Common mistakes when propagating hydrangeas
| Mistake | Result | Better solution |
|---|---|---|
| Compost too wet | Rot in the potato and cutting | Improve drainage, water less |
| Full, direct sun | Leaves scorch, cutting dries out | Choose partial shade, provide light shading |
| Shoots too old and woody | Roots form very slowly, or not at all | Use young, green summer shoots |
| Cuttings too short | Too few nodes, low success rate | Choose 10–15 cm length and at least two nodes |
Why the effort is genuinely worth it
Hydrangeas are among the most rewarding flowering shrubs for the garden. Anyone who has seen a well-established plant knows how abundant and long-lasting the blooms can be. The potato method saves money because you don’t need to buy new plants, and it gives struggling specimens a second chance.
It also helps you plan your borders: over time, a single mother shrub can produce several identical hydrangeas, arranged in a line along a fence or around a patio. That makes it easy to place colour accents deliberately – for instance, pink varieties in the front garden and white flowers in partial shade behind the house.
Even more uses for potato and hydrangea
Interestingly, this technique isn’t limited to hydrangeas. Many shrubs and perennials with similar stems respond in much the same way. If you feel adventurous, try the trick with lavender, fuchsias or smaller rose cuttings – always paying attention to good hygiene and fresh material.
Another point that often raises questions is the colour of hydrangea flowers. It depends heavily on soil pH and certain nutrients, especially aluminium. Blue flowers are more likely in acidic soil, while pink tends to appear in neutral to slightly alkaline soils. The potato does not permanently change this chemistry; it is primarily a starter package to help roots develop.
So the next time you’re standing in front of a sad-looking hydrangea and don’t know what to do, don’t reach for the spade straight away – reach for a knife and a potato first. With a bit of patience, a partially shaded spot and regular but moderate watering, a shrub that seems beyond saving can produce an impressive amount of new life.
Comments
No comments yet. Be the first to comment!
Leave a Comment