
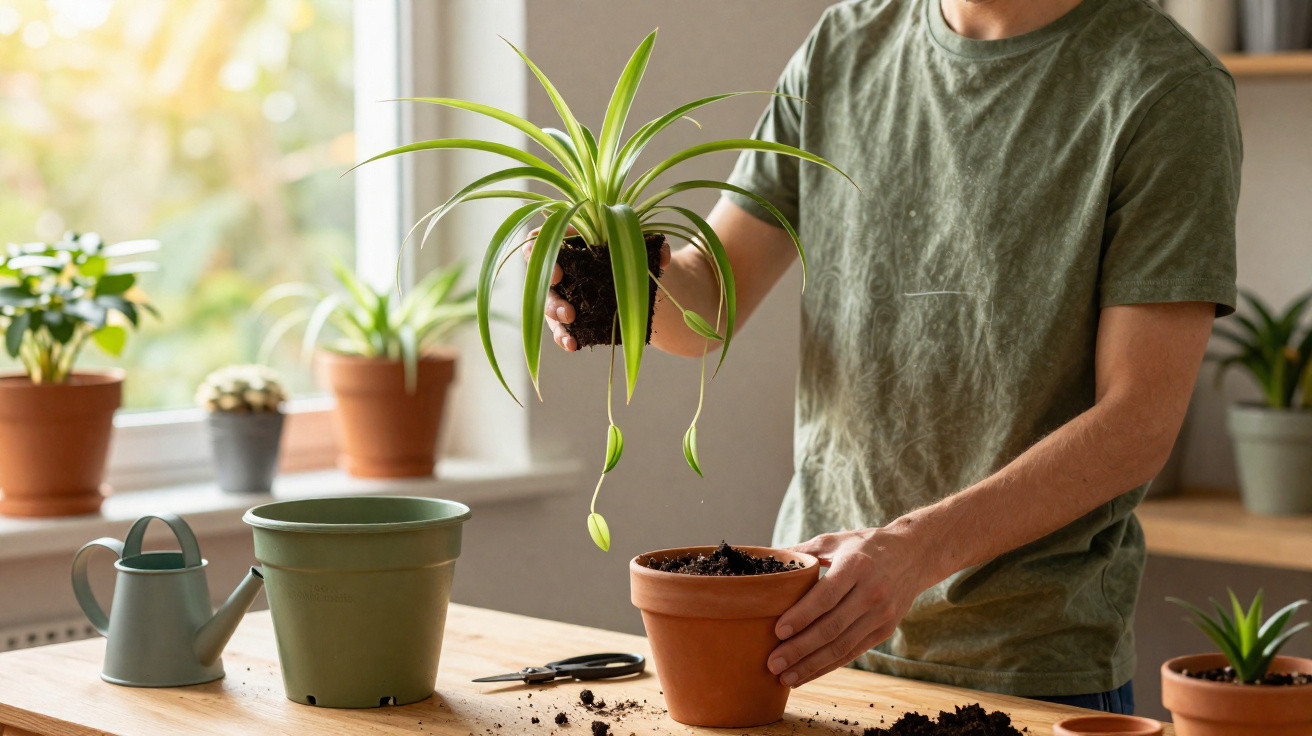
What’s behind it - and how do you change it?
Plenty of houseplant enthusiasts know this exact puzzle: your spider plant looks perfectly healthy, throws out a thick mop of leaves, yet produces none of the usual little “babies”. And that feels odd, because the spider plant (Chlorophytum comosum) is famous for multiplying with ease. If you get the conditions right, a single plant can turn into a small indoor plantation. The key factors are light, pot size, nutrients - plus a touch of stress.
How the spider plant decides when to form offsets
A spider plant generally doesn’t begin pumping out offsets in its first year. It needs time to build a strong root system and store enough reserves. It usually becomes properly keen to reproduce at around one to two years old.
Those familiar long, arching stems are stolons (runners). At their tips, small leaf rosettes appear - in other words, miniature spider plants. The mother plant supports these young plants using energy stored in its fleshy roots. Without that reserve in the bank, you’ll get a lush tuft of leaves - attractive, but with no offspring.
"Spider plants only set masses of offsets once they feel ‘established’: enough roots, enough reserves, slightly under stress."
This isn’t random. Light levels, day length, nutrient supply and pot size act like signals. When the plant in effect senses, “I’ve got the strength, but I don’t have unlimited space any more,” it shifts from root-and-leaf growth into reproduction mode.
Light: too much, too little - or simply timed wrong
Spider plants thrive in bright conditions, but not in harsh, scorching sun. A spot near an east- or west-facing window with plenty of indirect light is ideal. In deep shade it may still grow, but it often becomes sluggish and rarely produces stolons.
One point many people overlook is light duration. If the plant gets consistently very long, bright days - for example with strong supplemental lighting into the evening - it tends to prioritise leaves. Shorter daily light periods, by contrast, are more likely to trigger flowering and offset formation.
- Bright location, but not full sun
- Avoid direct midday sun, especially in summer
- For a few weeks, aim for fewer than 12 hours of light per day
If your spider plant sits under a grow light, adjusting the timer can make a big difference. Often, three to four weeks with reduced lighting is enough to prompt flowers - and then the little plantlets.
The biggest mistake: the pot is too comfortable
Spider plants actually prefer being slightly snug, more than many people realise. A pot that’s too large often stops offsets from forming. Instead of reproducing, the plant keeps investing in roots and foliage because it still has “plenty of room”.
"A slightly tight pot signals: ‘Space is getting limited’ - and that’s exactly when the spider plant launches its offspring offensive."
When is repotting worthwhile?
Often, a quick look underneath is enough: if thick roots are poking from the drainage holes or the root ball is bulging upwards, it’s time for a new pot. But go up only one size - don’t leap several sizes at once.
If you repot every few months, you remove the gentle pressure that encourages reproduction. A rhythm of roughly two years is better - and in between, it’s fine if the pot looks nicely filled.
| Pot situation | Likely reaction from the spider plant |
|---|---|
| Very large pot, lots of fresh compost | Strong leaf and root growth, hardly any offsets |
| Slightly snug pot, roots fill the container | Good chance of lots of stolons and young plants |
| Extremely root-bound pot, compost almost gone | Growth slows, plant looks stressed and more vulnerable |
Feeding and watering: a little stress helps
Spider plants are considered tough and they forgive a lot. That resilience can tempt people into over-care. Too much water and an overly generous nutrient supply create a well-fed, cosy green cushion - but not many plantlets.
During the growing season from spring to late summer, a standard houseplant feed about once a month is enough. Feeding more often, or at high strength, can remove the plant’s incentive to reproduce.
When it comes to watering, aim for evenly moist - but never constantly wet. Let the top layer of compost dry out clearly between waterings. A small dry spell provides the mild stress you want.
- Let the compost dry slightly before the next watering
- Avoid waterlogging at all costs; drainage holes are essential
- Largely stop feeding in winter
How to spot offsets that are ready to move out
Small leaf rosettes form first on the arching stems. Leaves appear before roots do, and then tiny root nubs develop. Those early roots are the sign that an offset is ready for the next step.
"Only once small roots are visible is it worth separating them - then the young plant gets going without a difficult start."
The warm season is best. From late spring to late summer, young plants establish fastest. In the darker months it often works too, but it takes longer and the risk of rot is higher.
Step by step: cutting and rooting offsets properly
Taking offsets from the mother plant
When you’re ready to cut, all you need is a clean pair of scissors:
- Choose offsets with visible, small roots.
- Cut the runner a few centimetres below the leaf rosette.
- Leave about a 2 centimetre “stem” section attached.
Alternatively, you can leave the offset connected to the mother plant and place it into its own pot first. That way it continues to be supplied via the runner until it has formed roots in the new compost.
Rooting in water
A very popular option is a glass of water on the windowsill:
- Dip only the base of the offset into the water; keep the leaves dry.
- Change the water every few days to prevent mould.
- After one to three weeks, you’ll usually have roots around 3 centimetres long.
Once there are enough roots, move the offset into compost. Keeping it in water for too long can make the roots delicate and slower to adapt.
Planting straight into compost
This can be even simpler if you use a loose, free-draining mix. A combination of multipurpose compost with a little sand or perlite works well.
Plant it only deep enough that the base is just covered. Then firm the compost gently and moisten it. Over the next few weeks, keep the compost evenly damp, but never soggy.
"Young spider plants love a bright but not overly sunny spot, a mild 18 to 22 °C, and slightly humid air."
How to care for a whole spider plant family
Once you’ve got the knack, you can quickly end up with the next “problem”: too many plants. Many people give their offsets away to friends, colleagues or neighbours. At home, the young plants can green up whole shelves or create air-cleaning “green islands”.
According to various studies, spider plants filter pollutants such as formaldehyde and certain solvents from indoor air. In homes with lots of MDF furniture or newly renovated rooms, they can be a useful addition alongside regular ventilation.
Typical mistakes - and how to avoid them
If you’re still not seeing any offsets despite your efforts, run through the usual culprits again:
- Too little light: move the plant closer to a window.
- Very large pot: choose a smaller pot next time; increase only moderately.
- Constant light: set grow lights to shorter day lengths.
- Constantly wet compost: extend the time between waterings; use a pot with drainage holes.
- Fertiliser stress in the wrong direction: cut back frequent feeding, especially in winter.
If you know these levers, you can experiment deliberately: slightly fewer hours of light, slightly longer dry intervals, a slightly tighter pot. Often, within a few weeks the spider plant responds with its first arching runners - and then that single plant quickly turns into a little “spider plant nursery” on the windowsill.
Comments
No comments yet. Be the first to comment!
Leave a Comment