
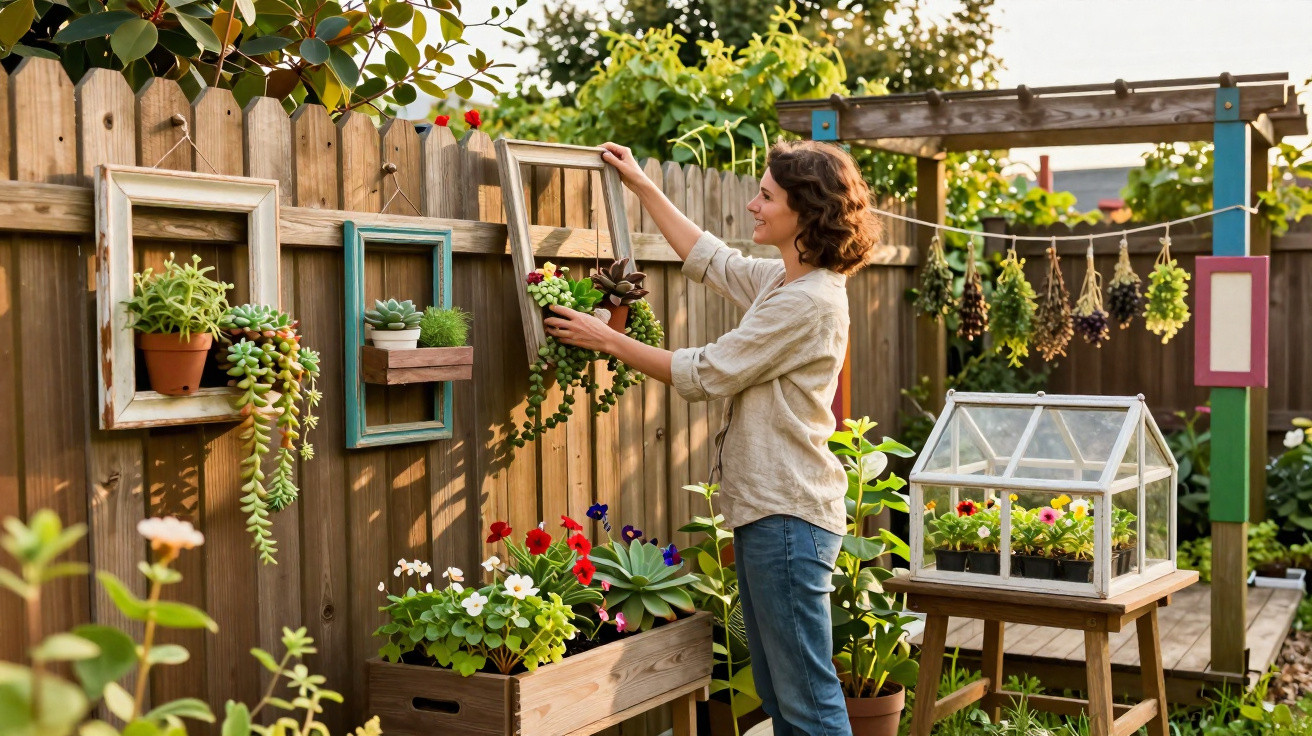
In many German homes, old picture frames end up piled in cupboards or corners, long after the photos have disappeared. At the same time, more and more people want extra greenery, even on the tiniest of balconies. What most don’t realise is that those forgotten frames are perfect for making shelves, planters, decorative pieces or even mini greenhouses - without an expensive trip to the DIY shop.
Why old picture frames suddenly matter in the garden
Wooden frames are sturdy, lightweight and, in most cases, already sitting at home. Once you stop thinking of them as photo holders and start treating them as building parts, a surprising number of DIY projects open up. Better still, plenty of these ideas work just as well in a rented flat with a micro-balcony or a narrow courtyard.
"What looks like rubbish becomes genuinely useful garden help - with little in the way of tools, little money, and lots of charm."
The craze has been heavily influenced by Great Britain, where small terraced-house gardens and compact patios are the norm. There, hobby gardeners regularly show how frames can be turned into shelves, planters, mini greenhouses and colourful statement pieces. Many of these tricks can be applied directly to German living situations.
1. Floating plant shelf from a single frame
The quickest option is a hanging shelf for one houseplant or a small pot of herbs.
- Choose a sturdy frame with glass
- Add a thin backing panel (for example, plywood or thick cardboard)
- Fix two lengths of string or cord to the top corners, either glued or screwed
- Hang the frame from hooks, a curtain rail or under a shelf
- Place a lightweight plant pot in the centre on the glass
You end up with a “floating” spot for a pothos, a succulent or even a scented candle - great in a kitchen or living-room window, and equally useful on a covered balcony.
2. Four frames become a proper planter box
If you have several old frames, you can build a small but eye-catching planter box - ideal for a balcony, windowsill or the corner of a patio.
Use four frames of the same size as the side walls. Stand them upright and glue or screw them together along the vertical edges. Small wooden blocks or metal corner brackets on the inside help keep everything square. Then add a wooden board underneath as the base and secure it from below.
Once assembled, you can sand the whole box and paint it in a colour of your choice. If you like, swap the glass for plywood or thin slats to create a different look. After that, line it with a sheet of plastic or use a suitable insert, add compost - and it’s ready for herbs, pansies or small perennials.
3. Living plant picture for the wall
“Living Frames” are particularly popular: a picture frame that grows small succulents like a piece of artwork.
For this, you’ll need a deep frame, or you can extend a standard old frame by adding a box-like section to the back. Line the inside with horticultural fleece or a strong plastic sheet, then add a shallow layer of soil. Across the front, fix chicken wire or a coarse mesh to stop the soil from falling out.
Push small succulents or cushion plants into the openings in the mesh. Let them root while the frame is laid flat, and only then hang the finished plant picture on the wall. It works best on sheltered exterior walls, and it also stands out in a conservatory.
4. Mini greenhouse from discarded glazed frames
With several glazed frames, you can make a compact propagation greenhouse - sized for a pot, a balcony planter or a herb bowl.
Six frames of roughly the same size are enough: four for the sides and two for the roof. Start by removing old hangers and any nails. Join the frames into a box using small hinges or corner brackets. Fill gaps with wood filler, then paint everything with a weatherproof outdoor finish.
Finally, refit the glass panes using silicone or a strong mounting adhesive. The result is a small cover that protects young tomatoes, chilli plants or basil from wind and chilly nights. On a city balcony, it often stands in for the garden shed you don’t have.
5. A cuttings station that looks great in the living room
If you like propagating cuttings, a picture frame can become an elegant growing station. The method is straightforward:
- Remove the glass from the frame
- Glue or screw in a sturdy backing board
- Drill two holes through the backing
- Wrap wire or strong string around a jar, test tube or small bottle
- Feed the wire ends through the holes and secure them on the back
Once the frame is on the wall, the glass container appears to float in front of it. Add water, pop in a cutting from ivy, monstera or coleus, and the old picture turns into a living plant lab.
6. Herb-drying rack from two wooden frames
Anyone harvesting basil, mint or sage on a balcony will know the problem: where do you dry it all?
A simple fix is to stretch insect mesh or fine wire across the back of two identical wooden frames. Use four equal lengths of cord to suspend the top frame from the ceiling or a hook. Then use four shorter lengths to hang the second frame beneath it.
This creates a two-tier, well-ventilated drying rack. Lay the herbs loosely, turn them regularly, and after a few days they’ll be dry enough for tea, seasoning mixes or scented sachets.
7. Frames as colourful garden art on fences and pergolas
Frames without glass are brilliant for outdoor decoration. They’re lightweight, easy to rearrange, and they add instant interest to dull fences or shed walls.
One approach is to spray old frames in bold colours - turquoise, sunshine yellow or red, depending on your taste. Hang them in a cluster on a fence, a pergola or a trellis. If you want to go further, add fairy lights or let climbers such as nasturtiums weave their way through.
The effect is like a “free-standing window”, bringing colour to the outdoor space even in winter. In the evening, paired with lights, a frame collage can look surprisingly premium - despite costing next to nothing.
8. A rustic garden sign for children and guests
Frames also work well for playful signs: the name of your balcony garden, a “Welcome” at the entrance, or a label for the tomato bed.
It’s simple enough for children to join in:
- Paint the frame with chalk paint or blackboard paint
- Once dry, lightly sand the edges for a vintage feel
- Attach artificial flowers, ribbons or small wooden letters to the frame
- Hang a cord with cut-out letters, or a small wooden plaque, in the centre
For families, it’s a lovely project: children can draw, stick and write, then proudly point out “their” sign on the raised bed or balcony rail.
What DIYers should watch out for with frame projects
With all the creativity, it’s worth giving safety and materials a quick check. Old frames can have splinters, loose joints or glass that’s already weakened. Before you start converting anything, inspect it carefully, tighten screws and sand down sharp edges.
For outdoor builds, standard craft paint often won’t last. Outdoor wood stains or weatherproof paints are a better choice. If you’re using glass in the garden, make sure it’s fixed securely and avoid placing it where children play or balls might fly. For greenhouse-style projects, acrylic sheet (such as Perspex) or frames that already use acrylic glazing are good alternatives.
Why the effort pays off - and what else can be upcycled
Beyond how good they look, these ideas score highly on sustainability. Instead of buying new decorative items and plant containers, you reuse what you already have. That saves money, cuts waste and gives a balcony an individual feel that no matching furniture set can replicate.
Other household “dust collectors” can be repurposed just as creatively: old ladders become plant shelves, wine crates turn into raised beds, and retired window sashes can be made into a cold frame. Once you start viewing your belongings through a “gardener’s eye”, you’ll spot potential plant furniture everywhere.
Old picture frames are an ideal starting point. They’re easy to work with, need only basic tools and deliver quick, visible results. And in the process, not only might the stack of frames disappear from the cupboard - your balcony could become a small, deeply personal green stage.
Comments
No comments yet. Be the first to comment!
Leave a Comment