
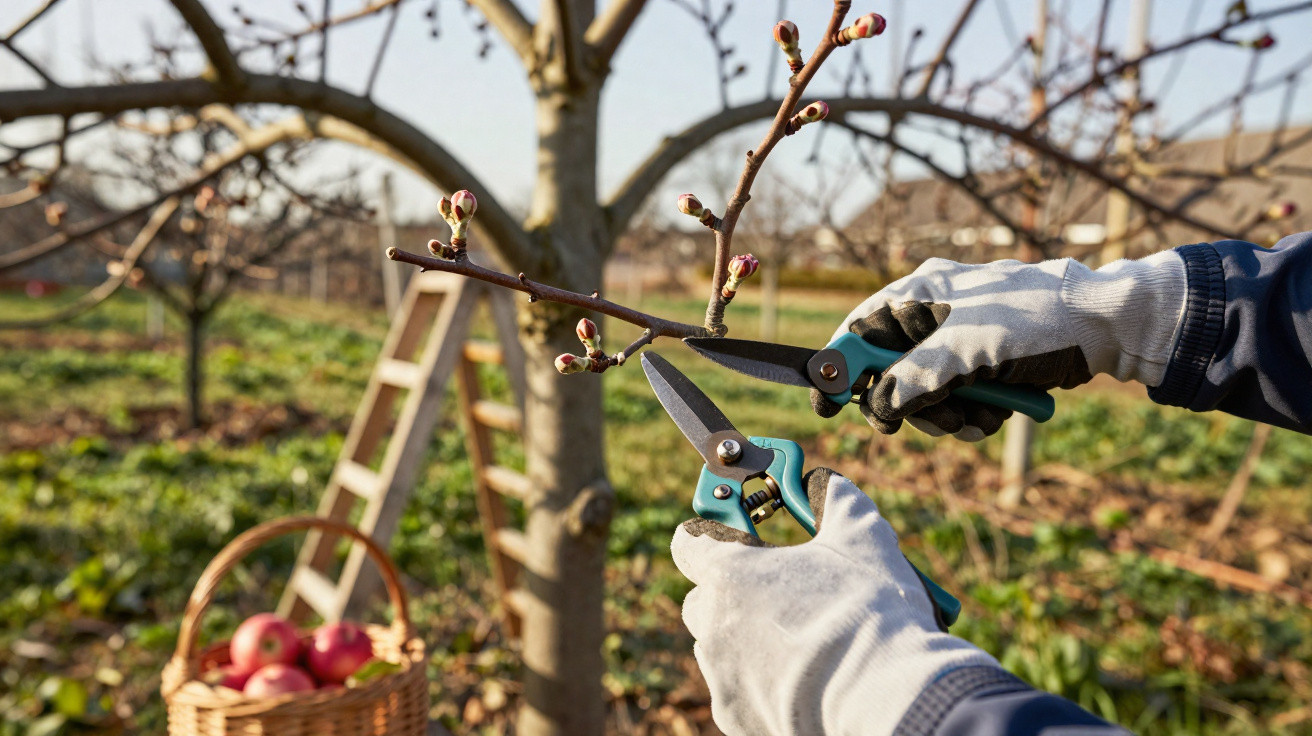
Many amateur gardeners sit back in February because nothing appears to be happening in the orchard. The trees are leafless, the ground is wet and cold, and apples are far from anyone’s mind. Yet taking action now can change the outcome: one frequently overlooked task can make the difference between undersized fruit and heavy, juicy apples.
Why February determines whether apple baskets are full
Apple trees are dormant in late winter, but vital processes are continuing out of sight. Their sap has retreated into the roots and the buds are still asleep. This dormant period is precisely what makes pruning especially well tolerated.
“The ideal time for beautiful apples is not spring, nor flowering time – it is right in the middle of grey February.”
At this point, apple trees generally cope far more calmly with pruning. Cuts scarcely bleed, the risk of frost damage to fresh wounds is low, and the tree has time to recover before growth begins.
The key to a generous crop is fruiting pruning. Unlike cosmetic pruning, which simply improves the tree’s shape, fruiting pruning directs its energy. Pruning correctly now ensures that the tree’s vigour goes into flower buds and fruit rather than needless, lengthy shoots.
Fruiting pruning rather than shaping: what really matters
Every apple tree is continually faced with the same “choice”: wood or fruit? Left untouched, it tends to prioritise growth, producing long, thin shoots. The result is plenty of foliage, too little light within the crown and apples that are often small and lacking in flavour.
Targeted winter pruning allows the gardener to correct this. Selected branches are shortened and troublesome shoots are removed. This means that:
- the crown becomes brighter and better ventilated;
- the tree’s energy is concentrated on fewer but stronger fruiting spurs;
- apples ripen more fully and develop greater flavour.
In February, this work acts rather like a reset for the tree. In spring, it responds with balanced new growth instead of sending out masses of frantic watershoots.
Choosing tools for apple tree pruning: what to prepare before the first cut
Before a single bud is removed, the condition of your tools determines whether the tree stays healthy or suffers unnecessarily. Blunt blades crush the wood, leave ragged wounds and create easy entry points for fungi.
A well-maintained apple tree calls for this basic equipment:
- Sharp bypass secateurs: for young shoots and slimmer branches.
- Sturdy loppers: for thicker branches requiring additional leverage.
- A pull saw, if needed: for old, substantial limbs that will no longer fit between the lopper blades.
- Alcohol or disinfectant: for cleaning blades between different trees.
“Clean, sharp cuts provide the best plant protection, long before sprays even become a consideration.”
One further step takes very little time but prevents substantial trouble: disinfect your tools when moving from an unhealthy tree to one that is clearly healthy. Many fungal spores and bacteria travel unseen on the blades.
Inspect first, prune afterwards: the quiet health check
Before removing the first branch, take a brief walk around the tree. This initial inspection will tell you where to make your cuts later.
Pay particular attention to:
- branches that cross or rub against one another;
- shoots growing into the crown rather than outwards;
- dead or visibly diseased branches, with discoloured or brittle wood;
- very upright shoots that rise like whips.
The aim is an open, airy crown that will later allow sunlight to reach as many fruits as possible. A light-filled tree dries more quickly after rain and gives fungal diseases fewer opportunities to take hold.
The “three-bud rule”: small cuts with a major effect
The side shoots growing from the main branches are at the heart of fruiting pruning. They determine whether your autumn basket holds shop-quality apples or mainly windfalls. One straightforward guideline is particularly helpful for beginners: the three-bud rule.
How the three-bud rule works
For each side shoot, proceed as follows:
- Find the base of the side shoot, where it emerges from the thicker branch.
- Starting at that base, count forwards to three buds.
- Make the cut directly above the third bud.
- Ensure that the third bud faces outwards.
“With every cut above the third bud, you focus the tree’s energy on a small number of productive buds – close to the nutrient supply.”
Why should the final bud face outwards? It ensures that new growth develops away from the centre of the crown. The middle of the tree remains clear, while the future apples are easier to reach and dry more quickly following rainfall.
What a good cut looks like
A properly placed cut has three features:
| Feature | What to look for | Effect on the tree |
|---|---|---|
| Angled cut surface | A slight slope leading away from the bud | Rainwater drains away and the bud remains dry |
| Smooth wood | No fraying or crushed fibres | The wound heals faster and pathogens have a harder time |
| Correct distance | 2–3 mm above the bud, no more | The bud does not dry out and the branch does not die back |
Common mistakes that prevent beautiful apples
Many gardeners hesitate because they fear cutting off “too much”. Others prune so severely that the tree seems offended for years. Both extremes reduce the harvest.
Too little or too much: the two classic wrong turns
- No pruning at all: The tree becomes increasingly tangled and its crown grows darker. Fruit stays small and is often produced only around the outer edge of the crown.
- Drastic pruning: Heavy cuts leaving thick stumps trigger a kind of emergency response. The tree produces numerous upright watershoots, which bear very little fruit.
The strongest results come from working moderately but consistently: make a few corrections every year rather than carrying out a major clear-out every five years.
The right angle: a small gesture with valuable protection
Many tree-wound problems begin with inconspicuous details. A cut made vertically above a bud collects water like a tiny bowl. If the area remains wet for a long time, fungal spores can establish themselves more easily.
“An angled cut leading away from the bud is like a small wooden roof – water simply runs off.”
Position the blade so that the cut surface slopes gently. The higher side should sit directly above the bud, while the lower side points towards the branch tip. This reduces the amount of moisture entering the wood.
After pruning: wound care and hygiene matter
Pruning leaves exposed surfaces in the wood. Larger branches in particular create openings through which pathogens may enter. Taking one additional step can be worthwhile here.
When wound sealant is useful
For very thin shoots, the tree’s own natural defences will usually be sufficient. With larger cut surfaces – from roughly two to three centimetres in diameter – a wound sealant can help.
Common products include:
- pine tar;
- clay-based or resin-based pastes;
- natural formulations containing plant oils.
They cover the wound and allow the tree time to form its own protective callus wood. Crucially, apply them only to dry wood; otherwise, you will seal moisture inside.
Do not simply leave prunings behind
The ground beneath the tree also affects the health of the planting area. If prunings displaying signs of disease are left there, they can spread spores throughout the surrounding area.
For this reason:
- Healthy branches can be chipped and added to the compost.
- Suspicious or infected material is best collected separately and disposed of.
“What you clear from the ground after pruning is one less new source of disease for the tree to endure in summer.”
How winter pruning affects apple flavour in autumn
Many gardeners notice the difference not only in a fuller basket, but also in fruit quality. Open crowns produce apples that can ripen in sunlight, develop sugars and form firmer skins.
An apple receiving enough light produces more pigments. That not only improves its appearance, but often goes hand in hand with better flavour. Pest pressure also falls, as spider mites and fungi favour dense, shaded areas.
Those who use secateurs regularly in February generally see a stable, reliable level of cropping after two to three years. Rather than producing an extreme crop one year and almost nothing the next, the tree settles into a healthy middle ground.
Practical example: two neighbours, one winter, two very different harvests
Imagine two neighbouring gardens. In the first is an older apple tree that has barely been touched for years. Its crown is dense and tall, while the few apples it produces hang at the very edge and are difficult to pick.
In the second garden, someone takes up the secateurs in February. They follow the three-bud rule, thin out crossing branches and remove dead sections. Initially, only subtle differences are visible in summer: more light, less foliage and a lighter crown.
By autumn, the effect is unmistakable. Tree one offers a few small, partly blemished apples around the crown’s edge. Tree two does not necessarily carry many more fruits, but they are evenly sized, colour up better and taste more intense. Both trees grow in the same climate and receive the same rainfall – the decisive factor was the work done in February.
Risks and limits: when restraint is advisable
Despite its many benefits, there are circumstances in which you should hold back. For very young trees in their first year after planting, a light formative prune is often enough. Cutting back too much can delay their establishment.
Trees that are severely damaged or threatened by fireblight should also be assessed by a professional. Incorrect cuts in infected areas can speed up the disease’s spread. In these cases, every centimetre of the cut matters.
For normally vigorous apple trees, a calm, clearly planned fruiting prune in February distributes the tree’s energy more intelligently. Anyone who invests a few hours in this winter work year after year lays the foundation for full fruit crates – long before the first leaf breaks from its bud.


Comments
No comments yet. Be the first to comment!
Leave a Comment