
What might sound like a nuisance can be solved with a simple trick that needs nothing more than a bit of paper or plastic and some compost. One neat rolling technique can replace dozens of pots – saving both money and waste at the same time.
What the so-called “snail sowing” method is
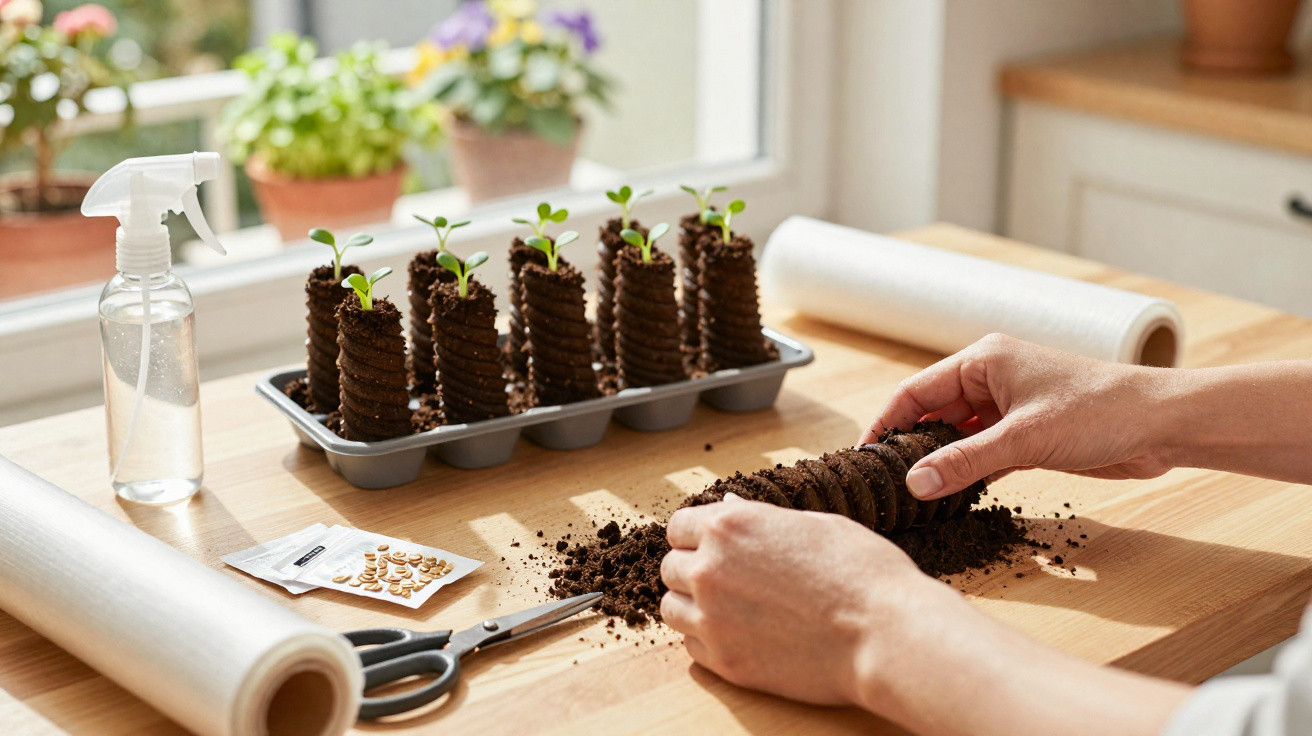
With snail sowing, you don’t use a traditional container. Instead, you fill a flexible strip of paper or film with compost and seeds, then roll it up. The result is a compact cylinder that, viewed from above, resembles a snail.
"Several rows of seedlings grow in a single upright roll – close together, but clearly separated and easy to reach."
Set upright in a shallow tray, the roll takes up very little space and can later be unrolled again without fuss. This means you can start far more young plants in a small area, without cluttering a balcony or windowsill with plastic propagation trays.
Why more and more gardeners are switching to this method
The concept comes straight from real-life growing: anyone trialling lots of varieties won’t want to buy an entire army of pots or seed trays. Snail sowing tackles several common spring seed-starting problems in one go.
- Saving space: Dozens of seeds fit into a single roll that needs little more room than a saucer.
- Using everyday materials: Old plastic bags, newspapers or packaging film can be reused instead of binned.
- Easy pricking out: Rather than teasing seedlings out of a pot, you simply open the roll bit by bit.
- Keeping control: All seedlings sit together, don’t dry out individually, and are easier to monitor.
Especially in small flats or on tiny balconies, the space advantage is huge: where you might otherwise manage four small pots, you can suddenly raise enough seedlings for a whole vegetable bed.
Materials: what you actually need
To get started, you’ll usually find everything in the kitchen cupboard or recycling box. In most cases, there’s nothing you need to buy.
Suitable base materials
- a cut-open freezer bag or a thin plastic bag
- strips of newspaper or brown packing paper
- thin, flexible film from packaging
The key is that the material rolls easily and doesn’t tear straight away. Paper will soften over time, which can even help roots develop.
Other items that are useful
- kitchen roll or a thin cotton cloth to hold moisture
- fine, crumbly seed compost
- the seeds you want to grow (lettuce, tomatoes, herbs, flowers, etc.)
- a shallow tray or saucer to stand the roll in
Many gardeners also use labelled wooden sticks or a strip of tape to note the variety and sowing date on the roll.
How snail sowing works, step by step
1. Cut the strip
Lay your chosen film or paper flat on the table. Cut a long strip about 10 to 15 centimetres wide. The length depends on how many seeds you want in one roll; for a first attempt, 40 to 60 centimetres is often plenty.
2. Add a damp layer
Place a sheet of kitchen roll or a thin cloth along the strip. Moisten it briefly, but don’t soak it. The aim is simply to help the compost stay evenly damp.
3. Spread the compost
Next, distribute a thin layer of seed compost over the damp base. Around 1 to 2 centimetres depth is ideal. Too thick and the roll becomes hard to shape; too thin and it dries out too quickly.
4. Place the seeds and leave spacing
Now arrange the seeds lengthways along the compost. Leave at least 2 to 3 centimetres between seeds; for larger seeds such as beans, allow a bit more. That way, seedlings will have enough room to form their first roots.
"The spacing between seeds determines how easily the young plants can be lifted out later on."
5. Roll it up and secure it
Carefully roll the strip from one short edge to the other. Don’t pull it too tight, otherwise the compost will be squeezed out. You’ll end up with a compact roll. If you like, hold it in place with an elastic band or a piece of string.
6. Stand the “snail” upright and water
Stand the roll upright in a tray with the open top facing upwards so the compost is visible. Add a small amount of water to the tray so the bottom edge of the roll can draw up moisture. The compost should absorb water by capillary action, without sitting submerged.
Care: keeping seedlings healthy
Once the snail is made, it mainly needs three things: light, steady moisture, and a quick check now and then.
- Check moisture: Test the top layer of compost with a finger. If it feels dry, add a little water to the tray.
- Ensure light: A bright spot on a windowsill is usually enough. However, direct midday sun can overheat the roll.
- Allow airflow: If you cover the roll (for example with cling film), ventilate regularly to prevent mould.
After a few days you’ll see the first green tips. From then on, seedlings need particularly good light so they don’t become leggy – producing long, thin stems.
When the young plants should move on
At the latest, once the first “true” leaves appear after the seed leaves, it’s time to think about moving them on. Depending on the plant, this is usually around two to three weeks after sowing.
To prick out, lay the roll down carefully in the tray and unroll it slowly, section by section. Each little plant sits with its small clump of compost in the damp layer and can be lifted gently with a spoon or your fingers.
Ideally, pot the seedlings into prepared pots of loose compost or – if the weather is settled – plant them straight into the bed. For the first few days after transplanting, keep the compost slightly moist so new roots can establish well.
Which plants are particularly suitable
Not every crop behaves the same way. Some plants benefit greatly from snail sowing, while others are simpler to sow directly outdoors.
| Plant | Suitability for snail sowing | Note |
|---|---|---|
| Tomatoes, peppers, chilli | very good | warmth-loving; many varieties can be started in a small space |
| Lettuce and Asian leaves | good | quick to germinate; easy to prick out |
| Herbs (basil, parsley) | good | need consistent moisture; benefit from the microclimate |
| Sweet peas, beans | limited | seeds are relatively large; leave more space |
| Root vegetables (carrots, beetroot) | less suitable | direct sowing into the bed is usually more sensible |
Typical mistakes and how to avoid them
The method is fairly forgiving, but a few common pitfalls crop up again and again:
- Roll too wet: If the snail sits in water constantly, the lower layer can rot. Aim for lightly moist conditions rather than a flooded base.
- Seeds too close together: When spacing is tight, seedlings quickly compete for light and nutrients.
- Not enough light: Long, pale growth is a clear sign the position is too dark.
- Pricking out too late: Roots tangle together and seedlings become harder to separate.
Why this technique fits the times so well
Many people want to garden more sustainably, cut down on waste, and buy less plastic. Snail sowing supports that: it makes use of materials you already have, avoids new plastic pots, and suits compact city living.
It also makes it easy to experiment with varieties in a playful way. Three or four tomato varieties, a few herbs, some lettuce – all in a handful of rolls on a narrow windowsill. If you have children, they can get involved too: rolling, moistening and checking each day makes the growing process feel tangible.
For beginners, the approach can seem unusual at first – but that’s part of the appeal. The method proves you don’t need much to raise strong young plants: a bit of imagination, a few everyday materials, and the willingness to try something new in the garden bed.
Comments
No comments yet. Be the first to comment!
Leave a Comment