
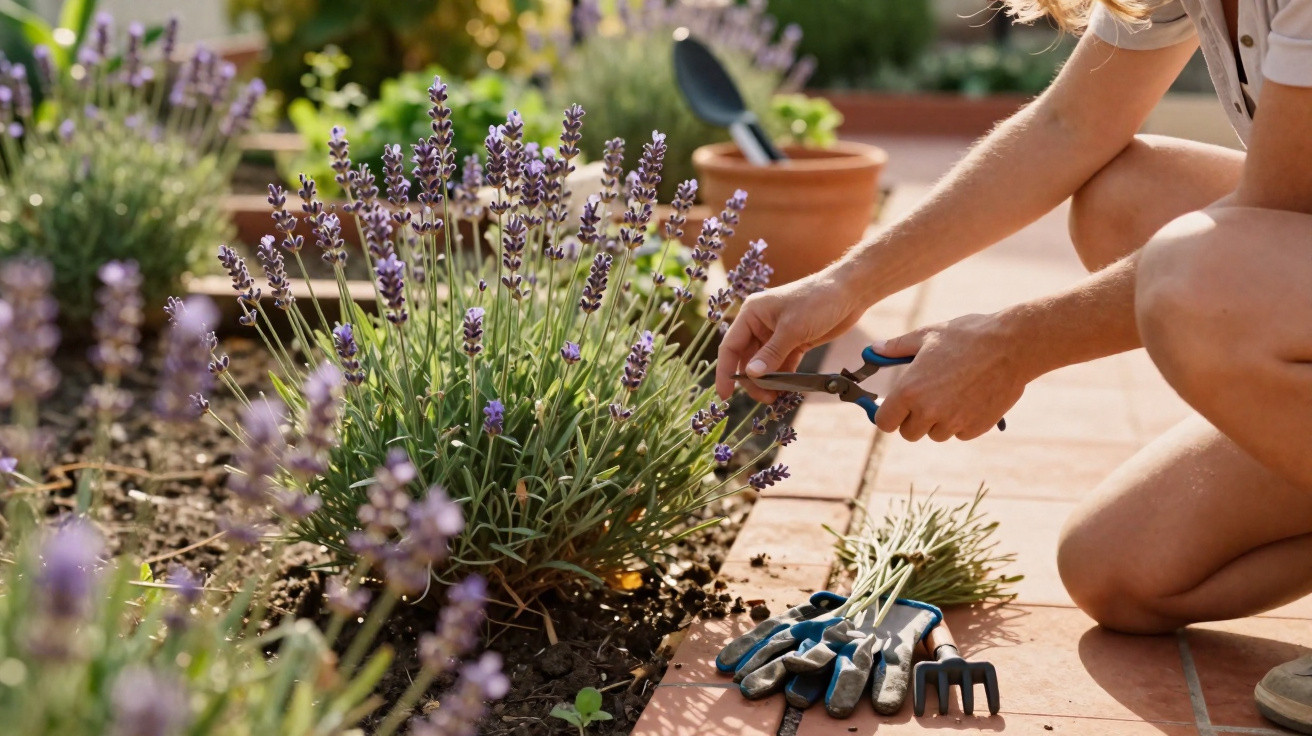
If you grow lavender in the garden, you will recognise the pattern: first it glows a vivid violet, then-almost overnight-it turns into a scruffy tangle of dry twigs. Most of us blame unpredictable weather or “bad luck with the spot”. In reality, it is very often the correct prune-at the correct time-that decides whether lavender gives up after five to eight years or keeps going for a solid two decades.
Why lavender ages quickly without pruning
Lavender is botanically a semi-shrub. In practice, that means the base quickly becomes hard, brown wood, while fresh green shoots continue to grow above. This so-called old wood hardly produces new growth. Once the plant slips too far into that woody section, it loses vigour.
You can usually see the decline clearly in the garden:
- The rounded, dense shape gradually opens up.
- The centre becomes bare, leaving real holes in the cushion.
- The plant starts to look like a small, dry broom.
- Flowers become fewer and are mostly carried around the outside edge.
At this stage, many people prune “hard” on impulse-and end up cutting right into the old wood. But there are hardly any viable buds there. The outcome can range from weak regrowth to entire branches drying out completely.
"If you never prune lavender, or prune it incorrectly, you often unknowingly halve its potential lifespan."
In gardens where plants are tended irregularly-or not at all-many lavender shrubs die off in under ten years. Very different are plants that are cut deliberately every year, but only within the green growth: compact, full, evenly flowering-and not uncommonly for 15 to 20 years.
The right time: reach for the shears twice a year
It is not only how you prune that matters, but also when you do it. Two timings have proved themselves and are easy to remember.
Main maintenance prune after flowering
The first window is shortly after the main flowering period, roughly between late August and late September. At this point the flower stems have faded, but the plant still has enough energy in its green growth.
Aims of this prune:
- Remove spent stems
- Shorten and shape the green growth
- Encourage new branching for next year’s bloom
Light shaping or correction in late winter
The second window is towards the end of winter, before sap flow really gets going-usually between February and March. This can vary slightly depending on your area:
- Milder regions: do the maintenance prune after flowering, then from late February a light corrective trim is possible, as long as the buds are still tight and there is no strong new growth.
- Cooler areas and upland regions: in autumn, only take off dead material and leftover flower stems. The actual shaping cut is better done in March, once severe frosts are unlikely.
"Use the calendar, but keep an eye on the plant too: what matters is whether it is already about to ‘get going’ or is still resting."
The golden rule: cut only in the green growth
The single most important point when pruning lavender can be summed up in one line: only cut in the green, leafy area-never into the bare, brown wood.
In practical terms:
- Find the lowest ring of green leaves on each shoot.
- Treat that level as your “safety line”.
- Always place the blades a little above it.
This simple habit stops you accidentally cutting into dead wood, from which lavender barely reshoots. Even if the plant has grown tall, the rule still stands: rejuvenate gradually over several years rather than shaving it down in one drastic go.
"Never cut lower than just above the last tier of green leaves-this saves many lavender cushions from total failure."
Step by step: how to prune lavender properly
With a bit of practice, a full prune takes only a few minutes per plant. What matters is sharp, clean tools and dry weather with no frost.
1. Prepare your tools
- Sharp secateurs (bypass type, not anvil)
- If you are cutting several plants: briefly disinfect the blades in between so you do not spread disease
2. Remove spent flower stems
Start by cutting off the old flower stems just above the first set of leaves. This gets rid of the straw-like remains and lets light reach the young shoots.
3. Shorten the green growth
Then reduce the green section by around a third. Younger plants can cope with a shorter cut-sometimes down to half their height-provided plenty of leafy shoots remain.
These guidelines have proved useful:
- Young plants (1–3 years): cut back more confidently to force strong branching.
- Established lavender: reduce by about a third, leaving 3–5 cm of leafy growth.
- Very old specimens: proceed gently, removing only a few old branches each year and favouring new, vigorous shoots.
4. Shape it like a cushion
Finish by trimming the plant all around into a softly domed, cushion-like form. This not only looks tidy, it also ensures air and light reach all sides and rainwater can run off easily.
"A lavender plant cut into a rounded shape dries faster, flowers more evenly and stays stable-even during summer thunderstorms."
What you should never do when pruning lavender
Certain mistakes crop up again and again in gardens and can cost the plant valuable years.
- Hard pruning into brown wood: cutting deep into bare, woody areas means many branches will not reshoot at all.
- Pruning during early spring growth: if you pick up the shears too late in spring, you remove fresh buds and noticeably reduce flowering.
- Choosing wet or frosty days: damp and cold encourage rot and splitting. A dry, mild day is far better.
- Using blunt secateurs: crushed cuts create easy entry points for pathogens.
Lavender types and how much pruning they need
Not every lavender in the garden reacts the same way. Broadly, three groups can be distinguished:
| Type | Characteristics | Pruning tip |
|---|---|---|
| True lavender | Compact bushes, generally lower, intense fragrance | Tolerates pruning well; the classic two-date rhythm is ideal |
| Lavandin (hybrids) | Often taller, very free-flowering | Cut back a little more firmly so the plant does not fall apart |
| French or butterfly lavender | Striking “flag” blooms, more frost-sensitive | Only trim lightly; take extra care in colder regions |
How correct pruning genuinely extends lifespan
The effect of pruning is straightforward: every cut made within the green growth prompts the plant to form new side shoots. Those young shoots sit closer to the light, stay vigorous and keep flowering well. The base still becomes woody-as with any semi-shrub-but it remains covered with living, active growth.
Gardeners who stick to this consistently report borders where lavender holds the same dense, conical form year after year. Fewer gaps develop, and even after harsh winters the plants bounce back faster because they can push plenty of young shoots from healthy sections.
Practical extras: position, soil and small helpful tricks
Even the best pruning will not help much if the site is wrong. Lavender wants sun, airflow and relatively poor, free-draining soil. Waterlogging around the roots is one of its biggest enemies-especially in winter.
- Sandy or gravelly soils are ideal.
- Improve heavy soils with a little grit or sand.
- Feed very sparingly; otherwise lavender becomes woody faster and flops open.
If you have to replace old, tired plants, you can easily raise new ones yourself. Simple tip cuttings from healthy, semi-woody shoots-taken in late summer and pushed into loose compost-often root within a few weeks. That way, your favourite lavender can return to the border in a fresh, young form.
With the combination of a suitable site, clean tools, two well-timed pruning dates and the clear rule “cut only in the green”, you can realistically almost double the lifespan of a lavender cushion-and keep the garden filled with violet, scented haze for many years.
Comments
No comments yet. Be the first to comment!
Leave a Comment