
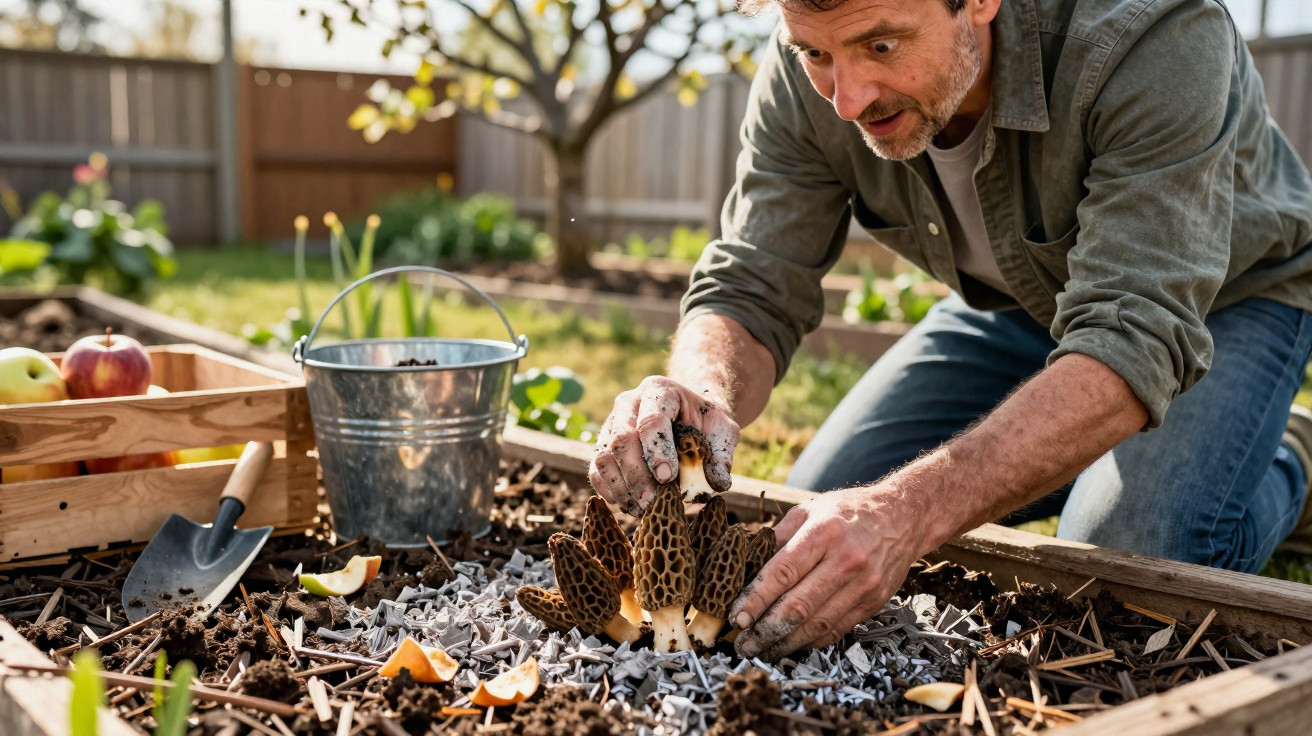
Rare delicacy from your own bed?
A seemingly insignificant bit of household waste can be exactly the kick-start morels need.
Plenty of keen gardeners dream of picking their own morels, only to fail year after year with this notoriously finicky luxury mushroom. Recent, surprisingly straightforward trials suggest that, with the right spot, some patience - and one specific kitchen leftover - the odds improve markedly that these coveted spring mushrooms will actually appear in your garden.
Why morels are so rare - and why they can still work in a garden
Morels are among Europe’s most intriguing edible mushrooms: expensive, scarce and notoriously difficult to locate. A springtime wander through woodland often ends with nothing to show for it, which is why the idea of the “un-cultivable mushroom” persists.
That reputation isn’t entirely deserved. Morels aren’t moody; they’re simply very selective, and they react badly to:
- the wrong soil pH
- too little or too much moisture
- blazing sun and parched ground
- a lack of organic reserves to get them through winter
A lime-rich, slightly alkaline soil, gentle partial shade, even moisture and a clear cold trigger before spring - that’s the basic formula for morels.
In most gardens, that combination doesn’t occur by itself. However, if you deliberately create those conditions and introduce the fungal network (mycelium), the chances become realistic. Particularly interesting is that one specific kitchen waste acts like a natural turbo for forming the morel’s underground “resting nodules”.
The surprising key: wood ash and apple pomace
The decisive pairing is made up of two materials many households already have: ash from untreated fireplace wood and apple pomace - the leftovers from pressing or juicing apples.
In a morel bed, each plays a different role:
- Wood ash raises the pH and mimics post-fire soils, where morels often emerge in the wild.
- Apple pomace provides readily available carbohydrates and pectins that the mycelium can use to build energy reserves in small nodules (sclerotia).
Wood ash creates the alkaline “burned ground”, apple pomace feeds the fungal network - together they can turn ordinary garden soil into a morel habitat.
The ideal location in the garden
Before you mix anything, you need the right place. The best options tend to be:
- areas beneath older fruit trees, especially apple or pear
- partial-shade zones along the edge of groups of deciduous trees
- slightly limey, humus-rich soils
- ground that doesn’t tend to become waterlogged
Deep shade behind the garage is just as unsuitable as a blazing, exposed south-facing patch with no cover. Morels prefer a “forest garden” feel: loose soil, plenty of humus, a bit of leaf litter, moderate light, and never bone-dry.
Step by step to your own morel patch
1. Prepare the soil in autumn
The best window is usually October or November. That’s when you set up the future morel zone:
- Lightly loosen the top layer of soil and remove coarse roots and stones.
- Work in a layer of leaves, ideally from fruit trees or ash.
- Spread apple pomace evenly over the surface, roughly 2–3 centimetres thick.
If you don’t have your own apple pomace, ask a local cider maker or juice producer. Large quantities often accumulate there and would otherwise be thrown away.
2. Apply wood ash at the right rate
Next, add an even layer of cold wood ash on top of the area already treated with apple pomace. A few points matter here:
- use only ash from natural, untreated wood - no charcoal and no painted or varnished timber
- let the ash cool completely before it goes anywhere near the garden
- thickness: about 2–3 centimetres, no more
Combined with the organic material, this typically produces a slightly to clearly alkaline pH (about 7.5 to 8) - a range where morels feel far more at home than in the normally acidic forest floor.
3. Introduce morel mycelium
At this stage you still need the fungus itself. There are three common approaches:
- crumble over-mature fruiting bodies and work them into the prepared area
- make “spore water” by rinsing morels in water, then distributing that water over the patch
- use ready-made mycelium kits from specialist suppliers and incorporate the substrate
If you have kitchen scraps from cooking morels, don’t throw them in the food-waste bin - save them for this. Trimmings from cleaning the mushrooms often still carry plenty of spores.
4. Protect with mulch and keep moisture in
To finish, cover the patch with a thin mulch layer of leaves or fine bark. This shields the sensitive mycelium from frost and drying out. Then the winter does the work for you.
The decisive phase happens out of sight: beneath leaves and ash, the mycelium forms its reserve nodules - the first morel caps only show in spring.
The thermal shock in spring
Many successful morel growers use a trick in early March: they imitate snowmelt. After a dry, rather cool spell, they thoroughly water the area with very cold water. That abrupt temperature change tells the fungus that the season has begun.
Whether the mycelium responds depends on several factors:
- how well the mycelium has established in the soil
- how harsh the winter was
- how steady the moisture remained in the weeks leading up to the trigger
If it works, the first morels appear between March and May, depending on region and weather - sometimes a little later.
When the first morels appear - and how to look after the spot
You’ll need staying power. Even with perfect preparation, cultivating morels is still a gamble with better odds, not a guarantee. Fruiting bodies can show up in the first spring, but it often takes until the second season.
Once you’ve created a promising patch, it pays to maintain it over the long term:
- add a thin layer of apple pomace again each autumn
- apply a little wood ash again, but sparingly, so the soil doesn’t become overly alkaline
- protect the area from being walked on or dug over
- during dry spells in late winter and early spring, water carefully
Harvest by cutting with a sharp knife just above the soil. Pulling mushrooms out or digging them up deeply can damage the network underneath.
Risks, common mistakes and sensible precautions
Where mushrooms grow, hazards are never far away. A few points deserve extra care:
- Risk of confusion: false morels can be poisonous. If in doubt, always consult a recognised mushroom expert.
- Overdoing the ash: too much wood ash harms soil life, and nearby plants may yellow.
- Waterlogging: standing puddles encourage rot, not mushrooms - good drainage is essential.
If you already have apple pomace and wood ash left over, you can turn two disposal headaches into a small garden experiment. At worst, you improve the soil for other plants. At best, you end up frying your own morels.
What sets morels apart from the rest of the mushroom family
Morels differ markedly from typical “cultivated mushrooms” such as button mushrooms or oyster mushrooms. They don’t grow reliably indoors, they respond sensitively to environmental cues, and they can form complex relationships with trees and other soil fungi.
Those reserve nodules - the sclerotia - are a key feature. They act like tiny energy stores in the ground. Only if they’ve been well supplied over winter and also exposed to a clear cold stimulus does it make sense for the fungus to push up fruiting bodies in spring.
That is exactly what makes the combination of apple pomace and wood ash so compelling. Each material supports a different stage of the cycle - turning two simple waste products into a practical tool for ambitious gardeners who want to replace the myth of the “un-cultivable morel” with something a little closer to reality.
Comments
No comments yet. Be the first to comment!
Leave a Comment